15 DIY to Upgrade Your Space with Style and Budget
Por: katia alves em julho 14, 2025

Upgrade Your Space with Style and Budget

In today’s world of fast content, limited space, and rising costs, giving your home a stylish, functional, and affordable upgrade isn’t just desirable—it’s essential. DIY (Do It Yourself) home hacks are more than weekend projects; they’re transformative solutions that combine sustainability, creativity, and personality into every corner of your living space.
This guide brings together 15 inspiring and practical DIY upgrades that can help you organize, decorate, and elevate your home without overspending. Each idea focuses on repurposing everyday materials, saving space, and adding personal charm.
🌿 1. Vertical Garden with Recycled Materials
Perfect for apartments and urban living, a vertical garden lets you grow herbs or flowers without sacrificing floor space. Reuse PET bottles, PVC pipes, or wooden pallets and mount them on a sunny wall. Fill with gravel, soil, and plant herbs like basil, mint, or rosemary. Add a drip irrigation system for a low-maintenance, eco-friendly garden wall.
📦 2. Organization with Fruit Crates
Wooden crates can be repurposed into bookshelves, shoe racks, or wall-mounted storage. Simply sand, paint or varnish them, and securely stack or mount them. This budget-friendly solution adds a rustic touch and keeps clutter at bay while giving your home a stylish, modular upgrade.
🛏️ 3. DIY Pallet Headboard

Give your bedroom a rustic, industrial upgrade with a pallet headboard. Sand and seal wooden pallets, paint or stain as desired, and mount behind your bed. For extra flair, add LED string lights or attach floating shelves. It’s an easy project with high visual impact.
💡 4. Mason Jar Light Fixtures
Turn old mason jars into charming pendant lights. Drill holes in the lids, insert LED bulbs, and hang them using ceiling hooks or wooden mounts. This project is a vintage-inspired lighting upgrade that combines eco-friendly reuse with cozy, personalized ambiance. Ideal for kitchens, dining rooms, or patios.
♻️ 5. Tire Ottomans
Tires may be destined for the landfill—but not in your home. Clean and wrap an old tire in sisal rope, attach a wood top with cushioning, and you’ve got a sturdy ottoman that works as extra seating, a footrest, or even a coffee table. This sustainable DIY upgrade is perfect for eco-conscious decorators who value both durability and design.
🍽️ 6. Magnetic Spice Rack on the Fridge
Save counter space and make cooking easier with a magnetic spice rack. Attach magnets to small tins or glass jars, label them, and stick them to your fridge or a metal board. This functional kitchen upgrade is a game-changer for small spaces and offers easy access to your most-used spices.
🪑 7. Coffee Table with Stacked Crates
Stack 2 to 4 wooden crates to form a coffee table that doubles as storage. Add wheels for mobility, sand and paint for style, and you’ve got a budget-friendly centerpiece that works in any small living space. Store books, throws, or even board games inside for smart functionality.
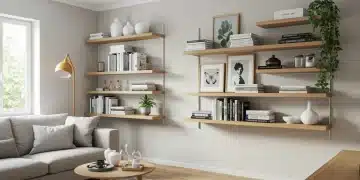
📚 8. Floating Shelves with Reused Wood
Repurpose reclaimed wood into sleek, minimalist floating shelves. Use hidden brackets for that clean, “floating” effect, and style them with books, plants, or art. This project helps you reclaim vertical space while adding warmth and texture through natural materials—a perfect upgrade for small or multifunctional rooms.
📖 9. Ladder Bookshelf
Old ladders can become trendy bookshelves or display racks. Lean one against a wall, secure it, and add wooden planks across the rungs. Paint or stain to match your décor. This easy, vintage-inspired project turns forgotten items into beautiful functional pieces.
💍 10. Jewelry Organizer with Old Frames

Transform an old picture frame into a wall-mounted jewelry holder. Remove the glass and backing, attach wire mesh or lace fabric, and use small hooks to hang necklaces, earrings, and bracelets. It’s both a decorative and practical upgrade, keeping your accessories visible and tangle-free.
🪢 11. Hanging Rope Shelves: A Light, Boho-Inspired DIY Upgrade with Minimal Footprint
If you’re looking to add stylish, functional storage without overwhelming your space, hanging rope shelves are the perfect minimalist DIY upgrade. With just a few inexpensive materials, you can build elegant, floating shelving that brings texture, warmth, and a breezy boho vibe to any room. Whether you’re decorating a bathroom, bedroom, kitchen, or entryway, this project offers a charming and practical solution—especially for renters or small-space dwellers.
Why Hanging Rope Shelves Are the Perfect DIY Upgrade
-
🌿 Minimalist and Modern: These shelves create an open, airy feel that avoids visual clutter.
-
♻️ Sustainable and Affordable: You can repurpose wood and use natural fibers like jute or cotton rope.
-
🧩 Customizable: Vary the number of tiers, paint or stain the wood, and use colored ropes to match your décor.
-
🪄 Versatile Design: Works in virtually any room—from rustic bathrooms to boho living rooms or modern kitchens.
Materials You’ll Need:
-
1–3 wood planks, depending on how many shelf levels you want
-
Thick rope (jute, cotton, or nylon), cut into equal lengths
-
Drill and drill bits
-
Measuring tape and level
-
Ceiling hooks or wall-mounted brackets
-
Sandpaper, wood stain or paint (optional)
Step-by-Step: How to Build Hanging Rope Shelves
-
Prep the Wood
Choose reclaimed wood, pine, or any sturdy board. Sand the surface to smooth out any rough edges, then paint or stain if desired. Let it dry completely. -
Drill Holes in Each Corner
Measure and mark equal distances from each corner of every plank. Drill holes just wide enough for your rope to pass through. Double-check alignment to ensure the shelf will hang evenly. -
Thread the Rope and Tie Knots
Cut two long pieces of rope. Thread each end through the holes of the first shelf, tying knots underneath to hold it in place. Repeat for additional tiers, keeping the knots evenly spaced. -
Mount the Shelf
Install ceiling hooks or use L-brackets on the wall. Hang the ropes so that the shelf levels are balanced and secure. Use a level to ensure proper alignment before finalizing the knots.
Where to Use Hanging Rope Shelves
| Room | Function |
|---|---|
| Bathroom | Hold rolled towels, soaps, plants, or candles |
| Bedroom | Display books, photo frames, or jewelry boxes |
| Kitchen | Store jars, spices, or hanging utensils |
| Living Room | Show off succulents, art, or small collectibles |
| Entryway | Keep keys, sunglasses, and small baskets organized |
Pro Tips for a Stunning Rope Shelf Upgrade:
-
🎨 Paint the wood for a bold, modern twist—or keep it raw for a rustic effect.
-
🌈 Use colored or braided rope to add personality and contrast.
-
🌿 Decorate with plants like pothos or trailing ivy for a natural, organic look.
-
✂️ Vary the lengths between tiers for a layered, artistic aesthetic.
-
🧲 Add magnetic strips or clips to the underside for lightweight hanging items.
🧑💻 12. Mini Home Office with Repurposed Furniture
Working remotely? No need for a full room. Repurpose old desks, tables, or cabinets to create a mini home office in a corner, hallway, or closet. Add floating shelves for vertical storage, personalize with lighting and greenery, and use drawer organizers to stay tidy. This DIY upgrade makes remote work more productive and pleasant.
🔩 13. Pegboard Tool Organizer
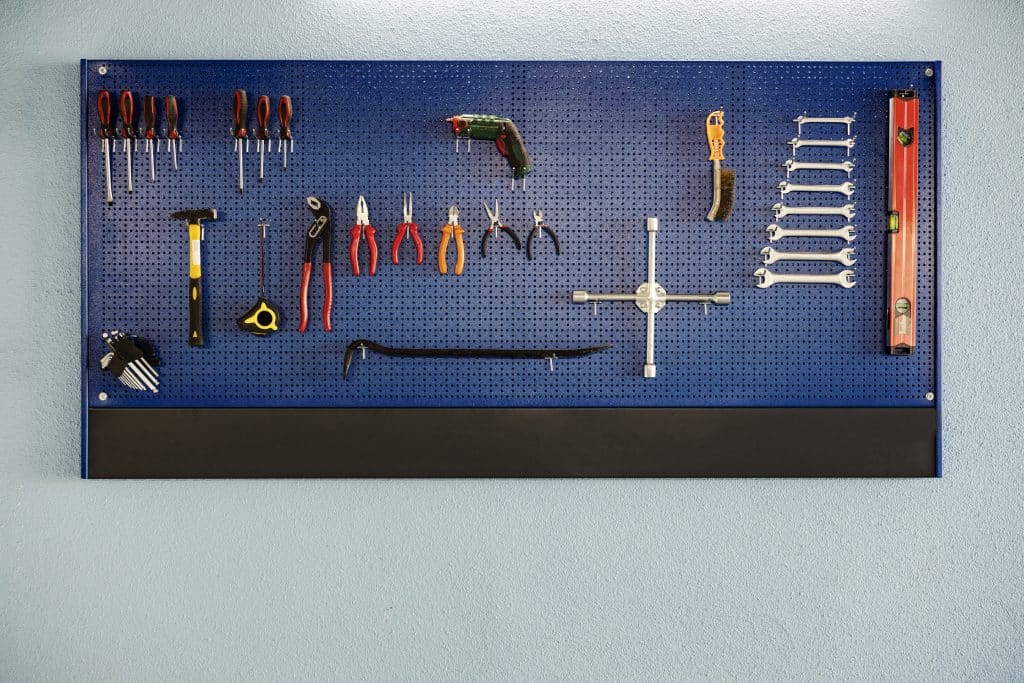
A pegboard wall is the ultimate customizable storage solution for tools, crafts, or kitchen utensils. Drill and mount a pegboard panel, add hooks, and organize by category. It’s a modular, changeable system that’s ideal for garages, craft rooms, or even minimalist kitchens.
🍷 14. Wine Cork Crafts
Don’t toss those wine corks—upgrade it by turning them into home décor! Create corkboards, trivets, framed art, or even monogram wall letters. These eco-friendly crafts are easy, fun, and a great way to add texture and character to your home.
🧰 15. Can Organizers: A Budget-Friendly DIY Upgrade for Smart, Stylish Storage
If you’re looking for an easy, affordable way to bring order and charm to your home, can organizers offer a surprisingly effective solution. With a bit of creativity, everyday tin cans can be repurposed into sleek, customizable storage units that suit nearly any space. This is a classic DIY upgrade that proves sustainable design doesn’t have to be complicated or expensive.
Instead of tossing those cans into the recycling bin, give them new life as practical and attractive holders for everything from pens and brushes to kitchen tools and kids’ toys. Perfect for small homes, home offices, classrooms, or workshops, these organizers are as functional as they are eye-catching.
Why Choose Can Organizers?
-
♻️ Eco-Friendly: Repurposing tin cans keeps waste out of landfills and supports sustainable living.
-
💸 Cost-Effective: Most of the materials are already available at home or extremely cheap.
-
🧠 Customizable: Match your room’s theme with paint, fabric, or labels.
-
🪛 Easy to Make: No special tools required—just glue, paint, and imagination.
-
🧩 Modular & Scalable: Use a few for a small desk or create a full wall-mounted system.
Materials You’ll Need:
-
Empty tin cans (e.g., soup, coffee, or canned veggie cans)
-
Acrylic paint, spray paint, or decorative paper
-
Hot glue gun or strong adhesive
-
Sandpaper or metal file
-
Labels, ribbon, washi tape, or twine (optional)
-
Mounting board, tray, or pegboard (optional for grouped organization)
Step-by-Step: How to Make Your Own Can Organizers
-
Clean the Cans Thoroughly
Wash the cans inside and out to remove any food residue or lingering smells. Let them dry completely before starting your project. -
Smooth Out Sharp Edges
Use sandpaper or a metal file to dull any sharp rim edges. This is essential if the organizers will be handled frequently or used by children. -
Paint or Decorate
Paint the exterior with your chosen color palette using spray or acrylic paint. You can also wrap them with decorative paper, fabric scraps, or twine for texture. Let the decoration dry completely before handling. -
Label and Personalize
Add custom labels using chalkboard stickers, printed tags, or handwritten notes. This helps keep your space functional while adding a personal design touch. -
Mount or Group Your Organizers
-
Glue several cans to a wooden board and hang it as a vertical organizer.
-
Arrange in a tray or drawer for a portable organizer station.
-
Attach magnets to the back and stick them to your fridge or a metal panel.
-
Stack them pyramid-style for a compact tower on your desk or counter.
-
Where to Use Can Organizers:
| Room | Common Uses |
|---|---|
| Home Office | Pens, scissors, markers, USB drives, sticky notes |
| Kitchen | Cooking utensils, chopsticks, herb jars, measuring spoons |
| Bathroom | Toothbrushes, razors, cotton swabs, makeup brushes |
| Craft Room | Paintbrushes, buttons, yarn, ribbons, glue sticks |
| Kids’ Room | Crayons, LEGO bricks, small toys, colored pencils |
| Garage/Workshop | Screws, bolts, nails, mini tools, tape rolls |
Bonus Tips for a Stylish & Functional DIY Upgrade:
-
🧲 Add magnetic strips to the back for fridge or wall mounting.
-
🌱 Use for plants: Turn cans into mini herb planters or succulent pots.
-
🎨 Create themes: Match colors by room or function (e.g., pastel for crafts, black & white for office).
-
📦 Use vertical space: Stack cans inside a drawer organizer or fix them to pegboards.
-
✨ Add finishing touches: Glue on beads, buttons, or washi tape borders for extra personality.
From Recycling Bin to Functional Art
Can organizers are the perfect example of a DIY upgrade that blends creativity, environmental awareness, and everyday usefulness. Instead of buying new plastic containers or pricey drawer units, you can build something unique with materials you already have—while reducing waste and enhancing your décor.
Whether you’re setting up a home workspace, organizing a cluttered kitchen, or creating a craft corner for the kids, these repurposed tin can organizers offer a beautiful and practical solution that’s easy to make and rewarding to use.
✅ Final Thoughts: Creativity Meets Sustainability
These 15 DIY home hacks go far beyond surface-level aesthetics—they represent a smarter, more intentional approach to modern living. In a world that increasingly values sustainability, creativity, and individuality, these projects reflect a growing movement toward eco-conscious design, personalized environments, and practical, budget-friendly solutions. Each idea encourages you to see your home not just as a place to live, but as a canvas for self-expression and mindful transformation.
Whether you’re building something completely new or repurposing forgotten items into functional art, every project offers the chance to blend style with sustainability. It’s not just about saving money—though that’s a major bonus—it’s about how to upgrade your space and fill it with pieces that hold meaning, story, and purpose.
You don’t need a huge budget or professional skills to make meaningful changes in your home. Sometimes, all it takes is a few basic tools, a splash of paint, and a spark of imagination. A single weekend project can breathe new life into a room, solve a storage problem, or bring warmth and personality into overlooked corners.
These simple, accessible DIY upgrades prove that functionality and beauty can go hand in hand—and that anyone, regardless of space or skill level, can create a home that feels uniquely theirs. With each shelf hung, light fixture built, or upgrade, you’re not just decorating—you’re designing a lifestyle that’s resourceful, thoughtful, and deeply personal.
💬 Enjoyed These Tips?
Share this article with a friend who loves DIY or is planning a home refresh. Tag someone creative and let them know: your dream space is only a few hacks away.

