DIY Home Theater: Projector & Screen Under $500
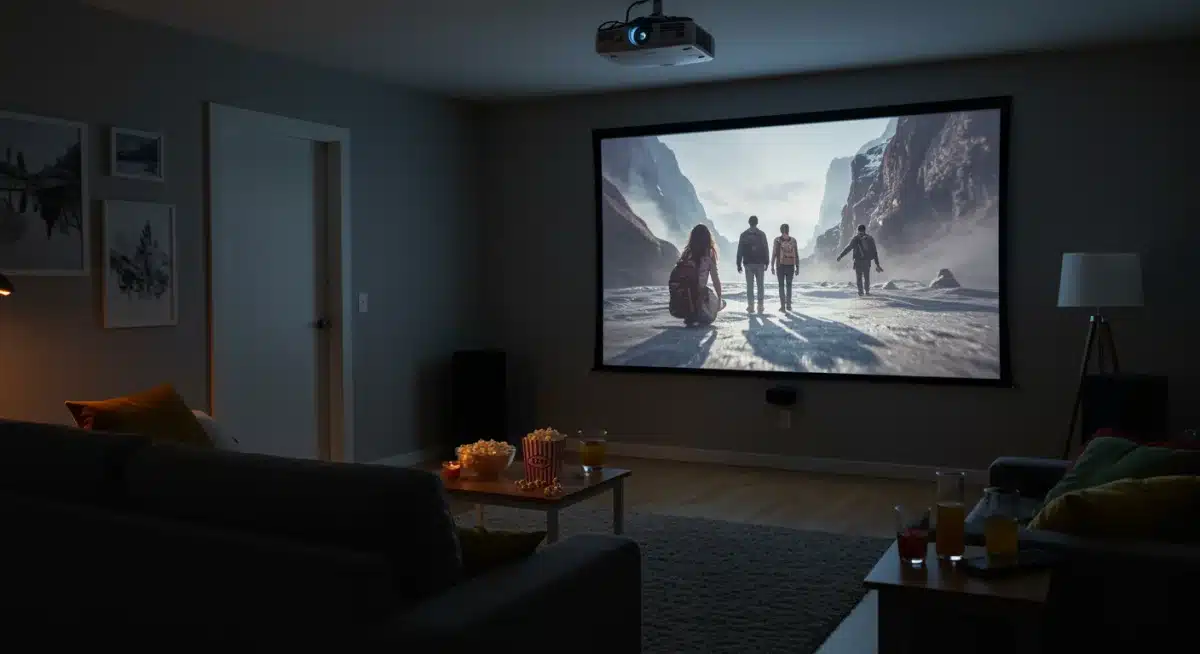
Imagine transforming your living room into a cinematic escape, a place where blockbuster movies and epic gaming sessions come to life on a grand scale.
Many people believe that creating a home theater requires a substantial investment, often running into thousands of dollars.
However, with a bit of planning and smart shopping, you can achieve an impressive DIY Home Theater: Set Up a Projector and Screen for Under $500 and Enjoy Movie Nights. This guide will walk you through the process, proving that high-quality entertainment doesn’t have to break the bank.
Understanding the Basics: Projectors and Screens
Before diving into specific product recommendations, it’s crucial to understand the fundamental components of our budget-friendly home theater: the projector and the screen.
These two elements are the heart of your cinematic experience, and choosing them wisely within our $500 budget is key to success. Knowing what to look for will help you make informed decisions without overspending.
Projectors have evolved significantly, offering remarkable quality even at lower price points. Screens, while seemingly simple, play a vital role in image clarity and vibrancy.
We’ll explore the characteristics that matter most for each, ensuring you get the best bang for your buck.
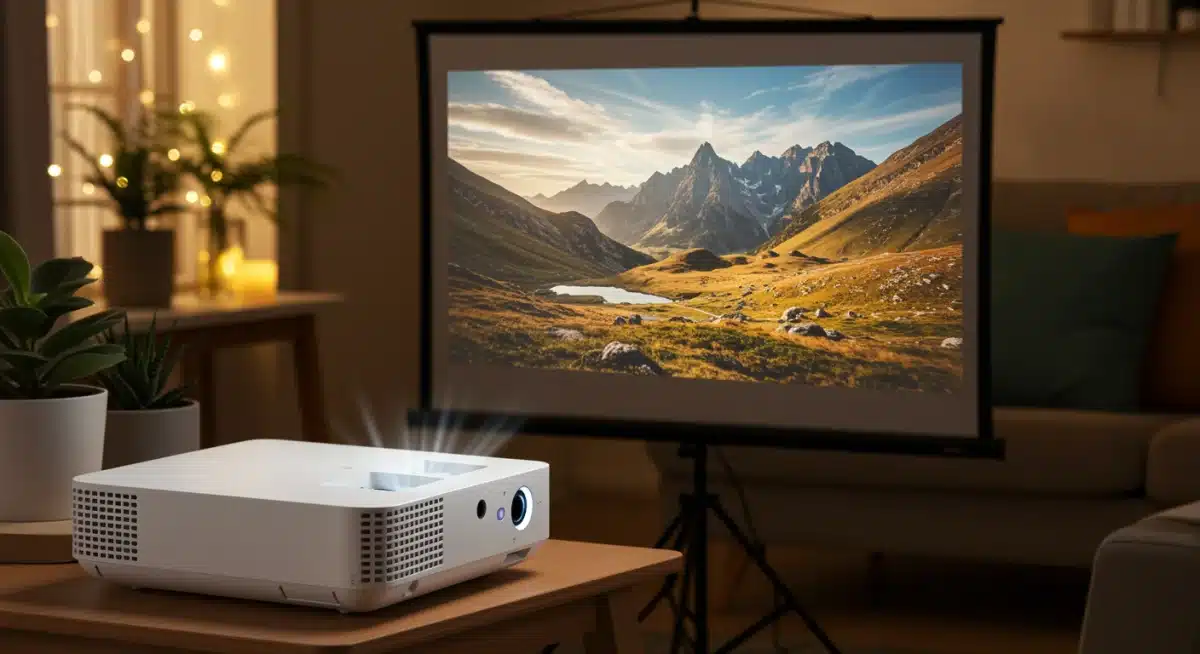
Choosing the Right Projector on a Budget
When selecting a projector for under $500, several specifications are paramount. Lumens, resolution, and connectivity options will determine the quality and versatility of your viewing experience. Don’t be swayed by overly optimistic marketing; focus on practical performance.
Lumens (Brightness): Aim for at least 3,000 ANSI lumens for a watchable image in a dimly lit room. Higher lumens are better, especially if you can’t achieve complete darkness.
Resolution: Native 1080p (Full HD) is ideal, but 720p can be acceptable for the budget. Avoid projectors with only 480p native resolution, even if they claim 1080p support.
Contrast Ratio: A higher contrast ratio (e.g., 2000:1 or more) will provide deeper blacks and brighter whites, enhancing picture depth.
Connectivity: Look for HDMI inputs, USB ports, and ideally, built-in Wi-Fi for streaming.
The projector’s throw distance, which is the distance from the projector to the screen required to achieve a certain image size, is also important. Measure your room to ensure the projector you choose can fit your space.
Many budget projectors are designed for flexible placement, but it’s always good to check. Understanding these core features will empower you to navigate the vast market of affordable projectors and select one that genuinely meets your needs, laying a solid foundation for your DIY home theater.
Selecting the Perfect Screen for Under $100
While a projector does most of the heavy lifting, the screen is where the magic truly appears. You might think any white surface will do, but a proper projector screen significantly enhances image quality.
For our budget, we have excellent options that won’t compromise your viewing pleasure. The screen’s material, gain, and size all contribute to the final picture.
A good screen will provide a flat, uniform surface that accurately reflects light, resulting in sharper images and more vibrant colors.
Skipping this step can lead to a less-than-optimal experience, even with a great projector. Let’s explore the best choices for under $100.
Screen Types and Materials
There are various screen types, each with its advantages. For our budget, we’ll focus on fixed frame, pull-down, and even DIY solutions. The material of the screen is also crucial, as it affects reflectivity and viewing angles.
Manual Pull-Down Screens: These are highly popular for their affordability and convenience. They can be mounted on a wall or ceiling and pulled down when needed, then retracted when not in use. They offer a clean, wrinkle-free surface.
Fixed Frame Screens: While slightly more expensive, some smaller fixed-frame screens can still fit our budget. They offer the flattest surface and a truly cinematic look, but they are permanent fixtures.
DIY Screen Material: For the ultimate budget option, specialized projector screen paint or fabric can be applied to a smooth wall. This requires careful application but can yield surprisingly good results for minimal cost.
Screen Size: Measure your available wall space and consider your viewing distance. A common recommendation is to have the screen width be roughly one-third of the viewing distance for an immersive experience.
When considering screen material, look for a matte white surface with a gain of 1.0 to 1.1. This provides a balanced reflection and wide viewing angles, suitable for most home environments.
Avoid glossy surfaces, which can create hot spots and uneven brightness. Choosing the right screen elevates your projected image from merely watchable to truly captivating, making your budget home theater feel much more premium.
Audio Solutions: Don’t Forget the Sound!
A stunning visual experience is only half of the home theater equation; high-quality audio is equally important for immersion.
While many budget projectors have built-in speakers, they are often lackluster and won’t deliver the cinematic punch you desire.
Fortunately, upgrading your audio doesn’t have to be expensive. There are several cost-effective ways to achieve impressive sound.
Poor audio can detract significantly from your movie-watching experience, making dialogue hard to hear and action scenes feel flat.
Investing a small portion of your budget in a decent sound system will dramatically improve your overall enjoyment. Let’s explore some affordable audio upgrades.
Budget-Friendly Audio Upgrades
You don’t need a full 7.1 surround sound system to get great audio. Simple soundbars, 2.1 speaker systems, or even repurposing existing speakers can make a huge difference.
Connectivity is key here, so ensure your chosen audio solution can easily connect to your projector or source device.
Soundbars: A good soundbar can offer a significant improvement over built-in projector speakers. Many come with a wireless subwoofer for added bass and can connect via Bluetooth, optical cable, or HDMI ARC (if your projector supports it).
2.1 Speaker Systems: These consist of two satellite speakers and a subwoofer, providing clearer stereo separation and richer bass than most soundbars. Computer speaker systems with a subwoofer can often be repurposed effectively.
Repurposing Existing Speakers: If you have old stereo speakers or a mini hi-fi system, you might be able to connect them to your projector using an auxiliary cable (3.5mm jack). This can be a zero-cost upgrade if you already own the equipment.
Bluetooth Speakers: For ultimate simplicity, a powerful Bluetooth speaker can provide a portable and wireless audio solution, though it may lack the depth of a dedicated sound system.
When selecting an audio solution, consider the acoustics of your room. A soundbar might be perfect for a smaller space, while a 2.1 system could fill a larger room more effectively.
Ensure the audio output from your projector or media player is compatible with your chosen sound system. A little attention to audio details will ensure your DIY home theater provides a truly enveloping experience, making every movie night feel special.
Setting Up Your DIY Home Theater: Placement and Connections
Once you have your projector, screen, and audio components, the next step is setting them up for optimal performance.
Proper placement and correct connections are crucial for maximizing image quality and sound. This is where the ‘DIY’ aspect truly comes into play, giving you control over every detail of your home cinema.
Rushing this stage can lead to frustrating issues like distorted images, poor sound, or inconvenient viewing angles.
Taking the time to plan your layout and make careful connections will ensure a smooth and enjoyable experience from the first movie night. Let’s break down the setup process.
Projector and Screen Placement
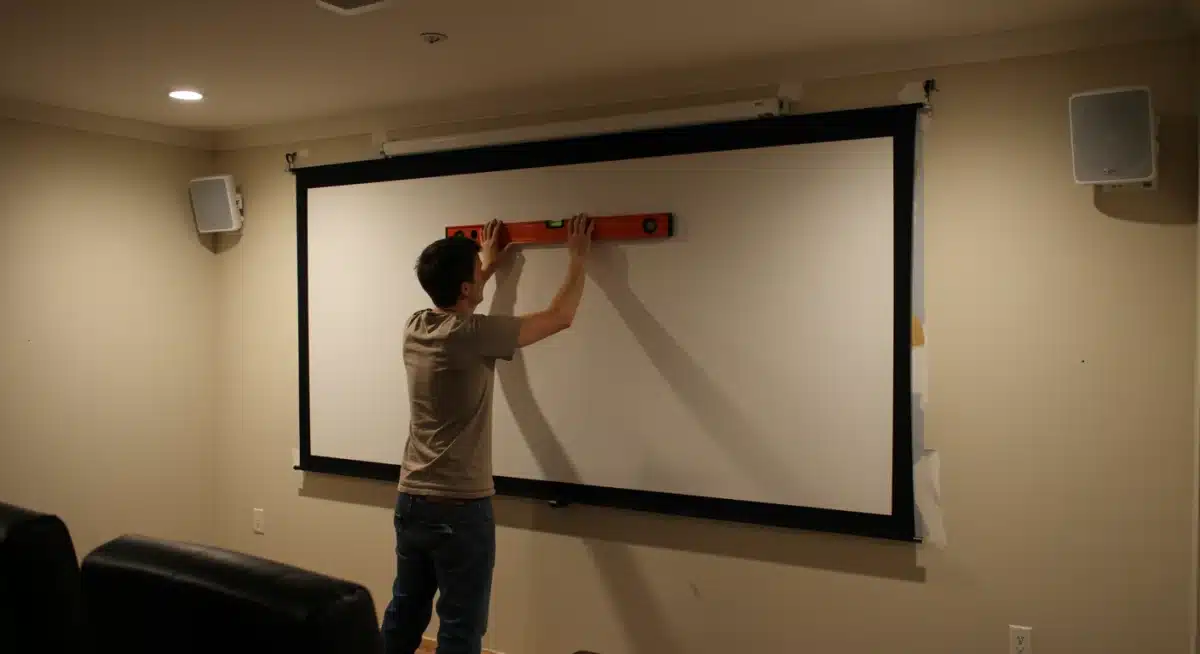
The positioning of your projector and screen is paramount. An ideal setup minimizes keystone effect (where the image is trapezoidal instead of rectangular) and ensures a bright, evenly lit picture. Measure twice, cut once, as the old adage goes.
Screen Installation: Mount your screen as flat and wrinkle-free as possible. Manual pull-down screens typically install with a few screws into wall studs or ceiling joists. For DIY fabric screens, ensure the surface is smooth and taut.
The bottom of the screen should ideally be about 2-3 feet off the floor.
Projector Placement: Position the projector directly in front of the screen, centered horizontally. The vertical placement depends on the projector’s offset; some are designed to sit on a table, others upside down from a ceiling mount.
Use the projector’s keystone correction (digital or optical) sparingly, as it can slightly degrade image quality.
Throw Distance: Refer to your projector’s manual for its recommended throw distance range for your desired screen size. This will help you determine how far back to place the projector.
Connecting your devices is usually straightforward. Most budget projectors will have at least one HDMI input. Connect your streaming stick, Blu-ray player, or gaming console via HDMI.
For audio, connect the projector’s audio output (usually a 3.5mm jack or optical out) to your soundbar or speaker system.
If your streaming device has its own audio output, you might connect it directly to your sound system to bypass the projector’s audio processing.
Proper cable management will also keep your setup tidy and safe, enhancing the overall aesthetic of your new home theater.
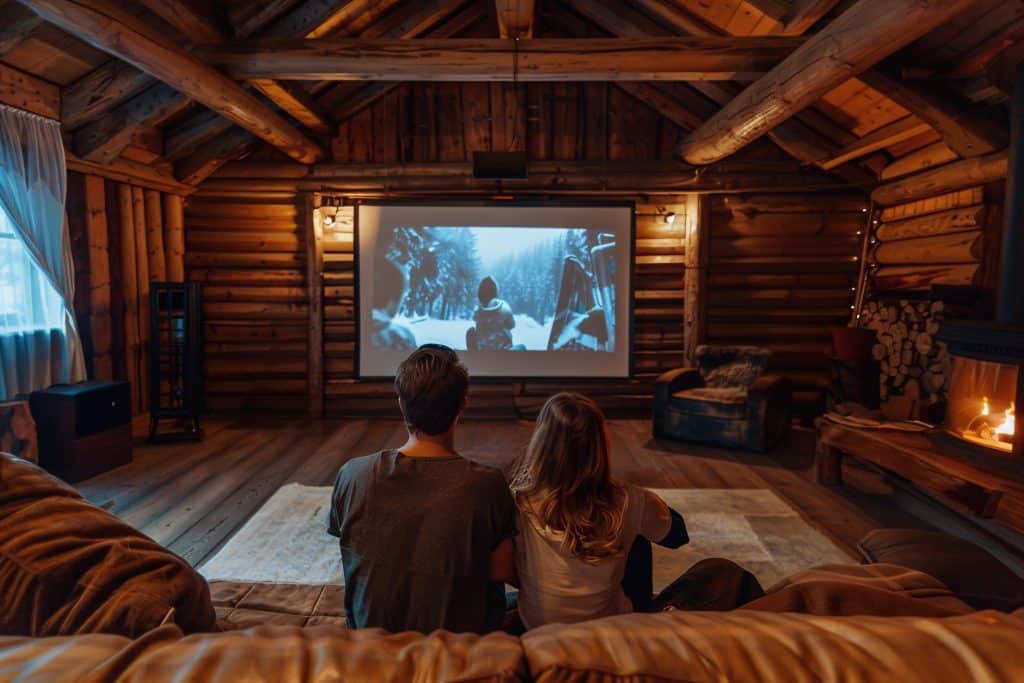
Optimizing Your Viewing Experience: Lighting and Room Acoustics
Once your hardware is set up, the next step is fine-tuning your environment to get the most out of your DIY Home Theater: Set Up a Projector and Screen for Under $500 and Enjoy Movie Nights. Factors like ambient light and room acoustics can significantly impact picture and sound quality.
Addressing these elements can transform a good setup into a truly exceptional one, all without requiring expensive renovations.
Even the best projector can look washed out in a brightly lit room, and excellent speakers can sound muddy in a room with too many hard surfaces.
Small adjustments can yield big improvements, ensuring you get the full cinematic impact you’re building towards. Let’s explore how to optimize your viewing space.
Controlling Ambient Light
Ambient light is the biggest enemy of projector image quality. The darker your room, the better your projector’s contrast and color saturation will appear.
This doesn’t mean you need a dedicated, light-sealed media room; there are simple, affordable solutions.
Blackout Curtains/Blinds: These are a game-changer. Invest in a good set of blackout curtains or blinds for any windows in your viewing area. They block external light and can be relatively inexpensive.
Wall Color: Lighter walls reflect more light, reducing contrast. If painting isn’t an option, consider hanging dark tapestries or blankets on walls near the screen during movie nights.
Lamp Placement: Position lamps away from the screen and ensure they are dimmable. Avoid direct light hitting the screen or shining into viewers’ eyes.
For room acoustics, soft furnishings absorb sound, reducing echo and improving clarity. If your room has a lot of hard surfaces (bare walls, hardwood floors), consider adding rugs, throw pillows, and even wall art.
These small touches can make dialogue clearer and effects more impactful. Experiment with speaker placement to find the optimal sound balance.
By paying attention to these environmental details, you’ll unlock the full potential of your budget home theater, creating an immersive experience that rivals much more expensive setups.
Content and Connectivity: What to Watch and How
With your DIY home theater physically set up and optimized, the final piece of the puzzle is ensuring you have access to a wide variety of content.
Modern projectors and streaming devices offer incredible flexibility, allowing you to enjoy everything from the latest blockbusters to classic films, sports, and video games. Understanding your connectivity options is key to a seamless entertainment experience.
No home theater is complete without a robust content delivery system. Whether you prefer streaming services, physical media, or gaming, your setup needs to support your viewing habits.
This section will guide you through the best and most affordable ways to get content onto your big screen, ensuring your movie nights are always filled with compelling entertainment.
Accessing Your Favorite Entertainment
Most budget projectors are designed to be highly compatible with a range of external devices. The most common and versatile option is a streaming stick, offering a world of content at your fingertips.
Consider what sources you primarily use and ensure your projector can connect to them easily.
Streaming Sticks/Boxes: Devices like Roku, Amazon Fire TV Stick, Chromecast with Google TV, or Apple TV are excellent and affordable ways to access virtually all major streaming services (Netflix, Hulu, Disney+, Max, etc.). Simply plug them into an HDMI port on your projector.
Gaming Consoles: Connect your PlayStation, Xbox, or Nintendo Switch via HDMI for an epic big-screen gaming experience. The larger image can truly immerse you in the game world.
Blu-ray/DVD Players: If you still enjoy physical media, connect your player via HDMI. Many budget projectors will upscale standard definition DVDs to fill the screen adequately.
Laptops/Computers: Use an HDMI cable to connect your laptop for presentations, web browsing, or playing local media files on the big screen.
Many projectors also feature USB inputs, allowing you to play media directly from a USB drive. Some even come with built-in smart TV functionalities, offering apps directly on the projector.
Ensure your home Wi-Fi network is strong enough to support high-definition streaming, especially if you plan to watch 4K content (though most budget projectors will downscale this to 1080p).
By strategically choosing your content sources, you ensure that your DIY home theater is a versatile entertainment hub, ready for any movie night, game day, or binge-watching session you can imagine.
Maintenance and Longevity: Keeping Your Home Theater Running
Building a DIY Home Theater: Set Up a Projector and Screen for Under $500 and Enjoy Movie Nights is an exciting achievement, but to ensure it provides years of enjoyment, proper maintenance is essential.
Neglecting basic care can shorten the lifespan of your equipment and degrade performance over time. A little proactive effort can save you money and hassle in the long run, preserving the quality of your cinematic experience.
Projectors, in particular, require some attention to maintain their brightness and clarity. Screens need care to remain pristine, and audio equipment benefits from periodic checks.
This section will cover simple, cost-effective maintenance tips to keep your budget home theater in top condition, ensuring consistent high performance for all your movie nights.
Essential Maintenance Tips for Projectors and Screens
The key to longevity for your projector lies in managing heat and keeping components clean. For your screen, preventing damage and maintaining a smooth surface is crucial. These are not time-consuming tasks but rather simple habits that extend the life of your investment.
Projector Lamp/LED Life: All projectors have a finite light source life. LED projectors generally last longer (20,000+ hours) than lamp-based ones (2,000-5,000 hours). Use eco-mode settings when possible to extend lamp life. Avoid frequent on/off cycles, as this can stress the lamp.
Cleaning Filters: Most projectors have air filters that can get clogged with dust. Periodically clean or replace these filters (refer to your projector’s manual) to ensure proper airflow and prevent overheating.
Lens Cleaning: Gently clean the projector lens with a microfiber cloth and specialized lens cleaner to remove dust and smudges, which can blur the image. Never use abrasive materials.
Screen Care: For pull-down or fixed screens, avoid touching the screen surface with bare hands. If cleaning is necessary, use a soft, damp cloth with plain water, wiping gently from top to bottom. For DIY painted screens, a light dusting is usually sufficient.
Ventilation: Ensure your projector has adequate ventilation. Do not block air vents, and avoid placing the projector in enclosed spaces where heat can build up.
Regular maintenance not only preserves the quality of your home theater experience but also protects your investment.
By following these simple steps, you can prevent common issues like dimming images, overheating, and dust spots, ensuring your DIY home theater continues to deliver impressive visuals and sound for countless movie nights to come.
A well-maintained setup is a happy setup, ready to transport you to any cinematic world you choose.
| Key Point | Brief Description |
|---|---|
| Budget Projector Choice | Focus on 1080p native resolution and 3000+ lumens for under $400. |
| Affordable Screen Options | Manual pull-down or DIY painted screens are effective and budget-friendly. |
| Essential Audio Upgrade | A soundbar or 2.1 speaker system significantly enhances immersion for under $100. |
| Room Optimization | Use blackout curtains and soft furnishings to improve picture and sound quality. |
Frequently Asked Questions About DIY Home Theater Setups
Can I really build a quality home theater for under $500?
Absolutely. With smart planning and careful product selection, it’s completely possible to create an enjoyable DIY home theater on a tight budget.
By focusing on essential components—such as a reliable budget projector, basic audio upgrades, and affordable streaming devices—you can achieve a cinematic experience without overspending.
Prioritize performance over brand names and look for bundle deals or refurbished options to stretch your budget further.
What’s the most important feature in a budget home theater projector?
For a budget-friendly home theater, native 1080p resolution and strong brightness (around 3,000 ANSI lumens or higher) are key.
These features ensure a sharp, clear image and adequate visibility, even in rooms that aren’t fully dark. A bright, high-resolution projector dramatically improves your overall theater experience.
Do I need a screen for my home theater, or can I use a wall?
You can use a smooth white wall temporarily, but a dedicated screen makes a noticeable difference in any home theater setup.
Projector screens are designed to reflect light evenly, boosting brightness, contrast, and color accuracy. Even an inexpensive pull-down or DIY screen can elevate your viewing quality.
How can I upgrade home theater sound on a budget?
Great audio doesn’t have to be expensive. A compact soundbar or a basic 2.1 speaker system can significantly enhance your home theater sound, delivering clearer dialogue and deeper bass than built-in projector speakers.
If you already own old stereo speakers, repurposing them is an excellent, cost-free solution.
What’s the easiest way to stream content in a DIY home theater?
Streaming sticks like Roku, Amazon Fire TV Stick, or Chromecast are ideal for a DIY home theater.
They plug directly into your projector’s HDMI port and connect via Wi-Fi, giving you instant access to popular streaming services with minimal setup and cost.
By choosing the right components and focusing on what truly matters, a DIY home theater can be affordable, immersive, and perfectly tailored to your space.
Conclusion
Creating a captivating DIY Home Theater: Set Up a Projector and Screen for Under $500 and Enjoy Movie Nights is not just a dream but an entirely achievable reality. By focusing on smart purchasing decisions for projectors, screens, and audio, and paying attention to setup and environmental optimization, you can transform your living space into an immersive cinematic experience without breaking the bank. This guide has demonstrated that high-quality home entertainment is accessible to everyone, proving that with a bit of ingenuity and careful planning, unforgettable movie nights are just a few steps away.


