Build a Compost Bin for Under $50: Reduce Waste 20%
 Building a compost bin for under $50 can significantly reduce household waste by 20% or more, transforming organic materials into nutrient-rich soil amendment for your garden.
Are you looking for an effective way to reduce your environmental footprint and enrich your garden soil without breaking the bank? Learning to build a compost bin for under $50 and reduce waste by 20% is a practical and rewarding endeavor that many American households are embracing. This guide will walk you through the simple steps to create your own composting system, turning everyday kitchen and yard waste into valuable organic matter.
The undeniable benefits of home composting
Composting at home offers a multitude of advantages that extend far beyond simply reducing trash. It’s a fundamental practice for sustainable living, directly impacting both your personal environment and the wider ecosystem. Understanding these benefits can solidify your motivation to start this rewarding journey.
One of the most immediate benefits is the significant reduction in household waste. A substantial portion of what Americans throw away each day, often up to 30%, consists of organic materials that could easily be composted. By diverting these items from landfills, you lessen the burden on waste management systems and reduce methane gas emissions, a potent greenhouse gas.
Enriching your garden with black gold
Nutrient-rich soil: Compost acts as a natural fertilizer, providing essential nutrients that plants need for healthy growth.
Improved soil structure: It enhances soil aeration, drainage, and water retention, leading to healthier root systems.
Reduced need for chemical fertilizers: By using compost, you can minimize or eliminate the use of synthetic products, promoting a more organic garden.
Beyond the garden, composting contributes to a healthier planet. It helps sequester carbon in the soil, supports biodiversity, and reduces the demand for peat moss, a non-renewable resource often harvested from delicate wetland ecosystems. Furthermore, it fosters a deeper connection to nature and a greater awareness of consumption patterns.
The financial savings are also noteworthy. Less waste means fewer trash bags and potentially smaller waste disposal fees, depending on your local services. Plus, producing your own compost eliminates the need to purchase expensive soil amendments and fertilizers, saving money on gardening supplies. Embracing home composting is a win-win, offering environmental, economic, and personal rewards.
Choosing the right compost bin design for your needs
Selecting the ideal compost bin design is a crucial first step in your composting journey. While the goal is to build a compost bin for under $50, there are several effective designs that fit this budget, each with its own set of advantages and considerations. Your choice should align with your available space, the volume of waste you anticipate, and your desired level of involvement.
For those with limited space or who prefer a neater appearance, a simple single-bin system is often sufficient. This design typically involves a contained structure where all organic materials are added and allowed to decompose. It’s excellent for small households producing moderate amounts of kitchen scraps and yard waste.
Popular DIY compost bin types
Pallet bins: Constructed from reclaimed wooden pallets, these are remarkably sturdy, cost-effective, and provide excellent aeration. You can often find pallets for free or very cheap.
Wire mesh bins: Made from fencing wire or hardware cloth, these are lightweight, easy to assemble, and offer superior airflow, accelerating decomposition. They are also very expandable.
Tumbling composters (DIY versions): While commercial tumblers can be pricey, you can create a DIY version using a sturdy plastic barrel mounted on a stand, allowing for easy rotation and mixing.
Consider the volume of organic material you generate. If you have a large garden or a big family, a multi-bin system might be more appropriate.
This allows for continuous composting, where one bin is actively decomposing, another is being filled, and a third holds finished compost. While slightly more complex, it ensures a steady supply of rich soil amendment.
Think about aesthetics and integration into your yard. A well-designed compost bin can be an attractive, functional addition rather than an eyesore.
Materials like wood can blend naturally into a garden setting, while wire bins are less conspicuous. Ultimately, the best design is one that you will use consistently and that effectively manages your organic waste.
Essential materials and tools for your budget build
Embarking on a DIY compost bin project requires a few basic materials and tools, all of which can be sourced affordably to keep your total cost under $50.
The key is to think resourcefully and utilize reclaimed or inexpensive items. This approach not only saves money but also aligns perfectly with the ethos of waste reduction.
For a basic pallet or wire mesh bin, your material list will be surprisingly short. Scouring local construction sites (with permission), asking neighbors, or checking online marketplaces can often yield free pallets.
Hardware stores are great for wire mesh, though you might find remnants or discounted rolls. The beauty of these materials lies in their versatility and low cost.
Budget-friendly material list
Reclaimed wood pallets: (Free to $5 each) Aim for 3-4 standard-sized pallets. Ensure they are heat-treated (HT stamp) rather than chemically treated (MB stamp).
Hardware cloth or chicken wire: ($15-$30 for a roll) Choose a gauge that’s sturdy enough to contain your compost but allows for good airflow.
Zip ties, bailing wire, or screws/nails: ($5-$10) For assembling the structure.
Hinges (optional): ($5-$10) If you want a hinged lid or access door for easier turning.
When it comes to tools, you likely already own most of what you’ll need. A hammer or drill, a pair of wire cutters, and possibly a saw for cutting wood are the primary implements.
If you don’t have them, consider borrowing from a friend or checking out tool libraries, often available in community centers. The simplicity of these projects means you won’t need specialized equipment.
Remember that safety is paramount. Always wear gloves when handling reclaimed materials, especially pallets, to avoid splinters. Eye protection is also recommended when cutting or drilling. By carefully selecting your materials and using basic tools, you can construct a durable and effective compost bin that meets your budget and composting needs.
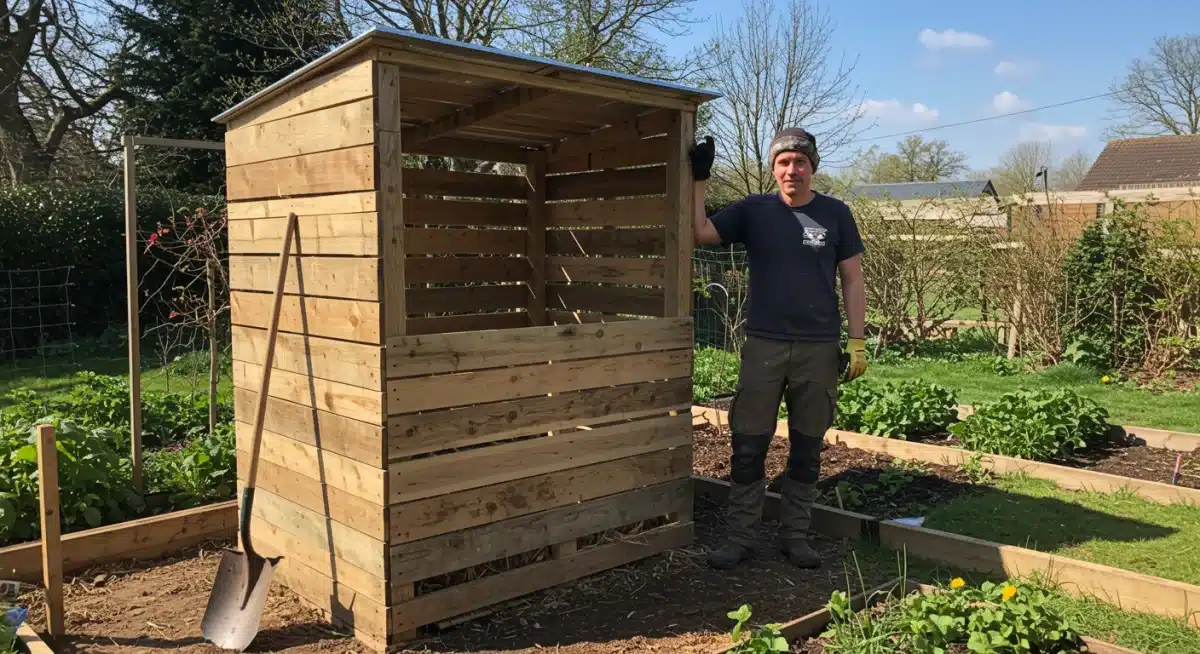
Step-by-step guide to building a pallet compost bin
Building a compost bin from reclaimed pallets is one of the most cost-effective and straightforward DIY projects for home composting. This method allows you to construct a sturdy and functional bin for next to nothing, fulfilling the goal to build a compost bin for under $50. The process is relatively quick, making it an excellent weekend project.
Before you begin, gather 3 to 4 heat-treated (HT) wooden pallets. Avoid chemically treated (MB) pallets, as the chemicals can leach into your compost. Clean any dirt or debris from the pallets. You’ll also need zip ties, bailing wire, or screws and a drill for assembly, along with work gloves and safety glasses.
Construction phases for your pallet bin
Prepare the site: Choose a level, well-drained spot in your yard, away from your house but accessible. Clear any weeds or grass from the area.
Form the base: Stand two pallets upright to form a corner. Secure them together using heavy-duty zip ties, bailing wire, or by screwing them together at multiple points.
Add the sides: Attach a third pallet to complete the three-sided structure. Ensure all connections are secure and the bin is stable.
Create an optional front or door: For the fourth side, you can either leave it open for easy access, attach a fourth pallet with hinges to act as a removable door, or simply lean another pallet against the opening.
Once your pallet bin is assembled, inspect it for any sharp edges or loose boards. You might want to line the inside with hardware cloth if you’re concerned about small critters getting in or if your compost materials are very fine.
This step is optional but can add to the bin’s effectiveness and longevity. The open slatted design of pallets naturally provides excellent aeration, which is crucial for healthy decomposition.
With your pallet compost bin complete, you’re ready to start adding your organic materials. This simple yet effective structure will serve as the heart of your home composting system, helping you manage waste efficiently and sustainably for years to come. It’s a testament to how creative repurposing can lead to significant environmental benefits.
Understanding the science of composting: browns and greens
Successful composting isn’t just about throwing organic waste into a bin; it’s about understanding the delicate balance between ‘browns’ and ‘greens.’ This fundamental principle is the science behind healthy decomposition and is crucial for creating nutrient-rich compost.
Getting this ratio right ensures your compost pile breaks down efficiently, without unpleasant odors or attracting pests.
Brown materials are rich in carbon and provide the energy source for the microorganisms that break down organic matter. They tend to be dry and coarse. Green materials, on the other hand, are high in nitrogen and supply the proteins needed for microbial growth and reproduction. They are typically moist and fresh.
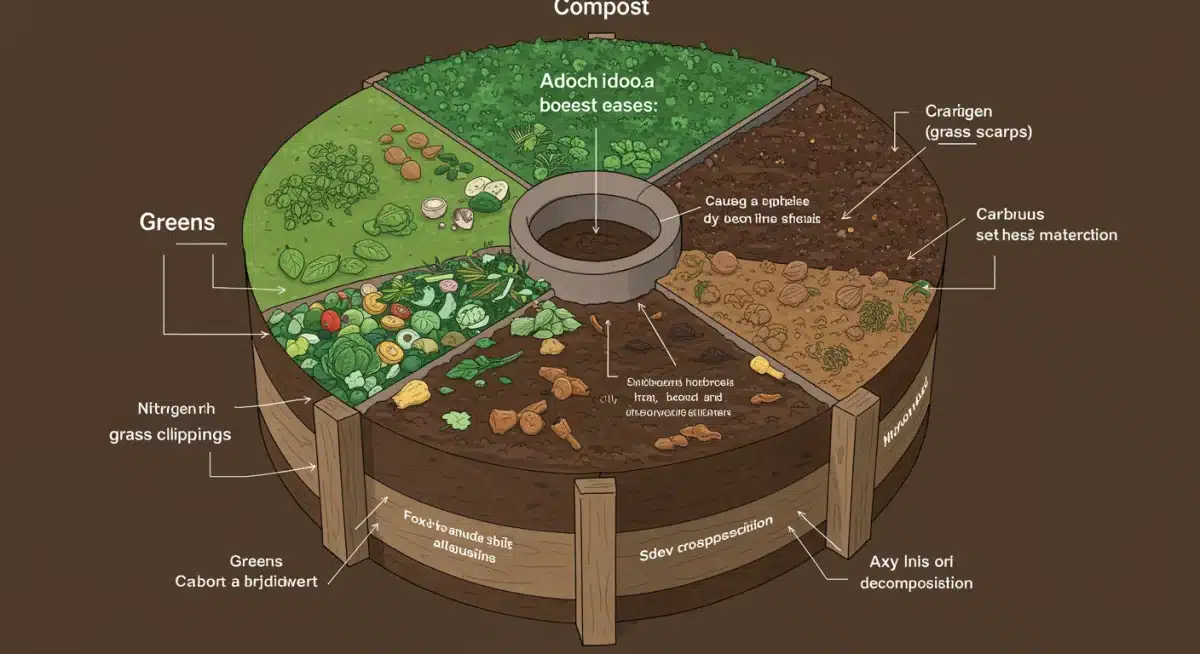
Balancing your compost pile
Browns (Carbon-rich): Dry leaves, shredded newspaper, cardboard, wood chips, straw, sawdust, pine needles, dried plant stalks.
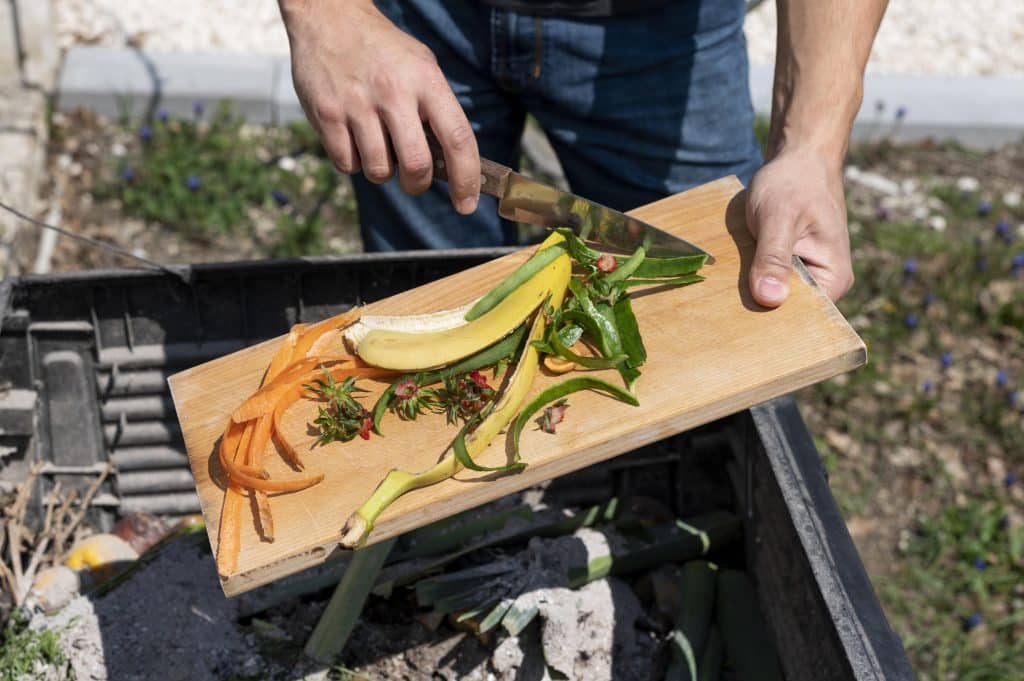
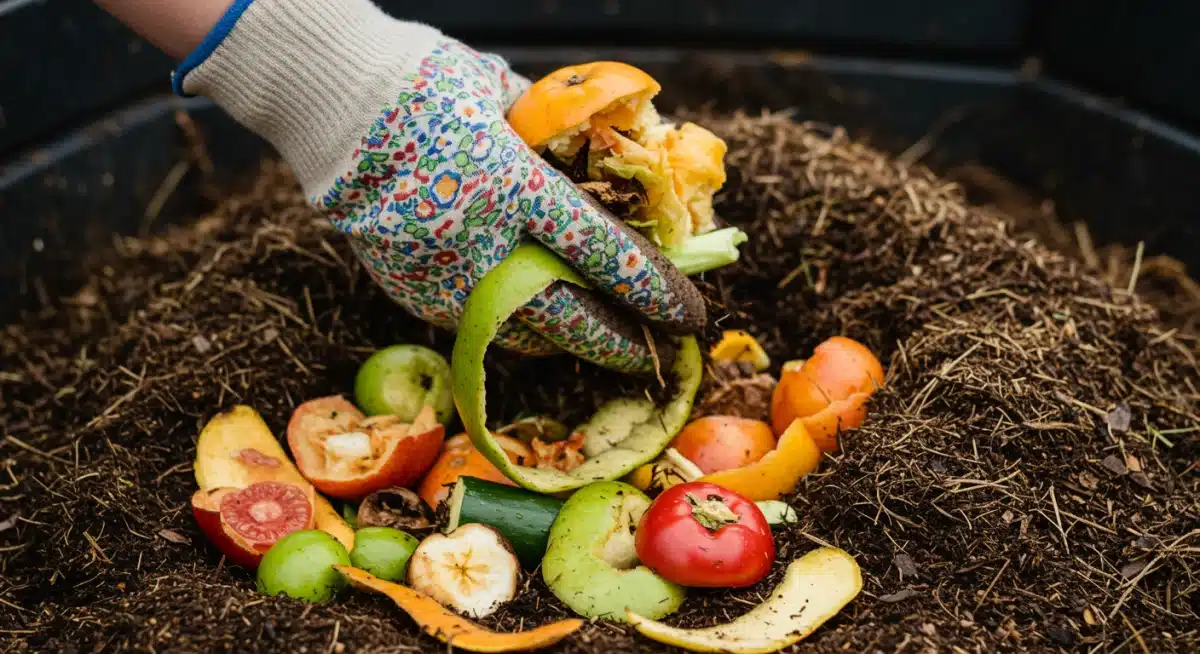
Greens (Nitrogen-rich): Fruit and vegetable scraps, coffee grounds, tea bags, grass clippings, fresh plant trimmings, manure (from herbivores).
Ideal ratio: Aim for a ratio of approximately 25-30 parts browns to 1 part greens by volume. While this might sound precise, a good rule of thumb is to have a larger volume of browns than greens.
Maintaining the right carbon-to-nitrogen (C:N) ratio is vital. Too many greens can lead to a wet, slimy, and smelly pile because of excess nitrogen.
Too many browns will cause the decomposition process to slow down significantly, as there isn’t enough nitrogen to fuel the microbes. A balanced pile will heat up, indicating active microbial activity, and will have an earthy, pleasant smell.
Beyond browns and greens, your compost pile also needs adequate moisture and aeration. The pile should feel like a damp sponge – not soaking wet, not bone dry.
Regular turning or mixing of the pile introduces oxygen, preventing anaerobic conditions that lead to foul odors. By understanding and applying these principles, you’ll be well on your way to producing excellent compost consistently.
Maintaining your compost bin for optimal results
Once your compost bin is built and you’ve started adding organic materials, proper maintenance is key to ensuring efficient decomposition and producing high-quality compost.
A well-maintained bin prevents issues like odors and pests, and significantly speeds up the composting process. Regular attention to your pile will yield rewarding results.
The primary maintenance tasks involve monitoring moisture levels, ensuring adequate aeration, and maintaining the correct balance of browns and greens.
Think of your compost pile as a living ecosystem that thrives with a little care and attention. Consistency in these practices will lead to a faster and more effective transformation of waste into valuable soil amendment.
Key compost bin maintenance tips
Moisture control: The pile should feel consistently damp, like a wrung-out sponge. If it’s too dry, add water; if too wet, add more browns to absorb excess moisture.
Aeration: Turn your compost pile regularly, ideally once a week or every two weeks. This introduces oxygen, which is essential for aerobic bacteria, and helps distribute moisture and nutrients. Use a pitchfork or a compost aerator.
Layering: Continue adding browns and greens in layers, always aiming for that ideal C:N ratio. Bury fresh food scraps under a layer of browns to prevent pests and odors.
Avoid problematic materials: Do not add meat, dairy, oily foods, pet waste, or diseased plants to your compost, as these can attract pests and introduce pathogens.
Observe your compost pile closely. If it smells putrid, it’s likely too wet and lacks oxygen – turn it and add more browns.
If it’s not heating up or breaking down, it might be too dry or lack enough greens. Adjusting these factors will help get your pile back on track. The decomposition process generates heat, and a healthy, active pile will feel warm to the touch.
Patience is also a virtue in composting. Depending on the conditions and materials, it can take anywhere from a few weeks to several months for compost to mature. Once it’s dark brown, crumbly, and has an earthy smell, it’s ready to be used in your garden. Consistent maintenance ensures a continuous supply of this ‘black gold’ for your plants.
Troubleshooting common composting challenges
Even with the best intentions, you might encounter a few hiccups on your composting journey. Understanding common challenges and knowing how to troubleshoot them will ensure your project remains on track and continues to help you build a compost bin for under $50 and reduce waste by 20%. Most issues are easily remedied with a few simple adjustments.
One of the most frequent complaints is a smelly compost pile. This usually indicates an imbalance in materials or a lack of aeration. A healthy compost pile should smell earthy, like a forest floor, not foul or rotten. Addressing this quickly is important to maintain a pleasant environment in your yard.
Addressing common compost problems
Foul odor (rotten egg smell): Too much nitrogen (greens) and/or not enough oxygen. Turn the pile thoroughly and add more dry, carbon-rich materials (browns) like shredded leaves or newspaper.
Attracting pests (flies, rodents): Often caused by exposed food scraps, adding meat/dairy, or a pile that’s too wet. Bury food waste deep within the pile, avoid problematic materials, and ensure the bin is covered.
Pile not heating up: Insufficient greens (nitrogen), too dry, or not enough volume. Add more fresh green materials, moisten the pile if dry, and turn it to introduce oxygen. A minimum pile size helps generate heat.
Slime or mold: Too much moisture and not enough air. Turn the pile, add more browns, and ensure good drainage at the base of the bin.
Slow decomposition is another common issue. If your pile isn’t breaking down as quickly as you’d like, it could be due to a lack of moisture, insufficient nitrogen, or poor aeration. Try adding water, mixing in more green materials, and turning the pile more frequently. Chopping larger items into smaller pieces before adding them can also accelerate the process.
Patience and observation are your best tools when troubleshooting. By understanding the underlying causes of these issues, you can make informed adjustments and keep your compost pile thriving.
Remember, composting is a natural process, and a little fine-tuning along the way is perfectly normal. Your efforts will ultimately lead to rich, valuable compost and a significant reduction in your household’s waste output.
| Key Aspect | Brief Description |
|---|---|
| Cost-Effective Build | Achieve a functional compost bin for under $50 using reclaimed materials like pallets or wire mesh. |
| Waste Reduction Goal | Effectively reduce household organic waste by 20% or more, diverting it from landfills. |
| Compost Science | Balance “browns” (carbon) and “greens” (nitrogen) for optimal decomposition and nutrient-rich soil. |
| Maintenance Essentials | Regular turning, moisture control, and proper layering prevent odors and accelerate composting. |
Frequently asked questions about composting
You can compost fruit and vegetable scraps, coffee grounds, tea bags, eggshells, grass clippings, dry leaves, shredded newspaper, and cardboard. Always aim for a good mix of “greens” (nitrogen-rich) and “browns” (carbon-rich) to ensure efficient decomposition in your bin.
The time it takes for compost to be ready varies, typically from two months to a year. Factors like material size, moisture, aeration, and the balance of greens and browns all play a role. A well-managed, warm pile can produce finished compost faster.
Properly managed compost bins generally do not attract pests. Avoid adding meat, dairy, greasy foods, or pet waste. Bury fresh food scraps deep within the pile and ensure your bin has a lid or is covered with browns to deter unwanted visitors effectively.
A foul smell usually indicates too much moisture or a lack of oxygen. Turn your pile thoroughly to aerate it and add more dry, carbon-rich materials like shredded leaves or newspaper. This helps to absorb excess moisture and balance the nitrogen content.
Absolutely! Even small urban backyards can accommodate composting. Compact bin designs like wire mesh bins or smaller pallet bins are ideal. You can also explore vermicomposting (worm composting) for indoor or very small outdoor spaces, which is efficient for kitchen scraps.
Conclusion
Embarking on the journey to build a compost bin for under $50 and reduce waste by 20% is a highly achievable and impactful endeavor.
This guide has demonstrated that with minimal investment and a bit of effort, you can create a robust composting system that not only diverts significant amounts of organic waste from landfills but also enriches your garden soil naturally.
By understanding the simple principles of browns and greens, maintaining proper moisture and aeration, and troubleshooting common issues, you’ll be well on your way to becoming a composting pro.
This sustainable practice offers a tangible way to contribute to a healthier environment, save money, and cultivate a thriving garden, proving that small actions can indeed lead to significant positive change for your home and the planet.


