Winter-Proof Your Home: DIY Weather Stripping Projects
 DIY weather stripping projects are a highly effective and budget-friendly way to significantly reduce energy costs and improve the comfort of your home during colder months.
As winter approaches, many homeowners begin to dread the inevitable spike in heating bills. However, there’s a simple, cost-effective solution that can make a significant difference: DIY weather stripping. This guide will walk you through various projects to seal your home against the cold, helping you save money and stay warm all season long.
Understanding the Importance of Weather Stripping
Before diving into the practical aspects of weather stripping, it’s crucial to grasp why this seemingly small detail plays such a monumental role in your home’s energy efficiency. Drafts and air leaks are not just minor annoyances; they are significant culprits behind heat loss in winter and heat gain in summer, leading directly to higher utility bills.
Weather stripping acts as a barrier, sealing the gaps around movable components of your home, such as doors and windows. By preventing the unwanted exchange of indoor and outdoor air, it helps maintain a stable indoor temperature, reducing the workload on your heating and cooling systems. This translates into tangible savings and increased comfort.
The Hidden Costs of Air Leaks
Many homeowners underestimate the cumulative effect of small air leaks. A draft under a door or a tiny gap around a window might seem insignificant, but when multiplied across all the potential leakage points in a home, the total can be equivalent to leaving a window open several inches wide. This constant air exchange forces your furnace to work harder and longer, consuming more energy.
Increased energy bills due to heat loss.
Reduced indoor comfort with fluctuating temperatures.
Potential for moisture intrusion and related issues.
Higher carbon footprint from excessive energy consumption.
Addressing these leaks with effective weather stripping is a proactive step towards a more energy-efficient and comfortable living environment. It’s an investment that pays for itself quickly through reduced energy expenditures.
Understanding the fundamental role weather stripping plays in your home’s thermal envelope is the first step toward appreciating its value. It’s not just about keeping the cold out; it’s about creating a consistent, energy-efficient barrier that protects your home and your wallet.
Identifying Air Leaks: The First Step to a Cozy Home
Before you can effectively winter-proof your home with DIY weather stripping, you need to know where the problems lie. Identifying air leaks is a critical first step, ensuring that your efforts are targeted and efficient. Many leaks are not immediately obvious, but with a few simple methods, you can pinpoint the areas that need attention.
One of the most common places for air leaks is around windows and doors, but don’t overlook less obvious spots like electrical outlets, plumbing penetrations, and attic hatches. A thorough inspection can reveal surprising sources of drafts.
Simple Methods for Leak Detection
There are several straightforward ways to detect air leaks without needing specialized equipment. These methods are easy for any homeowner to perform and require minimal tools, making them perfect for a DIY approach.
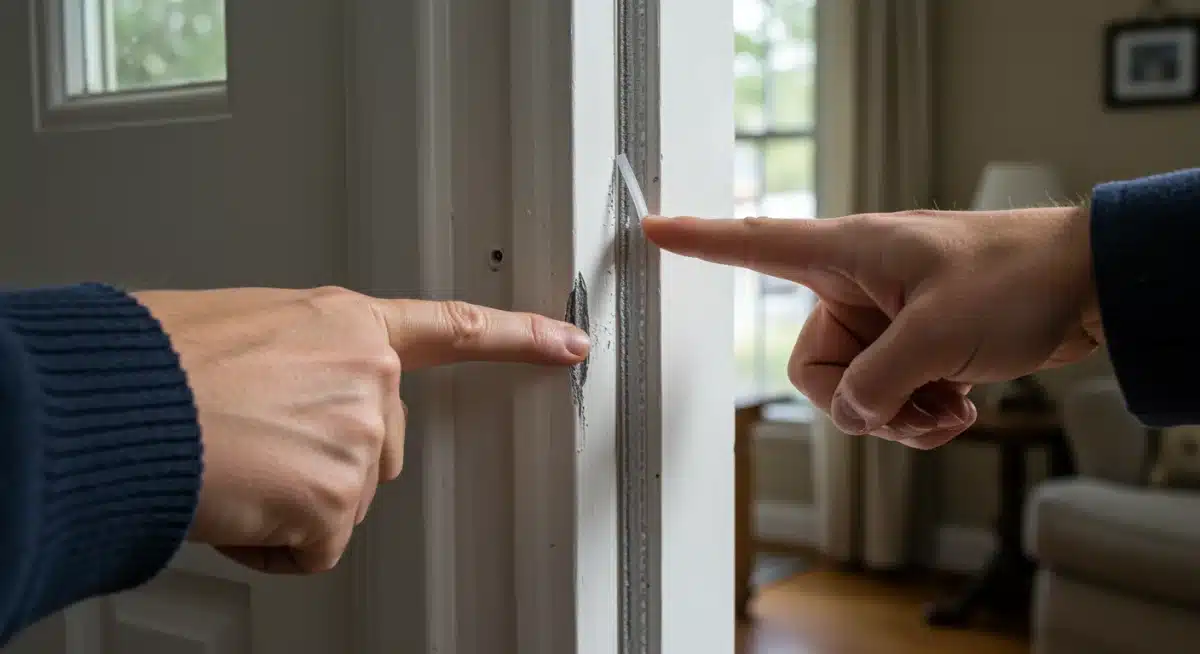
The Visual Inspection: Simply walk around your home, paying close attention to window and door frames, looking for visible gaps or cracks. Check where different materials meet, such as siding and foundation.
The Hand Test: On a cold or windy day, carefully run your hand around the edges of windows, doors, electrical outlets, and any other potential leak sites. You’ll often feel cold air blowing in.
The Smoke Test: Light an incense stick or a thin piece of paper (carefully, away from flammable materials) and hold it near suspected leak areas. If the smoke wavers or is drawn inward, you’ve found a leak. This method is particularly effective for subtle drafts.
Once you’ve identified these problem areas, you can prioritize which weather stripping projects to tackle first. Focusing on the largest or most numerous leaks will yield the most significant energy savings.
Choosing the Right Weather Stripping for Your Needs
With a variety of weather stripping products available, selecting the right type for each application is key to effective draft sealing.
Different materials and designs are suited for specific areas and levels of exposure, so a one-size-fits-all approach isn’t always the best. Understanding the characteristics of each option will help you make informed decisions.
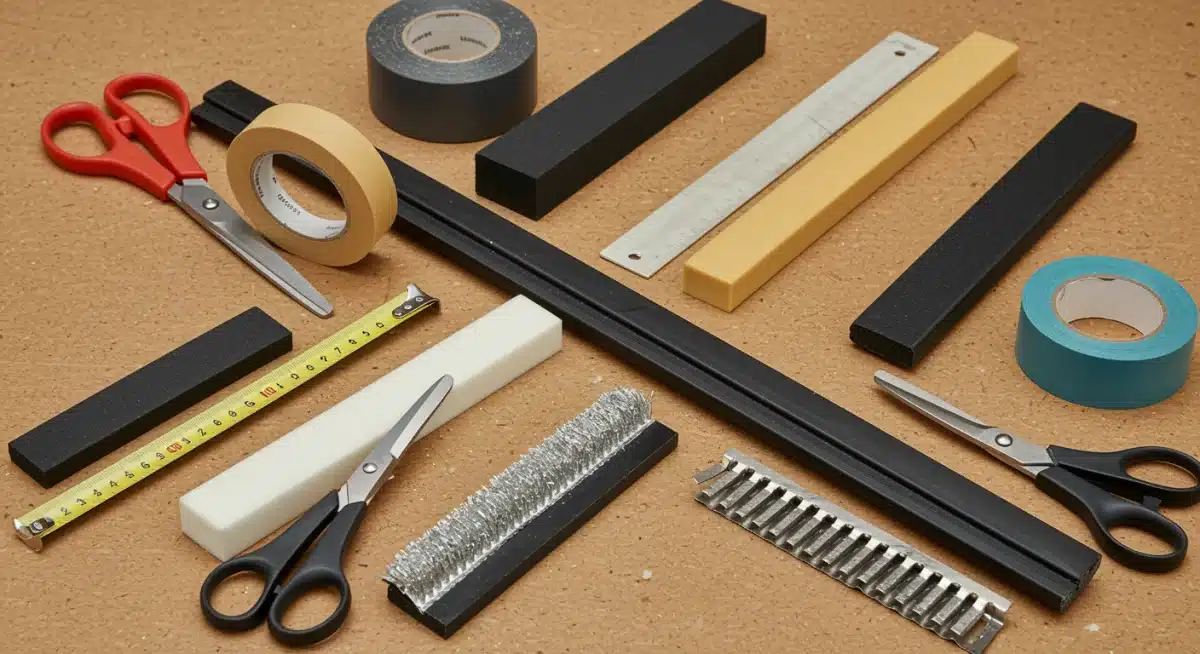
From simple foam tapes to more durable metal and vinyl strips, each type offers unique advantages in terms of cost, durability, and ease of installation. Consider the location of the draft, the movement of the component (door or window), and the expected lifespan of the material.
Common Types of Weather Stripping Materials
Let’s explore some of the most popular and effective weather stripping options for DIY projects. Each has its ideal use case and installation considerations.
Foam Tape: This self-adhesive, compressible foam is easy to apply and ideal for sealing small, irregular gaps around windows and infrequently used doors. It’s cost-effective but less durable than other options.
Felt or Pile Stripping: Often used for sliding windows and door bottoms, felt provides a soft, flexible seal. It’s inexpensive and easy to install, but can compress over time, reducing effectiveness.
V-Seal (Tension Strip): Made of flexible plastic or metal, V-seal strips are installed along the sides of window sashes and door frames. They spring open to fill gaps when the window or door is closed, providing a tight seal.
Tubular Gaskets (Bulb Type): These are rubber or vinyl tubes that compress when a door or window is closed, creating an excellent seal. They are durable and effective, often used for exterior doors.
- Door Sweeps and Thresholds: Specifically designed for the bottom of doors, sweeps attach to the door face and brush against the threshold, while thresholds often include a compressible seal to block drafts from underneath.
Carefully evaluating the specific needs of each drafty area will guide you in choosing the most appropriate and enduring weather stripping solution. The right choice ensures long-lasting results and maximum energy savings.
DIY Weather Stripping for Windows: A Step-by-Step Guide
Windows are notorious for air leaks, especially older ones. Addressing these gaps with DIY weather stripping can drastically improve your home’s energy efficiency and comfort. This section will guide you through the process of weather stripping your windows, offering practical advice for different window types.
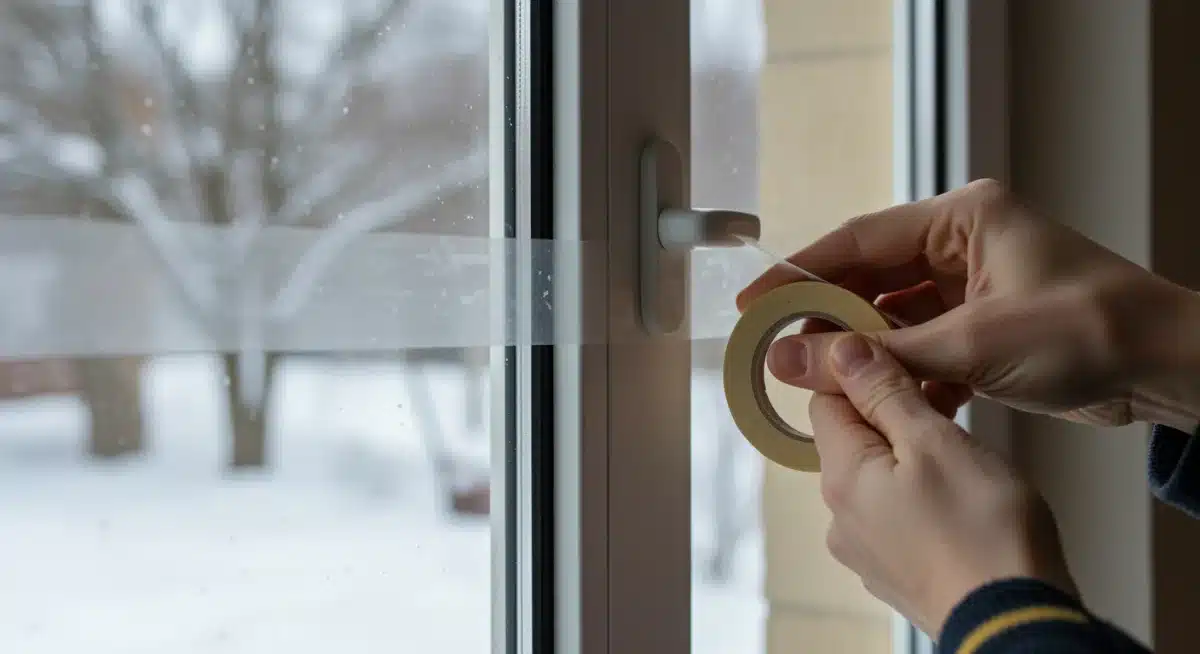
Before you begin, ensure your windows are clean and dry. Any dirt or debris can prevent the weather stripping from adhering properly or creating an effective seal. Gather your chosen weather stripping material, a measuring tape, scissors or a utility knife, and a cleaning solution.
Weather Stripping Double-Hung Windows
Double-hung windows, with their movable sashes, present several opportunities for air leakage. The key is to seal around the sashes and where they meet the frame, allowing for smooth operation.
Top and Bottom Sashes: For the top and bottom edges of both sashes, foam tape or V-seal stripping can be applied. Clean the surfaces thoroughly, measure the length needed, cut the stripping, and press it firmly into place.
Sides of Sashes: V-seal weather stripping works exceptionally well along the sides of the sashes where they slide against the frame. This allows for movement while creating a tight seal when the window is closed.
Meeting Rail: The horizontal rail where the two sashes meet is a common leak point. Apply a thin strip of foam tape or felt along the bottom edge of the upper sash where it overlaps the lower sash.
Sealing Other Window Types
For other window types, like casement or sliding windows, the approach is similar: identify the moving parts and the gaps they create. Casement windows often benefit from tubular gaskets or compression strips around their perimeter, as these provide a robust seal when the window is cranked shut.
Sliding windows can use felt or pile stripping along their tracks and where the sashes overlap. Remember, the goal is to create a seal that doesn’t impede the window’s operation but effectively blocks drafts.
By carefully installing the appropriate weather stripping, you can eliminate significant heat loss through your windows, making your home noticeably warmer and more energy-efficient throughout the winter.
Winter Door Draft Fix: Tackling Drafty Doors with DIY Weather Stripping
During the winter months, drafty doors can make your home feel colder than it should. Exterior doors are often major culprits, allowing icy winter air to seep in from all sides and underneath. This not only chills entryways and hallways but also forces your heating system to work harder. Fortunately, DIY weather stripping is one of the most effective winter projects to seal gaps and maintain a warm, energy-efficient home.
Just like with windows, preparation is key. Before installing any material, thoroughly clean all surfaces, ensure the door opens and closes smoothly, and remove any old or damaged weather stripping. A properly sealed door keeps out harsh winter drafts, reduces noise, and can even enhance your home’s overall security.
Sealing Around the Door Frame for Winter Protection
The perimeter of your door frame is a prime spot for air leaks—especially noticeable in winter. Several types of weather stripping help create a strong seal when the door is closed without compromising smooth movement.
Compression Strips: Made from vinyl, rubber, or silicone, these strips attach to the door stop and compress when the door closes, creating a durable winter-ready seal.
Tubular Gaskets: Ideal for irregular gaps, these bulb-shaped seals offer strong protection against winter drafts and moisture. Install them along the sides and top of the frame.
V-Seal Strips: These flexible strips are also effective for doors, especially on the hinge side where winter air can find its way in through uneven gaps.
Winterizing the Bottom of the Door
The gap beneath the door is one of the biggest sources of cold winter air infiltration. To block these drafts, choose products designed to withstand frequent opening and closing.
-
Door Sweeps: Featuring rubber fins or bristles, sweeps attach to the bottom of the door and form a tight barrier against winter air when the door is shut. They are affordable, easy to install, and highly effective.
-
Door Shoes: These U-shaped metal pieces with rubber or vinyl inserts slide onto the bottom of the door, providing a strong, long-lasting winter seal.
-
Adjustable Thresholds: If your threshold is old or ineffective, upgrade to an adjustable model with a built-in seal. You can fine-tune the height to meet the door bottom perfectly—ideal for winterproofing.
By selecting the right materials and properly installing DIY weather stripping, you can significantly reduce winter drafts, increase energy efficiency, and enjoy a warmer, more comfortable home all season long.
Beyond Doors and Windows: Other Areas to Weather-Proof
While doors and windows are primary targets for DIY weather stripping, a truly comprehensive winterization strategy extends to other less obvious areas of your home. Overlooking these spots can undermine your efforts, allowing cold air to infiltrate and warm air to escape, ultimately impacting your energy savings and comfort.
Think about all the penetrations in your home’s exterior envelope—where pipes, wires, and vents pass through walls, floors, and ceilings. These are often overlooked but can be significant sources of air leakage. A holistic approach ensures maximum efficiency.
Sealing Electrical Outlets and Light Switches
It might seem surprising, but electrical outlets and light switches on exterior walls can be significant sources of drafts. The small gaps around the electrical box and the plate itself allow cold air to seep in.
Foam Gaskets: Pre-cut foam gaskets are available specifically for outlets and switch plates. Simply remove the plate, place the gasket over the outlet/switch, and reattach the plate. This is a quick, inexpensive, and highly effective DIY fix.
Addressing Plumbing and Wire Penetrations
Wherever pipes or wires enter or exit your home, there’s a potential for air leaks. These gaps, often hidden behind walls or in utility areas, can be surprisingly large.
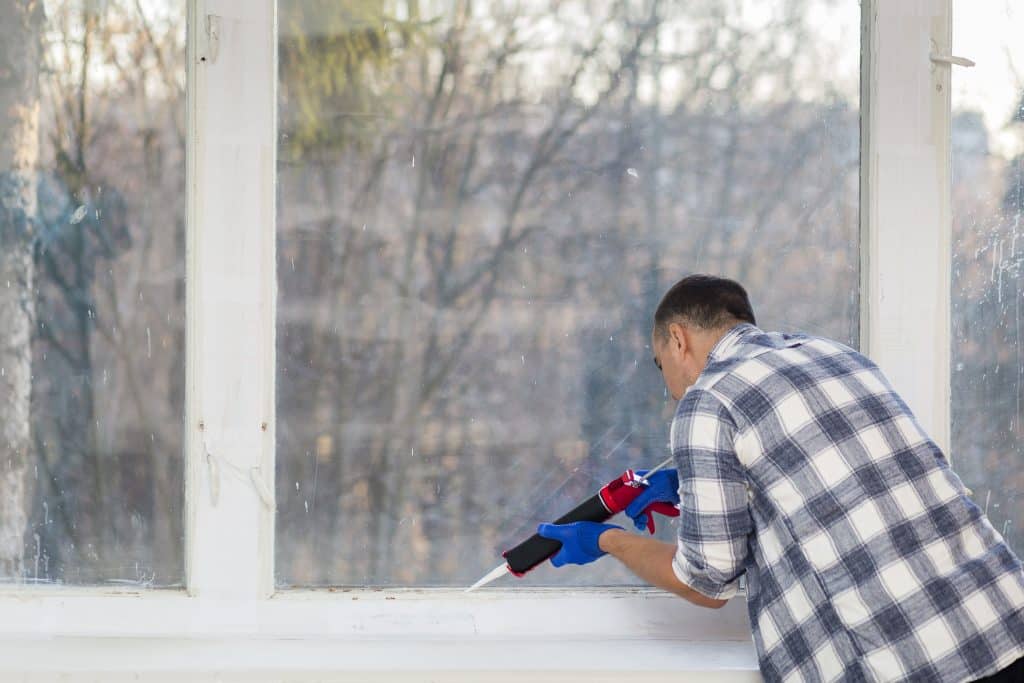
Caulk or Expanding Foam: For smaller gaps around pipes and wires, a good quality caulk (silicone or acrylic latex) can create a durable seal. For larger gaps, low-expansion spray foam is an excellent choice, as it fills irregular spaces and insulates simultaneously. Ensure you use foam designed for sealing and not for structural purposes.
Insulating Attic Hatches and Access Panels
Attic hatches and other access panels, especially those leading to unconditioned spaces, are often poorly sealed and insulated. They act as direct conduits for air exchange between your conditioned living space and the unconditioned attic.
Weather Stripping and Insulation: Apply foam tape or tubular gaskets around the perimeter of the attic hatch to create a tight seal when it’s closed. Additionally, consider attaching a rigid foam board to the top (attic side) of the hatch for added insulation.
By extending your weather stripping efforts beyond just doors and windows to these less obvious areas, you can significantly enhance your home’s overall airtightness, leading to greater comfort and even more substantial energy savings.
Maintaining Your Weather Stripping for Long-Term Savings
Installing DIY weather stripping is an excellent step towards an energy-efficient home, but its effectiveness relies on proper maintenance. Just like any other home improvement, weather stripping can wear out over time due to exposure to the elements, constant compression, and general wear and tear. Regular inspection and timely replacement or repair will ensure your investment continues to pay off year after year.
Neglecting maintenance can lead to degraded seals, allowing drafts to return and negating your initial efforts. A few minutes of attention each season can save you significant money in the long run and maintain a comfortable indoor environment.
Seasonal Inspection and Cleaning
It’s a good practice to inspect your weather stripping at least twice a year: once in the fall, before the heating season begins, and again in the spring, to prepare for cooling. This allows you to identify any issues before they become major problems.
Check for Cracks and Gaps: Look for any visible cracks, tears, or hardening in the material. Over time, some materials can lose their flexibility or adhesive properties.
Test the Seal: Use the hand or smoke test (as described earlier) to re-evaluate the effectiveness of your seals. If you feel a draft, it’s time for action.
Clean Regularly: Dirt, dust, and debris can accumulate on weather stripping, especially on door sweeps. Clean these areas with a damp cloth to ensure the stripping can make full contact and maintain its seal. For rubber or vinyl, a silicone-based lubricant can help maintain flexibility.
Repairing and Replacing Damaged Stripping
When you find damaged or ineffective weather stripping, address it promptly. Often, small repairs can extend the life of your existing strips, but sometimes a full replacement is necessary.
Minor Damage: For small tears in foam tape, you might be able to patch it with a new piece. For compression strips that have come loose, re-secure them with appropriate adhesive or small nails.
Significant Wear: If the weather stripping is brittle, heavily compressed, or extensively damaged, it’s usually best to replace the entire strip. Measure the section accurately and install new material following the original installation steps.
Proactive maintenance of your weather stripping is a simple, yet powerful way to ensure your home remains energy-efficient and comfortable throughout all seasons. It’s a small effort with substantial returns in savings and comfort.
| Key Point | Brief Description |
|---|---|
| Identify Leaks | Use visual inspection, hand tests, or smoke tests to locate drafts around windows, doors, and other openings. |
| Choose Right Material | Select appropriate weather stripping (foam, V-seal, tubular gaskets, sweeps) based on the gap type and location. |
| Windows & Doors | Focus on sealing movable sashes, frames, meeting rails, and door bottoms with specific weather stripping types. |
| Maintenance | Regularly inspect, clean, and replace worn weather stripping to ensure long-term effectiveness and savings. |
Winter Weather Stripping FAQ: Frequently Asked Questions
What is the most effective type of weather stripping for exterior doors during winter? ▼
For harsh winter conditions, compression-type weather stripping—such as tubular gaskets or solid vinyl/rubber strips—is among the most effective. These materials create a strong, tight seal when the door closes, helping block cold winter air. Pairing this with a high-quality door sweep or door shoe ensures the bottom gap is properly sealed, which is essential for winter draft protection.
How often should weather stripping be replaced to stay winter-ready? ▼
The lifespan varies based on material and exposure to winter temperatures. Foam tapes may need replacement every 1–3 years, while more durable options like tubular gaskets or rigid vinyl can last 5–10 years or longer. Inspecting your weather stripping at least twice a year—especially before winter—helps ensure your home stays sealed against drafts.
Can weather stripping really save money on winter energy bills? ▼
Absolutely. Proper weather stripping greatly reduces the amount of heated air that escapes during winter. Drafts can account for 5% to 30% of a home’s heating and cooling costs. By blocking winter air leaks and keeping warm air inside, weather stripping reduces the strain on your heating system and results in noticeable energy savings.
Is DIY weather stripping difficult to install for winter preparation? ▼
Most DIY projects are very beginner-friendly, making winter prep easy even for first-timers. Self-adhesive foam tape and V-seal strips require only basic tools like a measuring tape and scissors. Door sweeps or shoes may require a drill, but installation remains straightforward with clear instructions. It’s one of the simplest winter home-improvement tasks you can tackle.
What common mistakes should be avoided when installing weather stripping for winter protection? ▼
Common mistakes include:
Not cleaning surfaces before installation
Choosing the wrong type of weather stripping for winter-level gaps
Installing materials too tightly, which affects door or window movement
Ignoring smaller leaks around frames or thresholds
Skipping seasonal maintenance checks
Always aim for a snug—but not restrictive—fit to ensure maximum winter insulation and long-term effectiveness.
Conclusion
Embracing DIY weather stripping projects is more than just a seasonal chore; it’s a smart, proactive investment in your home’s comfort and your financial well-being. By diligently identifying and sealing air leaks around doors, windows, and other common entry points, you can significantly reduce your energy consumption, leading to lower utility bills throughout the year. The satisfaction of a warmer, cozier home, coupled with the tangible savings, makes these projects incredibly rewarding. Remember, consistent maintenance ensures long-term effectiveness, transforming your home into an energy-efficient sanctuary. Take the initiative this season and experience the lasting benefits of a well-sealed home.


