Boost Home Energy Efficiency 15% by 2026: Smart Thermostat DIY
Installing a smart thermostat can significantly boost your home’s energy efficiency by optimizing heating and cooling schedules, leading to substantial savings and enhanced comfort.
Are you ready to take control of your home’s energy consumption and contribute to a greener future? This comprehensive guide will show you how to Boost Your Home’s Energy Efficiency by 15% in 2026: A DIY Guide to Smart Thermostat Installation. Upgrading to a smart thermostat is one of the most effective ways to reduce your utility bills and improve your home’s comfort, all while being a rewarding do-it-yourself project.
Understanding Smart Thermostats and Their Benefits
Smart thermostats represent a significant leap forward from traditional models, offering unparalleled control and optimization of your home’s heating and cooling systems. They are designed to learn your preferences, adapt to your schedule, and even respond to external factors like weather, ensuring your home is comfortable only when needed. This intelligent management is the cornerstone of their energy-saving potential.
The benefits extend beyond just energy savings, encompassing convenience, environmental impact, and even property value. Understanding these advantages can help homeowners appreciate the true value of making this upgrade.
Key Advantages of Smart Thermostats
- Significant Energy Savings: By optimizing heating and cooling, smart thermostats can cut energy consumption by 10-15%, sometimes more.
- Remote Control: Manage your home’s temperature from anywhere using a smartphone, tablet, or computer.
- Learning Capabilities: Many models learn your habits and preferences, automatically adjusting settings for optimal comfort and efficiency.
- Detailed Energy Reports: Gain insights into your energy usage patterns, helping you identify areas for further improvement.
These devices often integrate with other smart home systems, creating a cohesive and automated living environment. The ability to fine-tune your home’s climate control with such precision not only saves money but also reduces your carbon footprint, contributing to a more sustainable lifestyle. The data provided by these systems can also empower homeowners to make more informed decisions about their overall energy consumption, leading to continuous improvements.
Choosing the Right Smart Thermostat for Your Home
With a plethora of smart thermostats on the market, selecting the ideal one for your home can seem daunting. The choice often depends on several factors, including your existing HVAC system, specific features you desire, and your budget. Compatibility is paramount, as not all smart thermostats work with every heating and cooling setup.
Researching different brands and models is crucial to ensure you find a device that not only meets your needs but also integrates seamlessly into your home. Consider factors like ease of installation, user interface, and smart home ecosystem compatibility.
Factors to Consider When Choosing
- HVAC System Compatibility: Verify if your system uses common (C-wire), conventional, or heat pump wiring.
- Features: Look for learning capabilities, geofencing, zoning options, and integration with voice assistants.
- User Interface: Some prefer touchscreens, others app-based control; choose what feels most intuitive.
- Cost and Rebates: Compare prices and check for local utility rebates, which can significantly offset the initial investment.
Leading brands like Nest, Ecobee, and Honeywell offer a range of products with varying features and price points. Reading reviews and comparing specifications will help you make an informed decision. Remember that a slightly higher upfront cost for a feature-rich model can often lead to greater long-term savings and satisfaction. Many utility companies offer incentives for installing smart thermostats, so it’s worth checking for available programs in your area before making a purchase.
Pre-Installation Checklist: What You Need to Know
Before you begin the installation process, a thorough pre-installation check is essential to ensure a smooth and safe upgrade. This step involves gathering tools, understanding your current wiring, and taking necessary safety precautions. Rushing this phase can lead to complications or even damage to your HVAC system.
Proper preparation not only simplifies the installation but also minimizes the risk of errors. Having all the necessary information and equipment at hand will make the DIY project much more manageable and enjoyable.
Essential Pre-Installation Steps
- Turn Off Power: Always cut power to your HVAC system at the breaker box before touching any wiring.
- Identify Wiring: Take a photo of your existing thermostat’s wiring before disconnecting anything. Label each wire.
- Check for C-Wire: A common wire (C-wire) provides continuous power to smart thermostats. If you don’t have one, you might need an adapter or professional installation.
- Gather Tools: You’ll likely need a screwdriver, wire strippers, and potentially a drill.
Refer to your new smart thermostat’s manual for specific wiring diagrams and compatibility notes. Most manufacturers provide clear instructions and even online resources to guide you through this process. A little time spent on preparation can save a lot of frustration later on. Understanding your existing setup is the first critical step towards a successful smart thermostat installation. This foundational knowledge ensures you’re prepared for any specific requirements or challenges your home’s wiring might present.
Step-by-Step DIY Installation Guide
Once you’ve completed your pre-installation checklist and gathered all necessary tools, you’re ready to begin the physical installation of your smart thermostat. This process is generally straightforward for most homeowners, provided they follow the instructions carefully and prioritize safety.
Each step is designed to be manageable, guiding you from removing your old thermostat to configuring your new smart device. Patience and attention to detail are key to a successful DIY installation.
Installation Steps
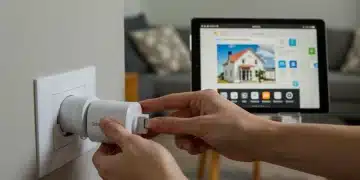
- Remove Old Thermostat: Carefully detach the old thermostat from the wall plate.
- Disconnect and Label Wires: Using your pre-taken photo, disconnect each wire and label it according to its terminal.
- Install New Backplate: Mount the new smart thermostat’s backplate to the wall, feeding the wires through the opening.
- Connect Wires: Connect the labeled wires to the corresponding terminals on the new backplate. Ensure secure connections.
- Attach Thermostat Head: Secure the main thermostat unit to the backplate.
- Restore Power: Turn the power back on at the breaker box.
After restoring power, your smart thermostat should power on. Follow the on-screen prompts to connect it to your home’s Wi-Fi network and begin the initial setup. This includes setting your preferred temperature ranges, scheduling, and connecting to any smart home apps. Most smart thermostats have intuitive setup wizards that walk you through these final steps, making the process user-friendly even for first-time installers. Double-checking all connections before restoring power is a critical safety measure that cannot be overstated.
Optimizing Your Smart Thermostat for Maximum Efficiency
Installing a smart thermostat is just the first step; unlocking its full energy-saving potential requires proper optimization and ongoing management. These devices offer advanced features that, when utilized correctly, can significantly enhance your home’s energy efficiency and comfort. It’s about more than just setting a temperature; it’s about intelligent climate control.
Learning to leverage features like scheduling, geofencing, and energy reporting will ensure you get the most out of your investment. These tools provide a dynamic approach to home climate management, adapting to your lifestyle rather than requiring constant manual adjustments.
Tips for Optimization
- Create Smart Schedules: Program different temperatures for when you’re home, away, or asleep.
- Utilize Geofencing: Allow the thermostat to adjust temperatures based on your proximity to home.
- Monitor Energy Reports: Regularly review usage data to identify patterns and areas for further savings.
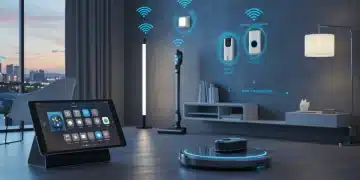
- Integrate with Smart Home Devices: Connect with other smart devices for a more cohesive and automated system.
Many smart thermostats also offer “eco” modes or energy-saving presets that automatically adjust settings to minimize consumption. Experiment with these features to find what works best for your household’s comfort and energy goals. Regular monitoring and fine-tuning will ensure your smart thermostat continues to perform optimally, delivering consistent savings and comfort throughout the year. Don’t forget to update the firmware regularly to access the latest features and security enhancements.
Troubleshooting Common Smart Thermostat Issues
Even with careful installation and optimization, you might encounter minor issues with your smart thermostat. Knowing how to troubleshoot common problems can save you time and the expense of a professional service call. Most issues are often simple fixes related to connectivity or basic settings.
Understanding the typical challenges and their solutions will empower you to maintain your system effectively, ensuring continuous performance and comfort. A quick check of the manual or online support resources can often provide immediate answers.
Common Problems and Solutions
- No Power to Thermostat: Check your circuit breaker and ensure the C-wire is properly connected.
- Wi-Fi Connectivity Issues: Restart your router and the thermostat. Ensure your Wi-Fi signal is strong.
- Inaccurate Temperature Readings: Ensure the thermostat is not in direct sunlight or near heat sources.
- HVAC System Not Responding: Double-check all wiring connections. If issues persist, consult an HVAC professional.
Many smart thermostats have built-in diagnostic tools accessible through their app or device interface. These can often pinpoint the exact nature of a problem, guiding you toward a resolution. If you’re unsure about any step, or if the problem involves complex electrical work, it’s always best to contact a qualified HVAC technician to avoid potential damage or safety hazards. Regular maintenance of your HVAC system can also prevent many thermostat-related issues, ensuring everything runs smoothly.
Beyond the Thermostat: Holistic Home Energy Efficiency
While installing a smart thermostat is a powerful step towards boosting your home’s energy efficiency, it’s part of a larger ecosystem of home improvements. Achieving significant and lasting energy savings often requires a holistic approach, addressing various aspects of your home’s energy consumption. Thinking beyond just temperature control can unlock even greater potential for savings.
Consider other areas where energy might be wasted, from inadequate insulation to inefficient appliances. Each improvement contributes to the overall goal of a more energy-efficient and comfortable home. These additional measures amplify the benefits gained from your smart thermostat.
Additional Energy-Saving Strategies
- Improve Insulation: Proper insulation in walls, attics, and crawl spaces prevents heat loss and gain.
- Seal Air Leaks: Caulk and weatherstrip around windows and doors to prevent drafts.
- Upgrade to Energy-Efficient Appliances: Look for ENERGY STAR certified appliances when replacing old ones.
- Optimize Window Treatments: Use blinds, curtains, or smart glass to manage solar heat gain.
- Regular HVAC Maintenance: Ensure your heating and cooling systems are regularly serviced for optimal performance.
By combining a smart thermostat with these additional strategies, you can create a truly energy-efficient home that not only saves you money but also provides a more comfortable and sustainable living environment. These integrated efforts not only reduce your carbon footprint but also increase your home’s value and overall appeal. Investing in these areas provides compounding returns on your initial smart thermostat installation, creating a truly optimized home environment.
| Key Point | Brief Description |
|---|---|
| Energy Savings | Smart thermostats optimize climate control, potentially saving 10-15% on energy bills annually. |
| DIY Installation | With proper preparation, installing a smart thermostat is a manageable DIY project for most homeowners. |
| Optimization | Utilize features like scheduling and geofencing for maximum efficiency and personalized comfort. |
| Holistic Approach | Combine smart thermostat use with insulation and sealing for comprehensive energy efficiency gains. |
Frequently Asked Questions About Smart Thermostats
A C-wire (common wire) provides continuous 24V power to your smart thermostat, which is essential for powering its advanced features like Wi-Fi and backlit screens. Without a C-wire, battery-powered smart thermostats might experience issues, or you may need an adapter for consistent power.
Yes, absolutely. By learning your schedule, utilizing geofencing, and allowing remote control, smart thermostats prevent unnecessary heating or cooling when you’re away or asleep. This optimized usage can lead to significant savings, often 10-15% or more on heating and cooling costs annually.
Most smart thermostats are designed to be compatible with a wide range of HVAC systems, including conventional and heat pump systems. However, compatibility can vary, especially with older or more complex setups. Always check the manufacturer’s compatibility guide before purchasing.
For many homeowners, installing a smart thermostat is a straightforward DIY task, especially if your home has a C-wire. The process typically involves disconnecting the old thermostat and connecting the new one. Most manufacturers provide clear, step-by-step instructions and online support resources.
Beyond a smart thermostat, consider improving your home’s insulation, sealing air leaks around windows and doors, upgrading to ENERGY STAR certified appliances, and performing regular HVAC maintenance. These measures collectively contribute to substantial energy savings and enhanced home comfort.
Conclusion
Embracing smart thermostat technology is a pivotal step towards achieving a more energy-efficient home by 2026. This DIY guide empowers you to take control of your energy consumption, leading to tangible savings and a reduced environmental footprint. By following the steps outlined, from careful selection and precise installation to continuous optimization and troubleshooting, you can significantly enhance your home’s comfort and efficiency. Remember that this upgrade is not an isolated effort; combining it with other energy-saving strategies will yield the most impactful results, transforming your home into a beacon of modern, sustainable living. The journey to a more efficient home is within your reach, starting with this smart choice.