Build a Pallet Furniture Set: DIY Outdoor Seating Under $150

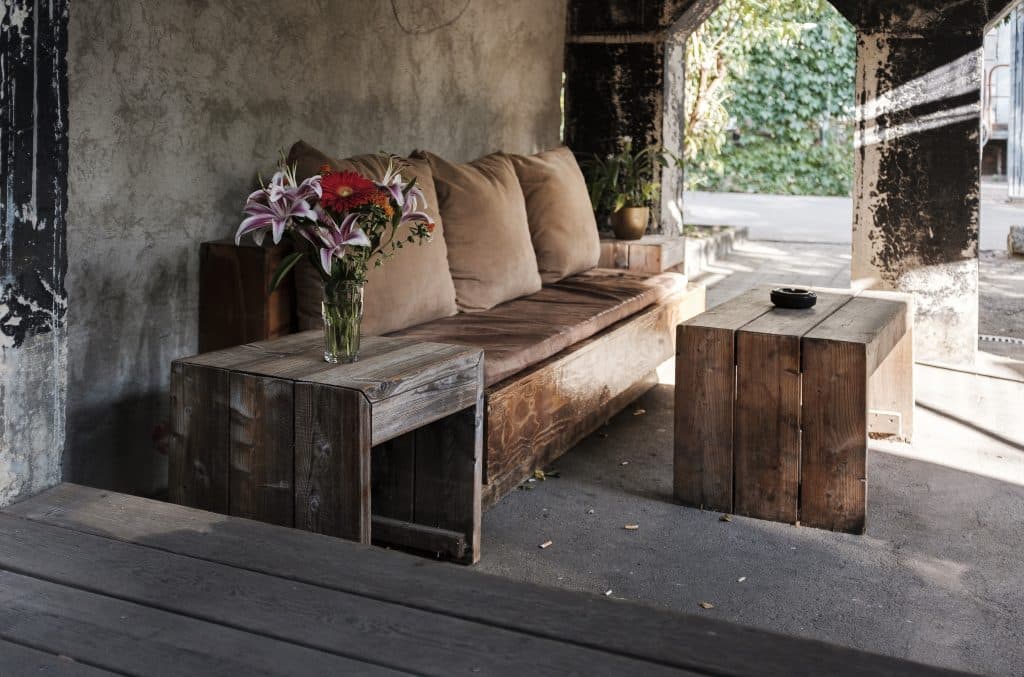 Transform your outdoor area into an inviting haven by learning how to build a stylish and durable pallet furniture set for under $150, offering comfortable seating without breaking the bank.
Are you dreaming of a cozy outdoor living space but cringing at the thought of expensive patio furniture? It’s time to embrace the power of DIY and learn how to build a pallet furniture set: DIY outdoor seating for under $150.
This guide will show you how to create comfortable, stylish, and remarkably affordable seating that will revolutionize your backyard or balcony, proving that a stunning outdoor oasis is well within your reach, regardless of your budget.
Understanding the appeal of pallet furniture for outdoor spaces
Pallet furniture has surged in popularity, becoming a staple in budget-conscious design and sustainable living. Its rustic charm and inherent versatility make it an ideal choice for outdoor settings, offering a unique blend of style and practicality.
Beyond the aesthetic, the fundamental appeal lies in its cost-effectiveness and the satisfaction of a do-it-yourself project.
Constructing furniture from pallets allows for significant savings compared to purchasing ready-made outdoor sets.
This approach not only reduces expenses but also contributes to environmental sustainability by repurposing materials that might otherwise end up in landfills.
The sturdy nature of industrial pallets, designed to withstand heavy loads and outdoor conditions, translates perfectly into durable furniture pieces.
Why choose pallets for outdoor seating?
The decision to use pallets for outdoor seating is rooted in several key advantages that cater to both practicality and design preferences. Their robust construction provides a solid foundation for various furniture types, from sofas and chairs to coffee tables.
Cost-effectiveness: Pallets are often available for free or at a very low cost, drastically cutting down material expenses.
Durability: Made for industrial use, pallets are inherently strong, offering a long-lasting furniture solution when properly treated.
Customization: Their modular nature allows for endless design possibilities, fitting any space or aesthetic.
Sustainability: Repurposing pallets is an eco-friendly choice, reducing waste and promoting recycling.
Moreover, the process of transforming raw pallets into functional furniture is an engaging and rewarding experience.
It empowers individuals to create something unique, tailored precisely to their needs and tastes, rather than settling for mass-produced items. This creative freedom is a huge draw for DIY enthusiasts.
In conclusion, the appeal of pallet furniture for outdoor spaces stems from its economic viability, environmental benefits, and the creative liberty it offers. It’s a smart solution for anyone looking to enhance their outdoor living area on a budget, without compromising on style or durability.
Gathering your materials: finding free or cheap pallets
The cornerstone of building an affordable pallet furniture set is acquiring the right pallets without breaking the bank.
While seemingly abundant, not all pallets are created equal, especially when intended for furniture that will be used by people. Prioritizing safety and quality is crucial during this initial phase.
The best places to find free or cheap pallets are often local businesses. Retail stores, warehouses, construction sites, and manufacturing plants frequently have an excess of pallets they need to dispose of.
It’s always best practice to call ahead and ask if they have any pallets available for pick-up. Some businesses might even be grateful for you to take them off their hands, saving them disposal fees.
Identifying safe and suitable pallets
Not all pallets are safe for use in furniture, particularly those that might come into contact with food or skin. Look for pallets stamped with an “HT” (Heat Treated) mark.
This indicates they have been heat-treated to prevent pests, as opposed to being chemically treated with methyl bromide (“MB”), which can be harmful. Avoid any pallets with spills, strong odors, or excessive damage.
“HT” stamp: Indicates heat-treated, safe for indoor/outdoor use.
“MB” stamp: Indicates chemically treated, avoid for furniture.
No stamp: Proceed with caution; origin unknown.
Cleanliness: Avoid pallets with stains, mold, or chemical residues.
Additionally, assess the condition of the wood. You want sturdy, intact pallets with minimal cracks or rot. While some weathering is acceptable and can even add character, severely damaged pallets will require more repair work, potentially increasing your costs and effort.
Focus on finding pallets that are roughly the same size and in good structural condition to minimize modifications.
Once you’ve secured your pallets, transport them carefully. Even free pallets come with a cost if they cause damage to your vehicle or yourself during transit. Proper planning for collection and transportation ensures a smooth start to your DIY project. Remember, a little discernment in pallet selection goes a long way in ensuring the safety and longevity of your furniture.
Essential tools and materials for your pallet project
Embarking on a pallet furniture project requires a specific set of tools and additional materials to ensure a successful and durable outcome. While the pallets themselves are often free or inexpensive, investing in the right equipment and supplies is crucial for safety, efficiency, and the overall quality of your finished piece. Don’t skimp on these essentials, as they will make the process much smoother.
Beyond the pallets, you’ll need basic woodworking tools that most DIY enthusiasts might already own. For those just starting, these tools are a valuable investment for future projects. Safety gear is non-negotiable; always protect yourself when working with wood and power tools.
Key tools and hardware you’ll need
Having the right tools at hand will significantly streamline the construction process and help you achieve a professional finish. These don’t have to be top-of-the-line, but they should be reliable and safe to operate.
- Saw: A reciprocating saw or jigsaw for cutting pallets to size.
- Drill: For pre-drilling holes and driving screws.
- Sander: An orbital sander or sandpaper for smoothing rough surfaces.
- Measuring tape and pencil: For accurate measurements and markings.
- Hammer and pry bar: For disassembling pallets if necessary.
- Safety gear: Gloves, safety glasses, and a dust mask.
In terms of hardware, screws are generally preferred over nails for pallet furniture due to their superior holding power and ease of removal if adjustments are needed. Opt for exterior-grade screws, especially if your furniture will be exposed to the elements, to prevent rust and corrosion.
Additional materials for finishing and comfort
Once the basic structure is complete, you’ll want to focus on making your pallet furniture comfortable and aesthetically pleasing. These finishing touches are where a small investment can make a huge difference in the overall look and feel of your outdoor seating.
- Wood treatment/sealant: Essential for protecting the wood from weather, rot, and insects.
- Exterior paint or stain: To enhance appearance and provide additional protection.
- Cushions and pillows: The most significant factor for comfort; look for weather-resistant options.
- Fabric for covers (optional): If making your own cushions or covers.
- Heavy-duty casters (optional): For movable pieces like coffee tables or modular seating.
By carefully selecting and preparing your materials and tools, you lay a strong foundation for a successful and satisfying pallet furniture project. This initial investment in quality supplies will pay off in the longevity and enjoyment of your DIY outdoor seating.
Step-by-step assembly: building your pallet sofa or chair
With your pallets cleaned, prepped, and all tools at the ready, it’s time to dive into the assembly phase. This section focuses on the practical steps involved in transforming raw pallets into functional and inviting outdoor seating. While designs can vary, the fundamental principles of construction remain consistent, emphasizing stability and durability.
Start by visualizing your desired furniture piece. For a simple sofa or chair, you’ll typically stack two or three pallets for the base to achieve a comfortable seating height. The backrest can be created from a single pallet cut in half or another full pallet secured vertically. Precision in measurement and cutting is key to a professional-looking result.
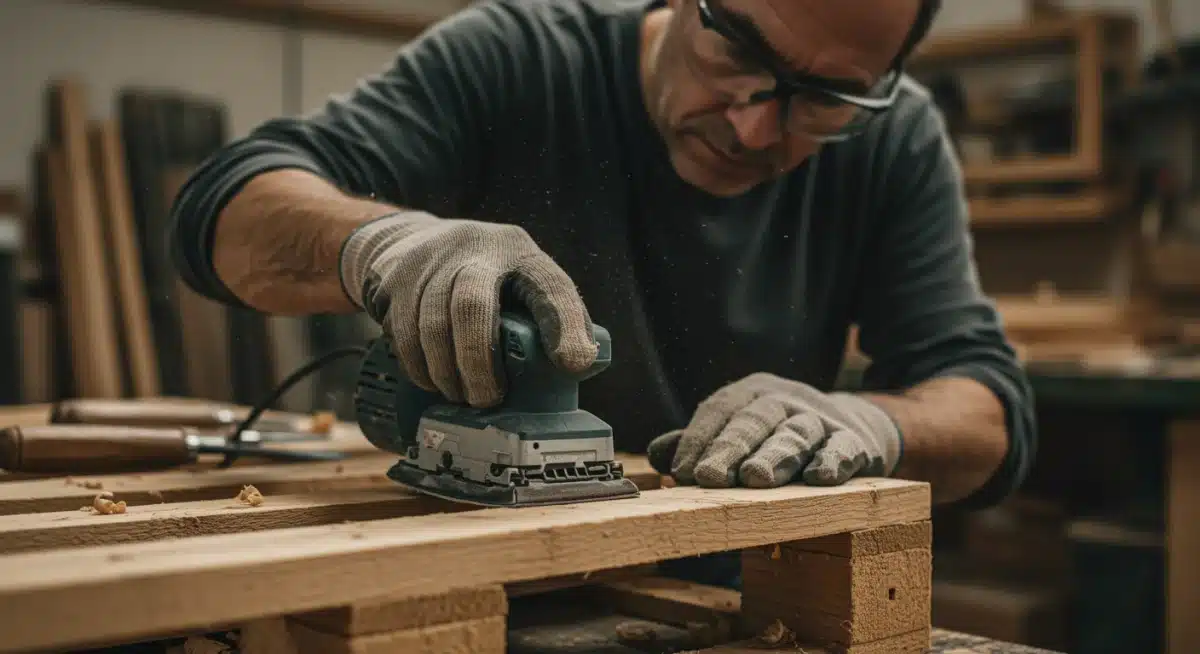
Preparing your pallets for assembly
Before any cutting or joining, ensure all your pallets are thoroughly cleaned and sanded. Sanding is particularly important to remove splinters and smooth rough edges, making your furniture safe and pleasant to touch. Use a medium-grit sandpaper first, followed by a finer grit for a smoother finish. This step is crucial for both aesthetics and safety.
- Clean: Scrub pallets with soap and water, then let them dry completely.
- Inspect: Check for protruding nails or loose boards and address them.
- Sand: Smooth all surfaces, especially edges and areas that will be touched frequently.
- Cut: Measure and cut pallets to your desired dimensions for the base and backrest.
Once prepared, you can begin arranging your pallets. For a basic sofa, place two pallets side-by-side for the seating area, and then stack another two on top to achieve the desired height. Ensure they are aligned perfectly before securing them.
Securing the structure and adding the backrest
The integrity of your pallet furniture relies heavily on how well the pieces are secured. Use long, exterior-grade wood screws to connect the stacked pallets firmly. Pre-drilling pilot holes is highly recommended to prevent the wood from splitting, especially with older, drier pallet wood.
For the backrest, position a cut pallet section or a full pallet vertically against the rear of your stacked base. Angle it slightly for comfort if desired. Secure the backrest to the base using robust L-brackets or by screwing directly through the backrest into the base pallets at multiple points. Ensure all connections are tight and stable.
- Connect base layers: Use screws to join stacked pallets for the seat.
- Attach backrest: Securely fasten the backrest pallet to the seat base using screws and/or brackets.
- Reinforce: Add extra bracing if needed for heavier use or larger designs.
- Test stability: Gently apply pressure to ensure the structure is solid.
Building your pallet furniture is a rewarding process that combines careful planning with practical execution. By following these steps, you’ll create a sturdy and functional piece of outdoor seating that forms the foundation of your new outdoor oasis.
Finishing touches: painting, staining, and weatherproofing
Once your pallet furniture is assembled, the real transformation begins with the finishing touches. This stage is crucial not only for enhancing the aesthetic appeal but also for protecting your hard work from the elements. Proper painting, staining, and weatherproofing will significantly prolong the life of your outdoor seating, ensuring it remains beautiful and functional for years to come.
Neglecting this step can lead to premature deterioration, as untreated wood is highly susceptible to moisture, UV damage, and pests. Investing a little time and effort here will save you from constant repairs or replacements down the line, making your initial under $150 investment truly worthwhile.
Choosing the right finish for outdoor use
The choice between paint and stain largely depends on the look you want to achieve and the level of wood grain visibility you prefer. Both offer protection, but they do so in different ways and with different visual outcomes. Consider your existing outdoor decor and personal style when making your decision.
- Exterior Paint: Provides a solid, opaque color that covers the wood grain. Offers excellent protection against moisture and UV rays. Choose a paint specifically formulated for outdoor use for best results.
- Exterior Stain: Penetrates the wood, enhancing its natural grain while providing color. Stains can be transparent, semi-transparent, or solid. They offer good protection against moisture and UV, with solid stains providing more coverage and protection.
- Clear Sealant: If you love the natural, raw look of the pallet wood, a clear exterior sealant or varnish is essential. It protects without altering the wood’s appearance significantly.

Regardless of your choice, ensure the product is suitable for outdoor use and offers UV protection. This is vital for preventing the wood from fading, cracking, and warping under sun exposure.
Application techniques and weatherproofing tips
Proper application is as important as the product itself. Always apply your chosen finish to clean, dry, and sanded wood. Follow the manufacturer’s instructions for drying times between coats and the recommended number of coats.
Preparation: Ensure the wood is completely dry and free of dust or debris before applying any finish.
Multiple Coats: Apply at least two coats of paint, stain, or sealant for maximum protection and durability. Lightly sand between coats if recommended by the product.
Edge Protection: Pay extra attention to the edges and ends of the wood, as these areas are most vulnerable to moisture absorption.
Regular Maintenance: Reapply a fresh coat of sealant or paint every 1-2 years, or as needed, to maintain protection.
For an extra layer of weatherproofing, especially in humid climates or areas with heavy rainfall, consider applying a dedicated deck or patio sealant over your paint or stain.
This creates a barrier that repels water, further safeguarding your pallet furniture. These finishing steps are an investment in the longevity and beauty of your DIY outdoor seating.
Adding comfort and style: cushions and decor
Once the structural work and weatherproofing are complete, the final and arguably most exciting step is to infuse your pallet furniture with comfort and personal style.
This is where your DIY project truly comes to life, transforming raw wood into an inviting oasis. The addition of cushions, pillows, and decorative elements can elevate your budget-friendly seating to look and feel luxurious.
Comfort is paramount for any seating, especially outdoors. Pallet wood, while sturdy, isn’t inherently soft. High-quality cushions are therefore a non-negotiable addition. Beyond comfort, they also provide an opportunity to introduce color, texture, and pattern, reflecting your personal aesthetic and complementing your outdoor space.
Selecting the right outdoor cushions
When choosing cushions for your pallet furniture, prioritize those designed specifically for outdoor use. These are typically made from weather-resistant fabrics that can withstand sun, rain, and mildew.
Look for materials like olefin, acrylic, or solution-dyed polyester, which are known for their durability and colorfastness.
Weather Resistance: Opt for materials that repel water and resist fading from UV rays.
Thickness: Thicker cushions (at least 4-5 inches) offer superior comfort for extended lounging.
Size: Measure your pallet dimensions carefully to ensure a snug fit. Custom cushions might be an option if standard sizes don’t work.
Removable Covers: Look for cushions with removable, washable covers for easy cleaning and maintenance.
While outdoor cushions can sometimes be an investment, they are crucial for transforming your pallet structure into comfortable seating. Shop around for sales, clearances, or consider making your own covers from durable outdoor fabric if you’re handy with a sewing machine to stay within your under $150 budget.
Enhancing with decorative elements and lighting
Beyond the cushions, strategically placed decorative items can significantly boost the style and ambiance of your pallet furniture set. Think of these as the jewelry for your outdoor living room.
Throw Pillows: Add an extra layer of comfort and an opportunity to introduce contrasting colors or patterns.
Outdoor Rugs: Define the seating area and add warmth underfoot. Choose weather-resistant options.
String Lights: Drape them above or around your seating area for a magical evening glow.
Potted Plants: Incorporate greenery to soften the industrial look of the pallets and bring nature closer.
Side Tables/Coffee Tables: Utilize smaller pallets or reclaimed wood to create functional surfaces for drinks and snacks.
By thoughtfully combining functional comfort with stylish decor, you’ll create an inviting and personalized outdoor retreat that feels both unique and luxurious, all while adhering to your budget-friendly approach. This final stage truly makes your pallet furniture set a focal point of your outdoor living.
Budget breakdown: achieving your $150 goal
One of the most appealing aspects of building a pallet furniture set is the potential for significant cost savings.
The goal of creating comfortable outdoor seating for under $150 is entirely achievable with careful planning and smart material sourcing. This section will break down the typical expenses involved, offering strategies to keep your project firmly within budget.
The primary cost-saving comes from the pallets themselves, which can often be acquired for free. The remaining budget will primarily be allocated to essential tools (if you don’t already own them), hardware, wood treatment, and most significantly, cushions. Prioritizing where to spend and where to save is key to staying on track.
Where to allocate your budget
To effectively manage your $150 budget, it’s helpful to categorize potential expenses and understand where the bulk of your money will likely go. Cushions are almost always the most expensive component, followed by wood treatment and hardware.
Pallets (Free – $20): Aim for free pallets. If you must buy, check local marketplaces or lumberyards for used ones.
Hardware (Screws, Brackets) ($10 – $20): Invest in exterior-grade screws for durability.
Wood Treatment/Sealant/Paint ($20 – $40): Essential for weather protection and aesthetics. Look for sales or consider smaller quantities.
Cushions ($70 – $100+): This is your biggest variable. Shop sales, clearance, or consider making simple foam and fabric cushions yourself.
Sanding Supplies ($5 – $10): Sandpaper or sanding discs.
Tools are generally not included in this budget, assuming you either own basic DIY tools or can borrow them. If you need to buy tools, factor that into your overall project cost, or consider it a long-term investment for future DIY endeavors.
Tips for cost-saving without compromising quality
Staying under $150 requires a strategic approach to purchasing and an openness to creative solutions. Every dollar saved on one item can be reallocated to another, allowing for flexibility.
Source Free Pallets: This is the biggest money-saver. Always ask businesses before taking.
DIY Cushions: Purchase foam inserts and outdoor fabric separately, then sew your own covers. This can be significantly cheaper than pre-made cushions.
Buy During Sales: Keep an eye out for end-of-season sales on outdoor cushions, paint, and sealants.
Re-purpose and Upcycle: Look for old outdoor pillows or fabric you can clean up and use.
Borrow Tools: If you don’t own a specific tool, borrow from friends, family, or consider renting for a short period.
By meticulously tracking your expenses and actively seeking out the most economical options for each component, you can confidently achieve your goal of building a beautiful and durable pallet furniture set for under $150. It’s a testament to how resourcefulness can lead to impressive results.
Maintenance and longevity of your pallet furniture
Building a pallet furniture set is a rewarding endeavor, but ensuring its longevity requires ongoing care and maintenance. While pallets are inherently robust, their exposure to outdoor elements necessitates regular attention to keep them in prime condition.
Proper maintenance not only preserves the aesthetic appeal but also extends the life of your under $150 investment, making it a sustainable choice for years to come.
Neglecting maintenance can lead to issues like wood rot, fading, and structural weakening, diminishing both the look and safety of your furniture. A proactive approach to care will save you time and money in the long run, ensuring your outdoor oasis remains a comfortable and inviting space.
Routine cleaning and inspection
Regular cleaning is the simplest yet most effective form of maintenance. Dust, dirt, pollen, and leaves can accumulate on your furniture, leading to grime and potential mold growth if left unchecked. A quick wipe-down or rinse can prevent most of these issues.
Weekly Wipe-Down: Use a damp cloth to remove surface dirt and dust.
Monthly Wash: For a deeper clean, use a mild soap solution and a soft brush, then rinse thoroughly with water. Ensure the wood dries completely.
Seasonal Inspection: Before and after peak outdoor seasons, inspect all screws, joints, and wood surfaces. Tighten any loose screws and look for signs of wear, cracks, or rot.
Cushion Care: Follow manufacturer instructions for cleaning outdoor cushions, typically involving spot cleaning or machine washing removable covers. Store cushions indoors during harsh weather.
Addressing minor issues as they arise prevents them from escalating into larger, more costly problems. Early detection of loose screws or small cracks means a quick fix, rather than a major repair.
Protecting against the elements and seasonal care
Outdoor furniture faces constant challenges from weather conditions. Implementing protective measures and adapting your care routine seasonally will significantly extend the lifespan of your pallet furniture.
Reapply Sealant/Paint: Every 1-2 years, or as needed, reapply your chosen wood sealant, stain, or paint. This renews the protective barrier against moisture and UV damage.
Use Furniture Covers: During prolonged periods of non-use, or when harsh weather is expected, invest in waterproof outdoor furniture covers. This offers excellent protection from rain, snow, and intense sun.
Winter Storage: If possible, move your pallet furniture to a sheltered area like a garage or shed during winter months, especially in regions with heavy snow or freezing temperatures. If not, ensure it’s well-covered.
Elevate from Ground: If your furniture sits directly on damp ground, consider adding small risers or rubber feet to the pallet bases to improve airflow and prevent moisture absorption from below.
By integrating these maintenance practices into your routine, your DIY pallet furniture set will continue to provide comfortable and stylish outdoor seating for many seasons to come, proving its value far beyond the initial under $150 investment.
| Key Point | Brief Description |
|---|---|
| Pallet Sourcing | Find free or low-cost “HT” (Heat Treated) pallets from local businesses for safety and budget. |
| Essential Materials | Gather basic tools, exterior-grade screws, wood treatment, and weather-resistant cushions. |
| Finishing & Protection | Sand, paint/stain, and seal wood to protect against weather and enhance longevity. |
| Budget Management | Prioritize free pallets and DIY cushions to stay within the $150 budget for the entire set. |
Frequently asked questions about pallet furniture
No, not all pallets are safe. Always look for pallets stamped with “HT” (Heat Treated), which means they were treated with heat to prevent pests. Avoid “MB” (Methyl Bromide) stamped pallets, as these are chemically treated and can be harmful. If there’s no stamp, it’s best to avoid them.
Many businesses, such as retail stores, warehouses, and construction sites, often have pallets they need to dispose of. It’s always recommended to call ahead and ask for permission before taking any pallets. Some businesses may even be grateful for you to take them off their hands.
Key tools include a saw (reciprocating or jigsaw), a drill, a sander (orbital or sandpaper), a measuring tape, and safety gear like gloves and safety glasses. A pry bar can be useful for disassembling pallets if needed. These tools ensure efficient and safe construction.
After cleaning and sanding, apply at least two coats of exterior-grade wood sealant, stain, or paint. These products protect the wood from moisture, UV rays, and rot. Regular reapplication every 1-2 years and using furniture covers during harsh weather will extend its lifespan significantly.
Absolutely! The key is sourcing free pallets and being resourceful with other materials. The biggest expense will likely be outdoor cushions, so look for sales, clearance items, or consider making your own cushion covers to stay within the $150 budget for a stylish and comfortable set.
Conclusion
Building a pallet furniture set for your outdoor space is an incredibly rewarding and budget-friendly project that proves that a stunning backyard oasis doesn’t require a hefty investment.
By carefully selecting safe pallets, investing in essential tools, and applying thoughtful finishing touches, you can create durable, comfortable, and stylish seating that rivals much more expensive options.
The process not only enhances your outdoor living area but also offers the satisfaction of a handmade creation, reflecting your personal style and commitment to sustainable living. Embrace the DIY spirit, and transform your outdoor dreams into a tangible reality, all while staying well within your $150 budget.


