DIY Headboard: Build a Custom Headboard for Under $100
 Transform your bedroom’s focal point with a custom-built headboard for under $100, easily achievable through accessible DIY methods and budget-friendly materials.
Are you dreaming of a bedroom makeover but hesitant about the cost? A custom headboard can dramatically elevate your space, providing both style and comfort. The good news is, you don’t need to spend a fortune. This guide will show you how to embark on a DIY headboard under $100 project, transforming your bedroom into a personalized sanctuary without breaking the bank.
Why a DIY headboard is a game-changer for your bedroom
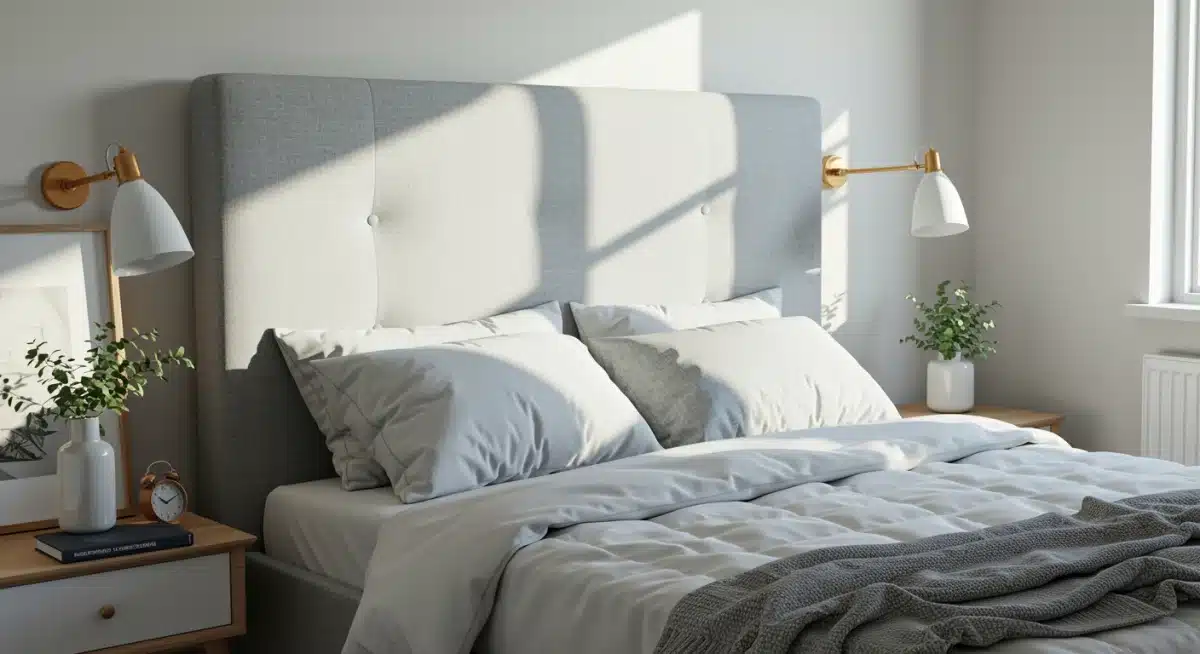
A headboard is more than just a decorative element; it’s the centerpiece of your bedroom, anchoring the bed and defining the room’s aesthetic. Opting for a DIY approach offers unparalleled benefits, particularly when budget is a consideration.
You gain complete control over the design, materials, and overall look, ensuring the final product perfectly matches your vision and existing decor.
Beyond cost savings, building your own headboard provides a deep sense of accomplishment. It’s an opportunity to infuse your personality into your living space, creating something truly unique that reflects your style.
This personal touch is often missing from mass-produced furniture, making a custom DIY headboard a truly valuable addition to your home.
Unleashing creativity and personal style
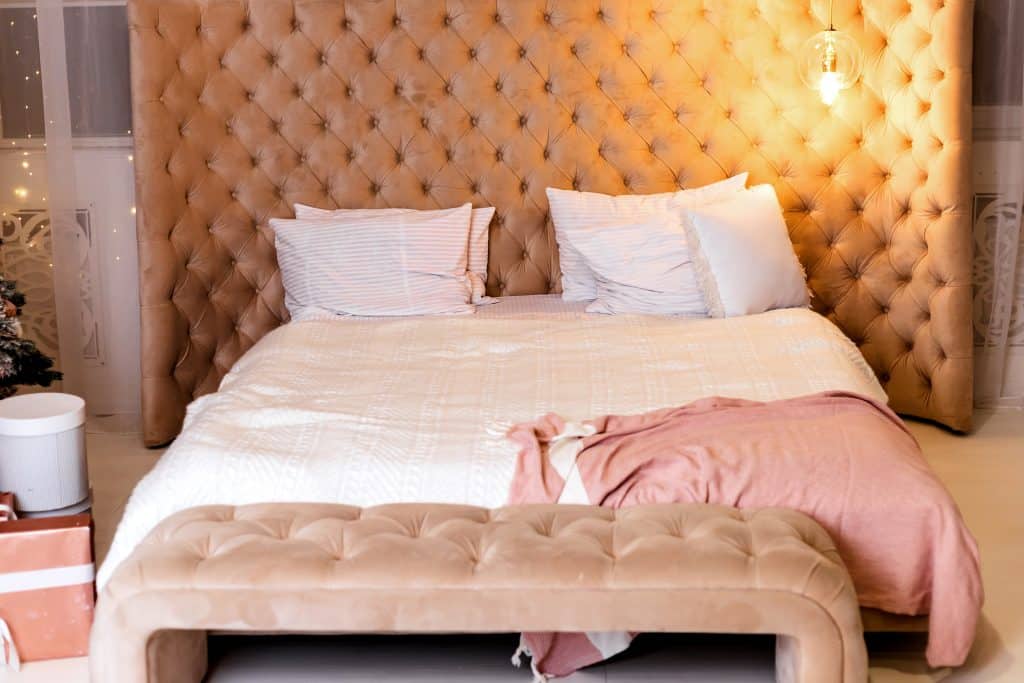
When you decide to build a headboard yourself, the possibilities are endless. You’re not limited by what’s available in stores or by pre-determined designs. This freedom allows for genuine creative expression, letting you experiment with different textures, colors, and shapes. Imagine a plush, tufted headboard in a bold velvet or a rustic, reclaimed wood design that tells a story. Your imagination is the only limit.
Material selection: Choose from a wide array of materials like plywood, reclaimed wood, fabric, foam, or even old doors.
Color palette: Match or contrast your existing bedroom colors to create a harmonious or striking effect.
Unique designs: Go beyond standard rectangles; consider arches, curves, or multi-panel designs.
Budget-friendly bedroom transformation
One of the most compelling reasons to build a DIY headboard is the significant cost savings. High-quality headboards can be surprisingly expensive, often costing hundreds or even thousands of dollars.
By sourcing materials yourself and investing a bit of time and effort, you can achieve a sophisticated look for a fraction of the price. This makes a stylish bedroom makeover accessible to everyone, regardless of their budget.
The beauty of a budget-friendly project lies in smart material choices and repurposing. Instead of buying new, consider visiting thrift stores, salvage yards, or even using items you already have. This not only saves money but also contributes to sustainable living by giving new life to old materials. The goal is to create maximum impact with minimal expenditure.
In conclusion, a DIY headboard is an excellent way to personalize your bedroom, express your creativity, and achieve a high-end look without the high-end price tag. It’s a project that offers both aesthetic and personal rewards, making your bedroom truly your own.
Planning your DIY headboard project: essential considerations
Before diving into construction, thorough planning is crucial for a successful DIY headboard project. This stage involves defining your vision, measuring accurately, and gathering all necessary supplies. A well-thought-out plan will save you time, money, and frustration in the long run, ensuring your project stays within budget and meets your aesthetic expectations.
Consider the overall style of your bedroom. Is it modern, rustic, bohemian, or traditional? Your headboard should complement this style, acting as a cohesive element rather than an outlier. Also, think about functionality: do you want a purely decorative headboard, or one that offers storage or extra cushioning for reading in bed?
Determining your design and dimensions
The design of your headboard is paramount. Browse online for inspiration, looking at different styles, shapes, and materials. Once you have a general idea, consider the dimensions.
Measure the width of your bed frame and decide on the desired height for your headboard. A common rule of thumb is for the headboard to be slightly wider than the bed, extending a few inches on either side.
Bed size: Ensure your headboard width matches your bed (Twin, Full, Queen, King, California King).
Desired height: Consider ceiling height and personal preference for a balanced look.
Shape and style: Square, arched, rectangular, or unique custom shapes.
Sourcing budget-friendly materials
Sticking to a budget of under $100 requires smart shopping and resourcefulness. Plywood is an excellent base material, often inexpensive and easy to work with. For upholstery, look for sale fabrics, remnants, or even repurpose old blankets or curtains. Foam can be costly, so consider using batting or multiple layers of inexpensive quilt batting for padding.
Hardware stores are your friend for basic supplies like screws, glue, and mounting brackets. Don’t overlook online marketplaces or local community groups for free or low-cost wood scraps or fabric. The key is to be creative and open to alternative materials that can still deliver a high-quality finish. Every dollar saved on materials brings you closer to your under-$100 goal.
Effective planning is the foundation of any successful DIY project. By carefully considering your design, dimensions, and material sourcing, you set yourself up for a smooth and enjoyable building process, culminating in a beautiful and affordable custom headboard.
Gathering your tools and supplies for success
Once your plan is solid, the next step is to gather all the necessary tools and supplies. Having everything on hand before you start will prevent interruptions and make the process much more efficient. Many of the tools required are common household items, but some specialized tools might be needed depending on your chosen design.
Double-checking your list against your chosen headboard design is crucial. For example, an upholstered headboard will require a staple gun and fabric scissors, while a wooden slatted headboard will need a saw and wood glue. Preparing adequately ensures you can tackle each step without delay.
Essential tools for most DIY headboards
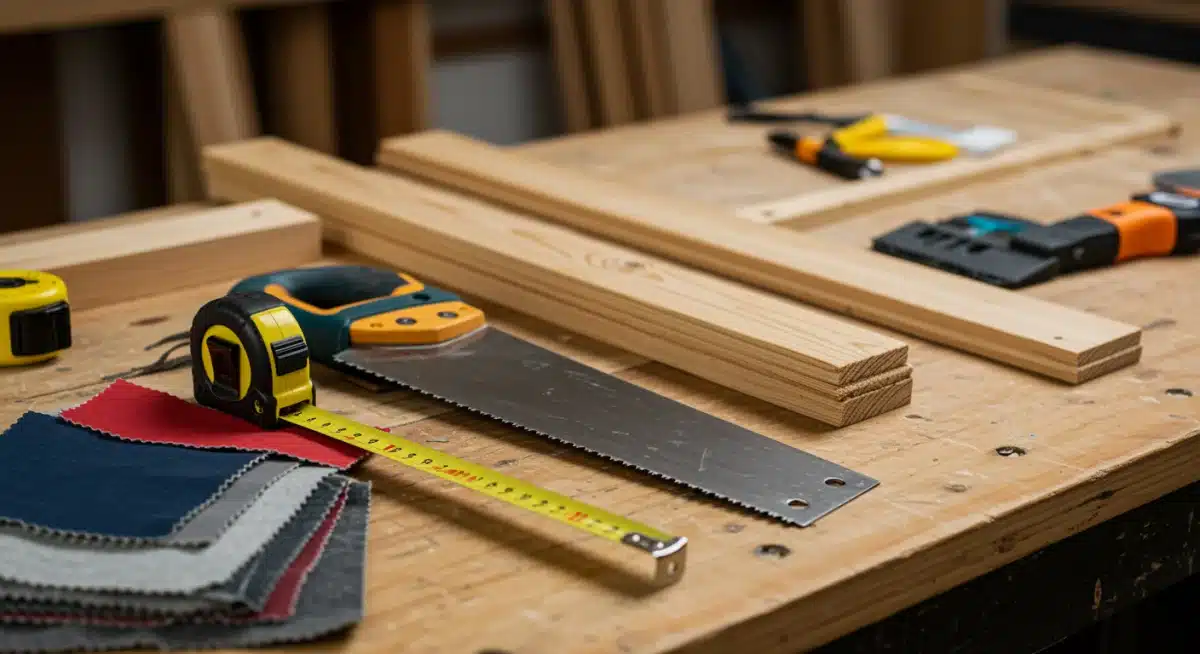
Regardless of the specific design, some tools are almost universally required for building a headboard. These include measuring tapes for accurate dimensions, a pencil for marking cuts, and a drill for assembling wooden frames. A good quality utility knife or scissors will be indispensable for cutting fabric or foam.
Measuring tape: For precise measurements of wood, fabric, and foam.
Pencil/marker: For marking cut lines and drilling points.
Drill: Essential for fastening screws and creating pilot holes.
Saw: Hand saw, circular saw, or jigsaw depending on wood thickness and cuts.
Materials checklist for an under-$100 project
Staying within the $100 budget requires a smart approach to material acquisition. For the base, consider a sheet of plywood (around $30-$50 for a standard size).
For padding, inexpensive foam mattress toppers or multiple layers of quilt batting can substitute for costly upholstery foam. Fabric can be found in remnant bins, clearance sections, or by repurposing old textiles.
Fasteners like screws and wood glue are relatively inexpensive. If you’re going for an upholstered look, a manual staple gun and staples are a must-have, typically costing under $20.
Don’t forget mounting hardware to attach your headboard securely to the wall or bed frame. Always compare prices at different hardware stores and online retailers to find the best deals.
Having all your tools and materials ready before you begin is a foundational step for a smooth and enjoyable DIY experience. This preparation minimizes interruptions and allows you to focus on the creative and construction aspects of building your custom headboard.
Step-by-step guide: crafting your upholstered headboard
An upholstered headboard offers a luxurious and comfortable feel, making it a popular choice for bedroom transformations. This step-by-step guide will walk you through the process of building a stylish upholstered headboard, designed to be both affordable and achievable for DIY enthusiasts.
The beauty of an upholstered headboard lies in its versatility. You can choose any fabric to match your room’s decor, from neutral linens to bold patterns. The padding provides a soft backrest for reading or lounging, adding a layer of comfort that elevates your entire sleeping experience.
Building the frame and adding padding
Start by cutting your plywood to the desired dimensions. This will form the sturdy base of your headboard. Next, apply a layer of foam or batting to the front of the plywood. Use spray adhesive to secure the foam, ensuring it’s evenly distributed without any lumps or gaps. You can add multiple layers of batting for extra plushness.
Cut plywood: Precisely cut your plywood base to match your bed’s width and desired height.
Attach foam/batting: Secure padding evenly with spray adhesive, ensuring full coverage.
Smooth edges: Trim any excess foam or batting for a clean, even surface.
Upholstering and finishing touches
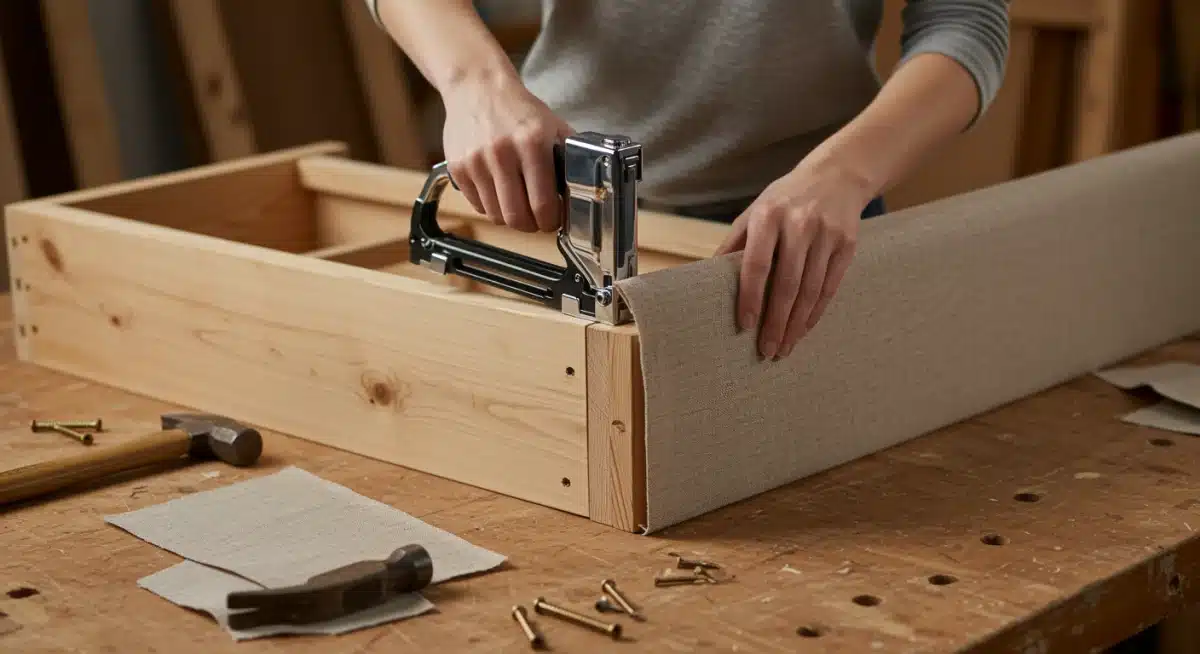
Lay your chosen fabric face down on a clean, flat surface. Center your padded plywood frame on top of the fabric. Begin pulling the fabric taut around the edges and stapling it to the back of the plywood. Start in the middle of each side and work your way out, ensuring the fabric remains smooth and wrinkle-free on the front.
Pay special attention to the corners, folding the fabric neatly to create crisp edges. Once all sides are stapled, trim any excess fabric.
For a truly professional finish, you can add decorative elements like nailhead trim along the edges or create tufts by pulling fabric through and securing it with buttons. These small details can significantly enhance the perceived value of your DIY creation.
Constructing an upholstered headboard is a rewarding project that yields a comfortable and visually appealing result. With careful attention to detail in framing, padding, and upholstering, you’ll create a professional-looking piece that enhances your bedroom’s ambiance.
Alternative DIY headboard ideas: rustic, modern, and more
While upholstered headboards are popular, the world of DIY offers a plethora of other creative and budget-friendly headboard options. Exploring different materials and styles can lead to a truly unique focal point for your bedroom, reflecting your personal taste and complementing your home’s overall aesthetic.
From the warmth of reclaimed wood to the sleek lines of a minimalist design, there’s a DIY headboard style for every preference. These alternatives often require different tools and techniques but remain firmly within the under-$100 budget, proving that creativity can overcome financial constraints.
Reclaimed wood headboard for a rustic charm
A reclaimed wood headboard brings an earthy, rustic charm to any bedroom. Source pallet wood, old fence planks, or even barn wood from local salvage yards or online listings. Clean and sand the wood thoroughly to remove splinters and smooth surfaces.
You can then arrange the planks vertically or horizontally, securing them to a simple plywood base or directly to wall studs.
Source wood: Look for free or cheap reclaimed wood from pallets, old fences, or construction sites.
Prepare wood: Clean, sand, and optionally stain or seal the wood for durability and aesthetics.
Assemble: Attach planks to a frame or directly to the wall, varying lengths for added visual interest.
Sleek and modern panel headboard
For a contemporary look, consider a panel headboard. This can be achieved using a large sheet of plywood, painted in a bold color or covered with a textured wallpaper.
Alternatively, you can create multiple smaller panels and arrange them in a grid pattern behind the bed. This design allows for clean lines and a minimalist aesthetic that suits modern interiors.
Another modern approach involves using pegboard. Paint the pegboard and then use pegs to hang small shelves, planters, or even string lights.
This offers a functional and customizable headboard that can evolve with your needs and style. The simplicity of these designs often belies their impact, creating a sophisticated focal point without much fuss.
Exploring different DIY headboard styles opens up a world of possibilities for personalization and budget-friendly decor. Whether you prefer the warmth of wood or the clean lines of a modern panel, there’s a creative solution waiting to transform your bedroom.
Mounting and securing your new headboard
Once your custom headboard is built, the final crucial step is to securely mount it. Proper installation ensures both safety and stability, allowing you to enjoy your beautiful new addition without worry.
There are several methods for mounting a headboard, each with its own advantages, depending on your headboard’s design and your preference.
Before you begin, decide whether you want the headboard to be attached directly to the bed frame or mounted to the wall. Wall-mounted headboards often create a more seamless, floating look, while bed-frame mounted headboards move with the bed, which can be convenient for rearranging.
Attaching to the bed frame
Many bed frames come with pre-drilled holes designed for attaching a headboard. If your frame has these, you’ll need to purchase specific headboard attachment brackets, which are typically inexpensive.
Simply align the brackets with the holes on your headboard and bed frame, then secure them with bolts and nuts. Ensure all connections are tight to prevent wobbling.
Check bed frame: Verify if your bed frame has existing headboard attachment points.
Purchase brackets: Acquire universal or specific headboard attachment brackets.
Secure attachment: Use bolts and nuts to tightly connect the headboard to the bed frame.
Wall mounting for a floating effect
Wall mounting offers a sleek, floating appearance and is ideal for heavier headboards or those without bed frame attachment points.
French cleat systems are an excellent option for wall mounting, providing strong support and easy removal if needed. Alternatively, you can use heavy-duty D-rings or keyhole hangers securely screwed into wall studs.
When wall mounting, always locate wall studs using a stud finder to ensure maximum stability. If studs aren’t conveniently located, use drywall anchors rated for the weight of your headboard.
Measure carefully to ensure the headboard is centered above your bed and level. A properly mounted headboard will look polished and professional, completing your bedroom’s transformation.
Mounting your headboard correctly is essential for both aesthetic appeal and safety. By choosing the appropriate method and taking precise measurements, you can ensure your DIY creation is a stable and prominent feature in your newly transformed bedroom.
Maintenance and longevity of your DIY headboard
Congratulations on building your custom DIY headboard! Now that you’ve invested time and effort into creating this beautiful piece, understanding how to maintain it is key to ensuring its longevity and continued appeal. Proper care will keep your headboard looking fresh and new for years to come, maximizing your initial investment.
The maintenance routine will largely depend on the materials you chose for your headboard. An upholstered headboard will require different care than a wooden one, so it’s important to tailor your cleaning and protection efforts accordingly. Regular attention will prevent premature wear and tear.
Caring for upholstered headboards
Upholstered headboards, while cozy, can attract dust and occasionally stains. Regular vacuuming with an upholstery attachment will keep dust at bay. For spills, act quickly: blot the area with a clean cloth, avoiding rubbing, which can spread the stain.
Use a mild fabric cleaner or a mixture of gentle soap and water for tougher spots, always spot-testing in an inconspicuous area first.
Regular vacuuming: Use an upholstery attachment to remove dust and debris weekly.
Spot cleaning: Address spills immediately with blotting; use mild cleaners for stains.
Fabric protection: Consider applying a fabric protector spray to repel future stains.
Maintaining wooden headboards
Wooden headboards are generally robust but benefit from regular dusting with a soft, dry cloth. For deeper cleaning, a slightly damp cloth can be used, followed immediately by drying to prevent water marks.
Avoid harsh chemical cleaners, which can strip finishes or damage the wood. Periodically, you might want to apply wood polish or wax to maintain its luster and protect the surface.
If your wooden headboard is made from reclaimed wood, a protective sealant or varnish applied during construction will greatly enhance its durability and make cleaning easier.
For painted wooden headboards, touch-up paint can address any chips or scratches that occur over time. Regular checks for loose screws or joints are also advisable, tightening them as needed to maintain structural integrity.
By implementing a simple maintenance routine, you can significantly extend the life and beauty of your DIY headboard. Whether upholstered or wooden, a little care goes a long way in preserving your custom creation and keeping your bedroom looking its best.
Beyond the bedroom: extending your DIY skills
Completing a custom DIY headboard project for under $100 is not just about transforming your bedroom; it’s also about building confidence and expanding your DIY skillset.
The techniques and principles you’ve learned—from planning and material sourcing to cutting, assembling, and finishing—are transferable to a myriad of other home improvement projects.
This newfound expertise can empower you to tackle more ambitious undertakings, saving you money on professional services and allowing you to personalize every corner of your home. Think of your headboard as a stepping stone to a world of creative possibilities within your own living space.
Applying learned techniques to other projects
The precision required for cutting wood, the patience for upholstery, and the problem-solving involved in assembly are valuable skills.
Consider applying them to building custom shelves, a small side table, or even a storage ottoman. These smaller projects can further enhance your home’s functionality and aesthetic, all while keeping costs low.
Custom shelving: Utilize wood cutting and fastening skills to build bespoke storage solutions.
Upholstered benches/ottomans: Apply fabric and padding techniques to create comfortable seating.
Repurposed furniture: Use your creativity to transform old pieces into new treasures with paint or new hardware.
Embracing the DIY lifestyle for home hacks
The satisfaction of creating something with your own hands is immense. Embracing a DIY lifestyle means seeing potential in everyday items and finding creative solutions to home decor challenges. It’s about personalizing your space to truly reflect who you are, rather than settling for off-the-shelf solutions.
Beyond furniture, think about small home hacks like organizing cluttered spaces with custom dividers, creating unique wall art, or even tackling minor repairs.
Each successful project builds confidence and encourages further exploration into the world of DIY. Your custom headboard is just the beginning of a more personalized and budget-friendly home.
In essence, building your DIY headboard is more than just a single project; it’s an investment in your skills and a gateway to a more creative and customized home. The lessons learned and the confidence gained will serve you well in countless future home improvement endeavors, proving that a little ingenuity can go a long way.
| Key Aspect | Brief Description |
|---|---|
| Budget Focus | Achieving a custom headboard for under $100 through smart material sourcing and DIY effort. |
| Design Freedom | Complete control over style, materials, and dimensions to match personal taste and bedroom decor. |
| Skill Development | Learning valuable DIY techniques applicable to various other home improvement projects. |
| Bedroom Transformation | Elevating the room’s aesthetic with a personalized centerpiece for significant visual impact. |
Frequently asked questions about DIY headboards
Plywood is an excellent base material, often costing $30-$50. For padding, consider inexpensive foam mattress toppers or multiple layers of quilt batting. Fabric remnants, clearance fabrics, or repurposed textiles like old curtains are great for upholstery, keeping costs significantly under $100.
For bed frame attachment, use specific headboard brackets and ensure all bolts are tightly secured. If wall mounting, always locate wall studs with a stud finder for maximum stability. Use heavy-duty D-rings, keyhole hangers, or a French cleat system, ensuring they are rated for your headboard’s weight.
Absolutely! Many DIY headboard designs, especially upholstered or simple panel styles, require only basic tools like a saw, drill, and staple gun. With clear instructions and a bit of patience, beginners can achieve impressive results and gain valuable experience for future projects.
Consider a rustic look with reclaimed wood planks, a modern minimalist design using a painted plywood panel, or a functional pegboard headboard for customizable storage and display. These options offer unique aesthetic appeal and can often be achieved with different materials found affordably.
For upholstered headboards, regular vacuuming and immediate spot cleaning of spills are crucial. Wooden headboards benefit from dusting with a dry cloth and occasional wood polish. For both, periodically check and tighten any fasteners to maintain structural integrity and keep your custom piece looking great.
Conclusion
Creating a DIY headboard under $100 is a highly rewarding project that offers significant benefits beyond just cost savings. It empowers you to infuse your personal style into your bedroom, transforming it into a unique and comfortable retreat.
From the initial planning and careful material selection to the hands-on construction and final mounting, each step is an opportunity to express creativity and develop valuable DIY skills.
The resulting custom headboard is not merely a piece of furniture; it’s a testament to your ingenuity and a personalized centerpiece that dramatically elevates your space.
Embrace the satisfaction of building something beautiful with your own hands, and enjoy the lasting comfort and style your affordable, custom-made headboard brings.


