DIY Home Repair: Quick Fixes for Common Household Problems
 Learning efficient solutions for common household issues enables homeowners to perform DIY home repair tasks, such as fixing leaky faucets or patching small drywall holes, quickly and effectively, preventing minor problems from escalating into costly repairs.
Tired of minor household annoyances piling up? It’s time to empower yourself with practical skills for DIY home repair that can tackle common household problems in under 30 minutes. Forget the frustration and expense of waiting for a professional; many everyday issues can be resolved quickly with the right knowledge and a few basic tools. This guide will walk you through essential fixes, transforming you into a confident homeowner ready to maintain your living space efficiently.
Understanding the Basics of DIY Home Repair
Embarking on DIY home repair doesn’t require a construction degree. It simply demands a willingness to learn, a few essential tools, and a clear understanding of the problem at hand. Many minor issues, from a dripping faucet to a squeaky door, can be diagnosed and fixed with minimal effort, saving you both time and money. The key is to approach each task systematically, ensuring safety and precision.
Before you even pick up a tool, it’s crucial to identify the root cause of the problem. A leaky pipe might just need a tightened connection, while a flickering light could be a loose bulb or a more complex electrical issue.
Always start with the simplest solution and work your way up. Understanding the basic components and functions of household systems will significantly boost your confidence and effectiveness in tackling these repairs.
Essential Tools for Every Homeowner
Having a well-stocked toolkit is the cornerstone of successful DIY home repair. You don’t need an arsenal of specialized equipment, but a few versatile items will cover most common household fixes. Investing in quality tools will not only make your tasks easier but also ensure their longevity.
Screwdriver Set: Both Phillips and flathead in various sizes are indispensable for tightening loose hinges, fixing outlet covers, or assembling furniture.
Adjustable Wrench: Perfect for plumbing tasks like tightening leaky pipes or showerheads. Its adjustable nature makes it suitable for different nut sizes.
Pliers: Needle-nose, slip-joint, and channel-lock pliers are useful for gripping, bending, and cutting wires or small components.
Utility Knife: Essential for cutting caulk, opening packages, or trimming small pieces of material. Always use with caution and a cutting mat.
Tape Measure: Crucial for accurate measurements, whether you’re hanging pictures or assessing a repair area.
Hammer: For driving nails or gently prying things open. Choose one with a comfortable grip.
Safety Glasses and Gloves: Non-negotiable for protecting your eyes and hands from debris, chemicals, or accidental scrapes.
By understanding these fundamental principles and equipping yourself with the right tools, you’ll be well on your way to mastering basic DIY home repair. This foundational knowledge will serve you well, allowing you to confidently address minor issues before they escalate into larger, more expensive problems.
Tackling Leaky Faucets and Running Toilets
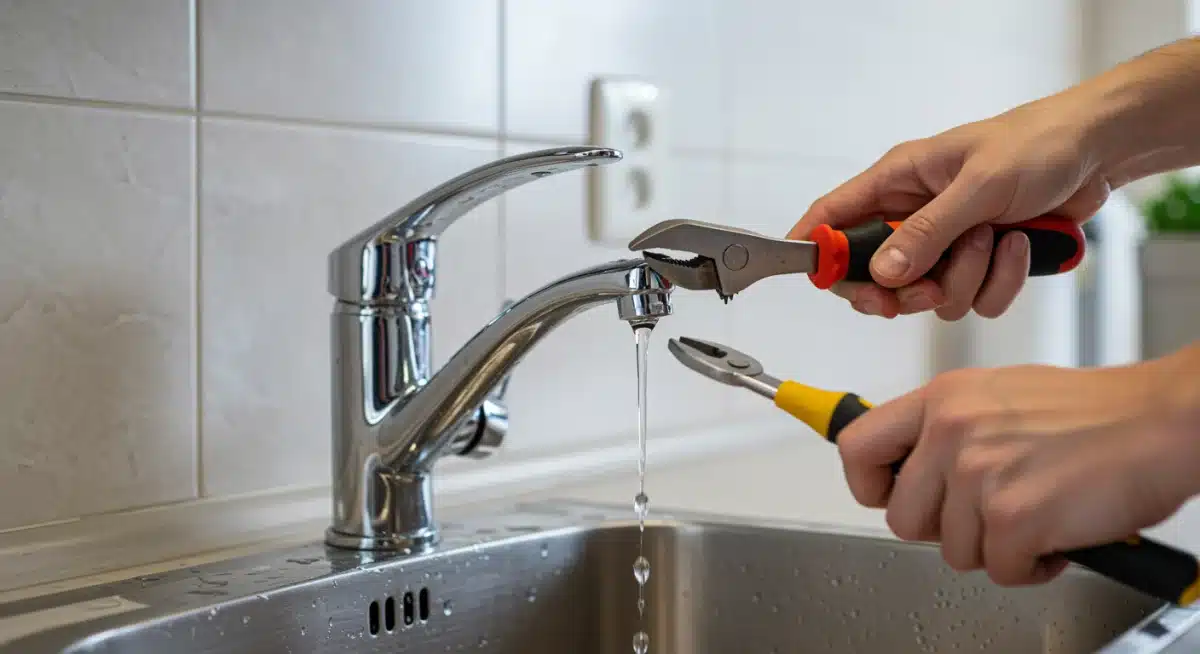
Few things are as annoying, or as wasteful, as a persistently leaky faucet or a toilet that runs incessantly. These common plumbing issues not only drive up your water bill but can also cause water damage if left unaddressed. Fortunately, most of these problems are straightforward to fix and fall squarely within the realm of DIY home repair that can be completed in under 30 minutes.
A dripping faucet often indicates a worn-out washer or O-ring. Before starting, turn off the water supply to the faucet, usually via a shut-off valve beneath the sink. Use your adjustable wrench to carefully remove the handle and then the packing nut.
Replace the old washer or O-ring with a new one of the same size. Reassemble the faucet, turn the water back on, and test. This simple task can save gallons of water and eliminate that irritating drip.
Silencing a Running Toilet
A running toilet is typically a sign of a faulty flapper valve or an improperly adjusted fill valve. The flapper, a rubber seal at the bottom of the tank, can become stiff or corroded over time, preventing a proper seal. To check, lift the tank lid and observe the flapper. If it doesn’t seal completely, water will continuously flow into the bowl.
Inspect the Flapper: Turn off the water supply to the toilet. Flush the toilet to empty the tank. Examine the flapper for any signs of wear, cracks, or calcium buildup.
Replace the Flapper: If damaged, simply unhook the old flapper from the flush chain and the overflow pipe, then attach a new one. Ensure the chain has a slight bit of slack, but not too much, to allow for proper sealing.
Adjust the Fill Valve: If the flapper is fine, the fill valve might be set too high, causing water to constantly overflow into the pipe. Most fill valves have an adjustment screw or clip to lower the water level slightly below the overflow tube.
Addressing these common plumbing woes quickly is a prime example of effective DIY home repair. Not only do you prevent water waste and potential damage, but you also gain a sense of accomplishment from resolving a practical household problem on your own. Remember to always have a bucket and towels handy for any spills.
Fixing Squeaky Doors and Loose Cabinet Hinges
The sounds of a squeaky door or the sight of a loose cabinet hinge can disrupt the peace and aesthetics of your home. These minor irritations are incredibly common but also incredibly easy to fix, making them perfect candidates for quick DIY home repair projects. You don’t need specialized skills, just a few basic items and a little patience.
Squeaky doors are almost always caused by friction in the hinges. Over time, dust, grime, and lack of lubrication can lead to that tell-tale screech. The solution is usually as simple as applying a lubricant. Start by opening the door wide and removing the hinge pins one by one.
Clean any visible rust or dirt from the pins with a cloth. Apply a silicone-based lubricant or a few drops of household oil (like 3-in-One oil) to each pin and inside the hinge barrels. Reinsert the pins, and your door should swing silently.

Securing Loose Cabinet Hinges and Handles
Loose cabinet hinges and handles are not just an aesthetic concern; they can lead to misaligned doors, difficulty closing, and even damage to the cabinet structure over time. The good news is that tightening them up is one of the easiest DIY home repair tasks you can undertake. All you typically need is a screwdriver.
Identify the Loose Screws: Open the cabinet door and examine the hinges. Look for screws that appear to be backing out or are visibly loose. Do the same for any wobbly handles or knobs.
Tighten Carefully: Using the appropriate screwdriver (Phillips or flathead), gently but firmly tighten each loose screw. Be careful not to overtighten, as this can strip the wood or the screw head.
Address Stripped Screw Holes: If a screw spins freely and won’t tighten, the hole might be stripped. A quick fix is to remove the screw, insert a wooden toothpick (or a golf tee) with a dab of wood glue into the hole, break it off flush, and then reinsert the screw. The wood will provide new material for the screw to grip.
These small repairs contribute significantly to the overall comfort and functionality of your home. By taking a few minutes to address squeaky doors and loose hardware, you prevent further wear and tear and maintain a more pleasant living environment, highlighting the tangible benefits of proactive DIY home repair.
Patching Small Drywall Holes and Cracks
Walls take a beating in any active household. From errant picture hooks to moving furniture, small holes and cracks in drywall are almost inevitable. While they might seem daunting to fix, patching these imperfections is a classic DIY home repair task that can be completed quickly, restoring your walls to a smooth, pristine condition. This process is surprisingly forgiving and doesn’t require extensive experience.
For small nail holes or minor dings, all you usually need is a small tub of spackle, a putty knife, and some fine-grit sandpaper. Apply a small amount of spackle over the hole with the putty knife, ensuring it’s slightly proud of the wall surface. Let it dry completely (which can take minutes to an hour, depending on the product and humidity), then gently sand it smooth and flush with the wall. Wipe away any dust, and your wall is ready for primer and paint.
Repairing Larger Drywall Damage
Slightly larger holes, perhaps from a door handle or a forgotten anchor, require a bit more effort but are still well within the scope of a 30-minute DIY home repair. For holes up to about 4-6 inches in diameter, a self-adhesive drywall patch is your best friend. These patches come with a mesh backing and a metal plate, providing structural support.
Prepare the Area: Ensure the edges of the hole are smooth. If there are any protruding pieces of drywall or paper, trim them with a utility knife.
Apply the Patch: Peel off the backing of the self-adhesive patch and center it over the hole, pressing firmly to ensure good adhesion.
Apply Joint Compound: Using a wide putty knife (6-inch or wider is ideal), spread a thin, even coat of all-purpose joint compound over the patch, feathering the edges out onto the existing wall. This helps blend the patch seamlessly.
Smooth and Dry: Allow the first coat to dry completely. Apply a second, very thin coat if necessary, and once dry, lightly sand the area until smooth.
Successfully patching drywall not only improves the aesthetics of your home but also protects the underlying structure.
It’s a highly satisfying DIY home repair task that prepares your walls for a fresh coat of paint, making your living space feel renewed and well-cared for without the need for professional intervention.
Restoring Grout and Caulk Lines
Over time, the grout between your tiles and the caulk around your sinks, tubs, and showers can become discolored, cracked, or even moldy. These issues not only detract from the cleanliness and appearance of your bathroom or kitchen but can also lead to water infiltration and structural damage. Fortunately, restoring grout and caulk lines is an accessible DIY home repair project that yields significant visual impact in a short amount of time.
For discolored grout, a good scrubbing with a specialized grout cleaner and a stiff brush can often work wonders. For more stubborn stains or if the grout is simply old and faded, a grout pen can be a quick and effective solution. These pens contain a specialized paint that refreshes the look of your grout, making it appear new again. Always ensure the area is clean and dry before applying, and work in small sections for best results.
Re-caulking for a Watertight Seal
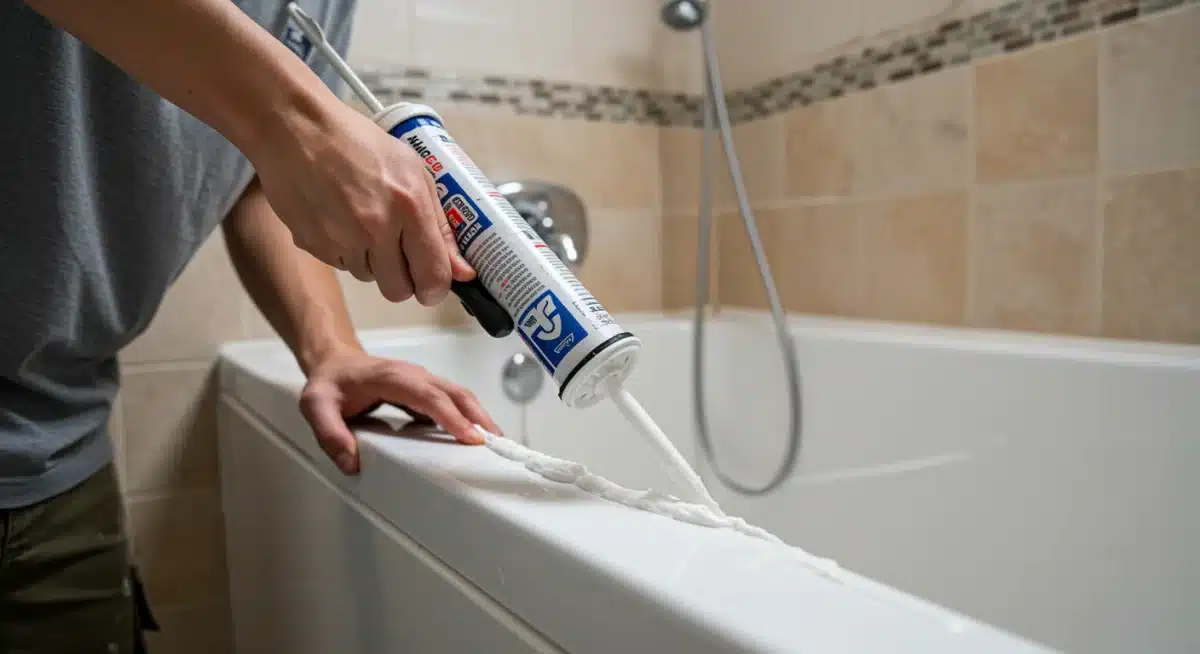
Cracked or moldy caulk is more than just an eyesore; it’s a breach in your home’s waterproofing. Replacing old caulk is a crucial element of DIY home repair to prevent water damage and mold growth. This task might seem intimidating, but with the right technique, it’s quite manageable.
Remove Old Caulk: Use a utility knife or a specialized caulk removal tool to carefully cut and scrape away all traces of the old caulk. This is the most crucial step for a lasting new seal. Ensure the surface is completely clean and dry afterward.
Prepare the Surface: Clean the area thoroughly with rubbing alcohol or a mild cleaner to remove any soap scum, mold spores, or residue. Allow it to dry completely.
Apply New Caulk: Load a tube of silicone caulk (choose one specifically for kitchens and bathrooms with mold inhibitors) into a caulk gun. Cut the tip of the caulk tube at a 45-degree angle, making an opening just large enough for the bead you want. Apply a steady, even bead along the joint, maintaining consistent pressure.
Smooth the Bead: Immediately after applying, use a wet finger, a caulk tool, or a damp cloth to smooth the caulk bead. This creates a clean, watertight seal and a professional finish.
The satisfaction of seeing crisp, clean grout and caulk lines transforms the look of your bathroom or kitchen. This type of DIY home repair not only improves aesthetics but also provides essential protection against moisture, extending the life of your fixtures and preventing costly future repairs.
Unclogging Drains and Garbage Disposals
Clogged drains and malfunctioning garbage disposals are among the most common and frustrating household problems. They can bring daily routines to a grinding halt, but most can be resolved quickly with a few simple DIY home repair techniques.
Understanding how to tackle these issues can save you from inconvenient backups and expensive plumber calls.
For minor clogs in sinks, showers, or bathtubs, a plunger is often your first and most effective tool. Ensure there’s enough water in the basin to cover the plunger’s cup. Create a tight seal over the drain and plunge vigorously for about 20-30 seconds.
If the water starts to drain, you’ve likely dislodged the clog. Repeat if necessary. For persistent clogs, a mixture of baking soda and vinegar followed by hot water can sometimes break down grease and grime.
Troubleshooting Your Garbage Disposal
A humming garbage disposal that isn’t grinding typically means something is jammed inside. Before attempting any DIY home repair on a disposal, ALWAYS ensure the power is off at the switch. Safety is paramount when dealing with electrical appliances.
Check for Obstructions: Using a flashlight, peer into the disposal to look for foreign objects like silverware, bones, or fruit pits. If you see something, use pliers or tongs (NEVER your hand) to remove it.
Reset Button: If no obstruction is visible and the disposal is humming but not working, look for a small red reset button on the bottom of the disposal unit. Press it firmly.
Allen Wrench Fix: Many disposals come with a special Allen wrench. There’s a hexagonal hole in the very center of the bottom of the disposal. Insert the Allen wrench and turn it back and forth several times to dislodge any internal jams.
Run Water and Test: Once you’ve removed obstructions or reset the unit, turn the power back on, run cold water, and then flip the disposal switch.
Learning to effectively unclog drains and troubleshoot your garbage disposal are invaluable DIY home repair skills. These quick fixes prevent unpleasant odors, standing water, and the potential for more severe plumbing problems, ensuring your kitchen and bathroom remain fully functional.
Maintaining Appliances and Electrical Fixtures
Beyond the obvious repairs, proactive maintenance of your home appliances and electrical fixtures can prevent many common problems before they start. Many small issues can be resolved with quick DIY home repair interventions, extending the lifespan of your devices and ensuring your home remains safe and efficient. Don’t wait for a breakdown; regular checks and minor adjustments can make a big difference.
For instance, a noisy washing machine might just need its feet adjusted to be level, or a dryer that isn’t drying efficiently might simply have a clogged lint trap or vent. Regularly cleaning appliance filters, such as those in your dishwasher or refrigerator, can significantly improve their performance and prevent costly repairs down the line. Always consult your appliance manual for specific maintenance recommendations.
Simple Electrical Fixes and Safety
When it comes to electrical fixtures, caution is key. Always turn off the power at the circuit breaker before attempting any work. Flickering lights often just need a tightened bulb. If that doesn’t work, ensure the bulb is securely seated in the socket. Sometimes, a faulty switch is the culprit, which can be replaced with a new one, but always double-check the wiring diagram and ensure the power is off.
Loose Outlet Covers: If an outlet cover is loose, simply tighten the screw in the center. This is a quick aesthetic fix and prevents dust and debris from entering the electrical box.
Resetting Breakers: If an outlet or an entire circuit stops working, check your electrical panel for a tripped breaker. Flip the breaker completely off, then back on. If it trips again immediately, there’s a more serious electrical issue that requires a professional.
Replacing Light Switches: A non-working light switch can often be replaced. After turning off the power, remove the old switch, carefully disconnect the wires (note their positions), and connect them to the new switch. Secure the new switch and cover plate.
While some electrical work is best left to professionals, these basic checks and simple replacements are within the scope of careful DIY home repair. Prioritizing safety by always cutting power is paramount. By taking these small steps, you contribute to a safer, more functional home environment, avoiding unnecessary service calls and ensuring your appliances and fixtures operate smoothly.
| Common Problem | Quick Fix in Under 30 Minutes |
|---|---|
| Leaky Faucet | Replace worn washer or O-ring after turning off water supply. |
| Squeaky Door | Lubricate hinge pins with silicone or household oil. |
| Small Drywall Hole | Apply spackle, let dry, and sand smooth. |
| Clogged Drain | Use a plunger or a baking soda/vinegar solution. |
Frequently Asked Questions About Quick Home Fixes
For beginners, a basic toolkit should include a screwdriver set (Phillips and flathead), an adjustable wrench, pliers, a utility knife, a tape measure, a hammer, and safety glasses. These tools cover a wide range of common household repairs, making them invaluable for tackling quick fixes around the house.
A running toilet is usually caused by a faulty flapper valve or an improperly adjusted fill valve. First, check the flapper for wear and replace if necessary. If the flapper is fine, adjust the fill valve to lower the water level slightly below the overflow tube. These steps often resolve the issue within minutes.
Basic electrical tasks like tightening loose outlet covers or resetting tripped breakers are generally safe for DIYers if done with extreme caution.
Always turn off the power at the circuit breaker before touching any wiring. For complex electrical issues or anything beyond simple fixes, it’s always best to call a qualified electrician to ensure safety.
For small holes (like nail holes), use spackle and a putty knife.
Apply a small amount, let it dry, then sand it smooth. For slightly larger holes (up to 6 inches), use a self-adhesive drywall patch covered with joint compound, feathered out to blend with the wall. This simple process restores wall integrity quickly.
It’s beneficial to perform a quick visual inspection of your home for minor repairs quarterly. Pay attention to common problem areas like faucets, toilets, doors, and walls. Addressing small issues promptly prevents them from escalating into more significant, costly problems, ensuring your home remains in top condition.
Conclusion
Embracing the world of DIY home repair is more than just saving money; it’s about fostering a sense of independence and competence within your own living space. From silencing a persistent drip to patching an unsightly hole, many common household problems can be resolved efficiently and effectively in under 30 minutes.
By equipping yourself with basic tools, understanding fundamental troubleshooting steps, and prioritizing safety, you transform from a passive homeowner into an active problem-solver. These quick fixes contribute not only to a more functional and aesthetically pleasing home but also significantly extend the lifespan of your fixtures and appliances, proving that a little proactive effort goes a long way in maintaining your most valuable asset.


