DIY Wireless Home Security: Under $200, Sleep Soundly Tonight
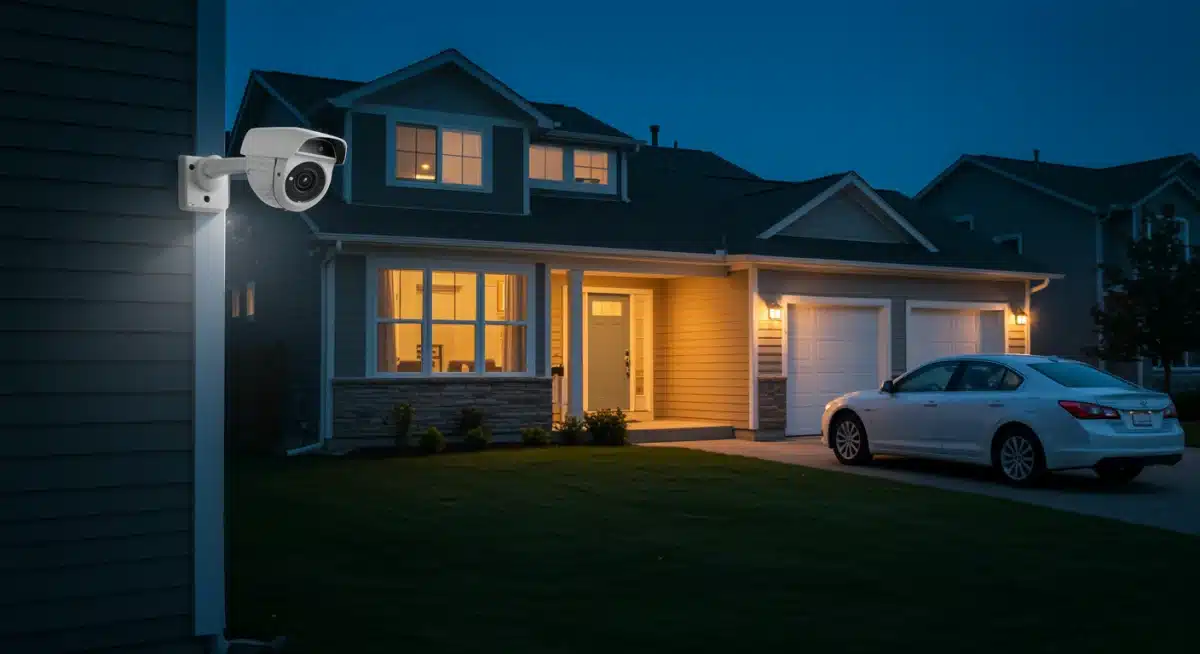
 Installing a DIY wireless security system for under $200 is entirely achievable, offering robust protection and peace of mind without the need for professional installation or costly monthly fees.
Are you looking to bolster your home’s defenses without emptying your wallet? The good news is that enhancing your property’s safety doesn’t require a hefty investment or complex installations.
In fact, you can achieve robust DIY Home Security: Install a Wireless System for Under $200 and Sleep Soundly Tonight, empowering you to take control of your peace of mind.
This comprehensive guide will walk you through everything you need to know, from selecting the right components to a seamless installation, ensuring your home is secure and you can rest easy.
Understanding the Basics of Wireless Home Security Systems
Before diving into the specifics of installation, it’s crucial to grasp what constitutes a wireless home security system and why it’s an excellent choice for budget-conscious homeowners.
Wireless systems utilize radio frequencies to communicate between components, eliminating the need for cumbersome wiring and making installation significantly simpler for the average DIY enthusiast.
This technology has evolved considerably, offering reliability and advanced features that were once exclusive to professional setups.
The core of any wireless system is its control panel or hub, which acts as the brain, receiving signals from various sensors and triggering alarms or notifications.
These systems are highly flexible, allowing you to customize coverage based on your home’s unique layout and your specific security concerns.
The absence of wires not only simplifies the installation process but also makes the system more adaptable if you decide to rearrange your home or move to a new property. This flexibility is a key advantage for those seeking an affordable and scalable security solution.
Key Components of a Basic Wireless System
A fundamental wireless security system, especially one aiming for a sub-$200 budget, typically includes a few essential elements. Understanding these components will help you make informed decisions when purchasing your kit.
Control Panel/Hub: This central unit manages all connected devices, processes signals, and often includes an integrated siren.
Door/Window Sensors: These two-piece sensors detect when a door or window is opened, triggering an alert.
Motion Detectors: Designed to sense movement within a room, these are crucial for covering larger areas.
Key Fobs/Remote Controls: For convenient arming and disarming of the system without interacting directly with the control panel.
Beyond these basics, many budget-friendly systems offer expansion options, such as additional sensors, indoor cameras, or even smart home integration, which you can add later as your budget allows.
Focusing on the core components first ensures you get adequate protection for the most vulnerable points of entry.
In essence, a wireless home security system offers a blend of convenience, flexibility, and effectiveness.
Its modular nature allows you to start with a basic setup and expand over time, making it an ideal choice for anyone looking to secure their home on a budget without compromising on essential protection.
This foundational understanding sets the stage for a successful DIY installation.
Setting Your Budget and Finding the Right System Under $200
Achieving effective home security for under $200 might seem challenging, but it’s entirely feasible with careful planning and smart shopping.
The market is saturated with options, and knowing what to look for will prevent overspending while ensuring you get a reliable system. The key is to prioritize essential features and consider reputable brands that offer entry-level kits.
Many manufacturers now offer starter packs specifically designed for DIY installation, often including a control panel, a few door/window sensors, and a motion detector.
These kits are often priced competitively to attract new users to their platform. It’s important to read reviews, compare features, and look for systems that don’t require mandatory monthly subscriptions, which can quickly inflate the total cost of ownership beyond your initial budget.
Where to Look for Affordable Systems
Finding a quality system within your budget requires exploring various retail avenues. Online marketplaces and big-box retailers are excellent starting points, often featuring sales and bundled deals.
Online Retailers: Websites like Amazon, eBay, and Walmart.com frequently offer a wide range of DIY security kits from various brands, often with detailed customer reviews.
Electronics Stores: Local electronics stores or chains like Best Buy sometimes carry entry-level security systems, allowing you to see the components in person.
Manufacturer Websites: Directly checking manufacturer websites can sometimes reveal exclusive deals or refurbished kits that offer significant savings.
When comparing systems, pay close attention to the number of sensors included and their type. Some kits might offer more door/window sensors, while others might focus on motion detection.
Choose a kit that best matches the vulnerable points in your home, such as ground-floor windows and main entry doors.
Remember that while the initial purchase price is critical, also consider the cost of additional sensors if your chosen kit doesn’t provide enough coverage for your needs.
Some brands offer individual components at reasonable prices, allowing you to expand your system incrementally.
By being strategic in your search and prioritizing value, you can confidently find a robust wireless security system that fits comfortably within your $200 budget.
Pre-Installation Planning: Mapping Your Home’s Vulnerabilities
Successful DIY home security isn’t just about buying a system; it’s about strategically deploying it. Before you even open the box, take the time to conduct a thorough assessment of your home’s layout and identify potential points of entry.
This pre-installation planning is a critical step that ensures your wireless system provides optimal coverage and protection against intruders.
Walk around your home, both inside and out, with the mindset of a potential burglar. Which windows are easily accessible? Are there secluded doors that might go unnoticed?
Consider all ground-floor windows and doors, basement windows, and any entry points from an attached garage.
Don’t forget about sliding glass doors or large windows that could be easily forced open. This reconnaissance mission will help you determine exactly how many sensors you’ll need and where they should be placed.
Identifying Key Placement Areas for Sensors
Strategic placement is paramount for maximum effectiveness. A well-placed sensor can cover a broad area, while a poorly placed one might create security gaps.
Main Entry Doors: The front door, back door, and any side doors are primary targets. Each should have a door/window sensor.
Accessible Windows: All ground-floor windows, especially those in secluded areas, require sensors. Consider basement windows as well.
High-Traffic Areas (Motion Sensors): Place motion detectors in central hallways, living rooms, or areas an intruder would likely pass through after gaining entry.
Valuables Area: If you have a room with significant valuables, consider an additional motion sensor or a specialized vibration sensor for windows.
Think about the flow of movement within your home. Motion sensors work best when they can cover the path an intruder would take.
Avoid placing them directly facing windows or heat sources that might cause false alarms. Door/window sensors should be mounted securely so that the two parts separate cleanly when the opening is breached.
By meticulously mapping out your home’s vulnerabilities, you can ensure that every critical entry point is covered, maximizing the effectiveness of your budget-friendly wireless security system.
This thoughtful approach to planning will save you time during installation and provide greater confidence in your home’s security.
Step-by-Step Installation Guide for Your Wireless System
Once you’ve selected your system and planned your sensor placement, the actual installation process is surprisingly straightforward.
Most DIY wireless security systems are designed for ease of use, often requiring minimal tools and no special technical skills. Following these steps will ensure a smooth setup and proper functioning of your new home defense.
Before you begin, unpack all components and familiarize yourself with the instruction manual provided by the manufacturer.
While the general steps are similar across systems, specific pairing procedures or mounting details might vary.
Ensure you have fresh batteries for all wireless sensors and an appropriate location for your control panel, typically near a power outlet and a central part of your home for optimal signal reception.
The Installation Process
Here’s a general sequence of steps to guide you through installing your wireless system:
Step 1: Set Up the Control Panel/Hub: Plug in your control panel and power it on. Follow the on-screen prompts or app instructions to connect it to your home’s Wi-Fi network (if applicable) and create your user account.
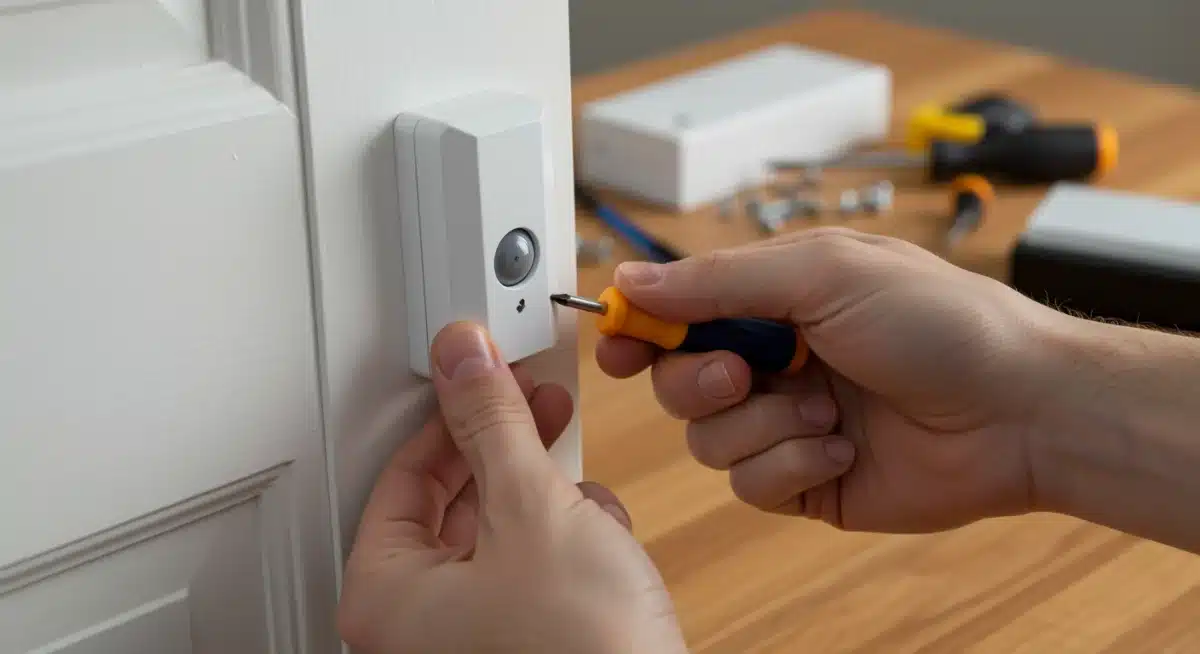
Step 2: Install Door/Window Sensors: Mount the main sensor unit on the door or window frame, and the smaller magnetic piece on the moving part (door or window) itself. Ensure they are aligned and within half an inch of each other when closed. Test each sensor after installation to confirm it’s communicating with the control panel.
Step 3: Place Motion Detectors: Mount motion detectors in the strategic locations identified during your planning phase. Position them in corners or high on walls to maximize their field of view. Test their detection range by walking through the room.
Step 4: Pair Key Fobs/Remotes: Follow the manufacturer’s instructions to pair any key fobs or remote controls with your system, allowing for easy arming and disarming.
Step 5: Configure Settings and Test: Access your system’s settings via the control panel or mobile app. Customize delay times for entry/exit, set up notification preferences, and perform a full system test to ensure all components are working correctly and the siren activates.
Most wireless sensors come with adhesive backing for easy mounting, but for a more secure installation, small screws are often included.
Always test each component immediately after installation to confirm connectivity and functionality. This proactive approach helps identify and resolve any issues before they become a security vulnerability.
By systematically following these installation steps, you can confidently set up your DIY wireless security system.
The process is designed to be user-friendly, putting effective home protection within reach of anyone willing to dedicate a little time and effort.
Testing Your System and Understanding Notifications
Installing your wireless security system is only half the battle; thoroughly testing it and understanding how it communicates alerts are equally vital.
A well-installed but untested system offers a false sense of security. This phase ensures every component functions as intended and that you are prepared to respond effectively to any potential security breaches.
Begin by performing a full system test. Most control panels or accompanying mobile apps have a dedicated test mode. In this mode, you can trigger each sensor individually to confirm it registers with the main hub.
Open every door and window with a sensor, walk through the coverage area of each motion detector, and ensure the control panel acknowledges every event. Listen for the distinct chime or notification that indicates a sensor has been triggered.
Configuring Alerts and Notifications
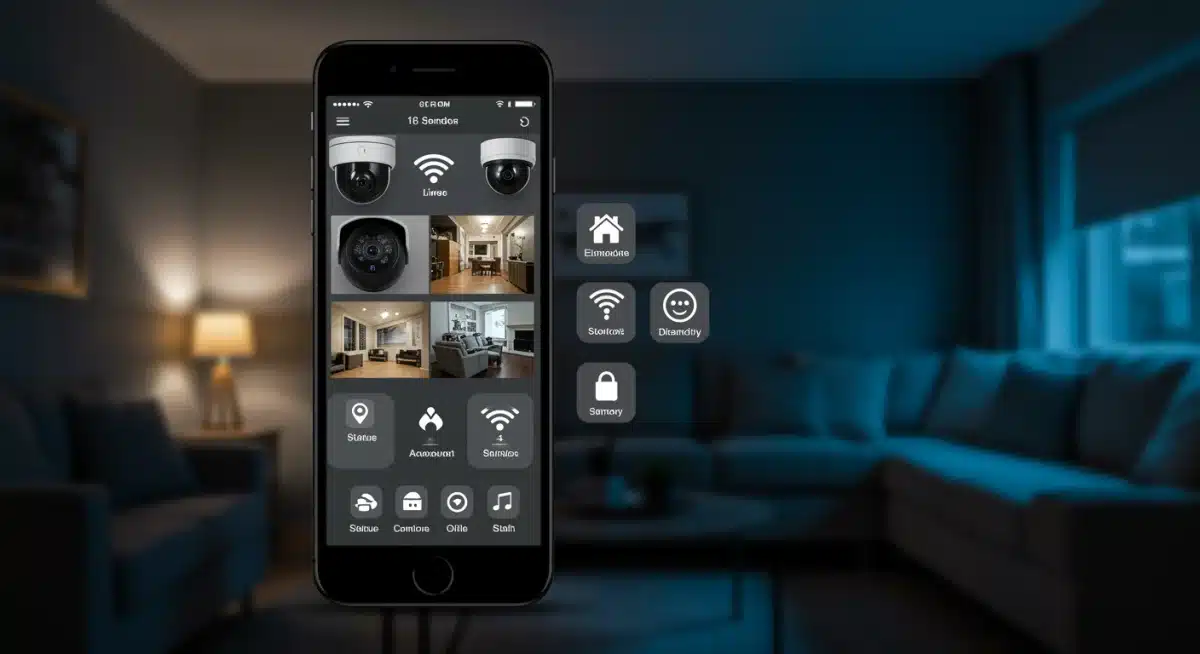
Modern wireless systems offer various ways to notify you of an event, from loud sirens to silent smartphone alerts. Customizing these notifications is crucial for your peace of mind.
Siren Activation: Ensure the built-in siren (if present) is loud enough to deter intruders and alert neighbors. Test its volume and duration.
Smartphone Notifications: Most systems integrate with a mobile app. Configure push notifications for alerts, ensuring they are distinct and attention-grabbing.
Email/Text Alerts: Some systems offer email or SMS notifications as a backup. Set these up if available, especially if you have multiple household members who need to be informed.
Emergency Contacts: If your system has monitoring capabilities (even self-monitoring), program emergency contacts who can be notified in case of an alarm.
Understanding the different types of notifications and how to respond to them is paramount.
For instance, a door/window sensor alert might indicate an immediate breach, while a motion sensor in an unoccupied room could be a secondary confirmation. Familiarize yourself with the system’s various alert tones and messages.
Regularly test your system, perhaps once a month, to ensure batteries are still good and all components remain in communication.
This proactive approach to maintenance, combined with a clear understanding of your system’s notification protocols, means you’ll be well-prepared to handle any security event, giving you confidence in your DIY wireless security setup.
Maximizing Your Security: Beyond the Basic Setup
While a basic wireless security system under $200 provides essential protection, there’s always room to enhance your home’s defenses further, even on a budget.
Thinking beyond the initial setup involves integrating smart practices and potentially adding affordable components over time. The goal is to create multiple layers of security that deter potential intruders and provide comprehensive coverage.
One of the most effective ways to maximize your security is through visible deterrence. Simply having a security system, especially one with visible sensors or a yard sign, can make your home a less attractive target.
Criminals often look for easy opportunities, and a protected home signals a higher risk. Complement your wireless system with good exterior lighting, especially motion-activated lights, which can startle intruders and expose their presence.
Affordable Enhancements for Your System
Additional Sensors: If your initial kit didn’t cover all vulnerable points, purchase extra door/window sensors or motion detectors as needed. They are often inexpensive and easy to integrate.
Security Cameras (Budget-Friendly): While not always included in sub-$200 kits, many affordable Wi-Fi cameras (often under $30-$50) can be added for visual monitoring, even if they don’t integrate directly with your alarm panel. They provide valuable video evidence.
Smart Plugs/Lighting: Simple smart plugs can be used to automate lights, making it appear as though someone is home, even when you’re away. This is a low-cost, high-impact deterrent.
Glass Break Sensors: For specific windows, a standalone glass break sensor can provide an additional layer of detection, reacting to the sound of breaking glass.
Consider the placement of valuables. Don’t leave expensive items visible through windows. Keep doors and windows locked even when you’re home.
These basic habits, combined with your wireless security system, form a powerful defense. Even a small investment in a safe for important documents and jewelry can add another layer of protection.
By thinking strategically about deterrence, adding components incrementally, and practicing good home security habits, you can significantly enhance the effectiveness of your DIY wireless security system.
Building a comprehensive security strategy doesn’t have to be expensive; it requires smart choices and consistent effort.
Maintaining Your Wireless Security System for Long-Term Reliability
A home security system, even a budget-friendly DIY one, is an investment in your peace of mind. To ensure it continues to function effectively year after year, regular maintenance is essential.
Neglecting simple checks can lead to system failures, false alarms, or, worse, a compromised security posture when you need it most. Proactive maintenance is key to long-term reliability.
The beauty of wireless systems lies in their simplicity, but this doesn’t mean they are set-it-and-forget-it devices. Batteries in sensors will eventually need replacement, and environmental factors can sometimes interfere with signal integrity.
Establishing a routine maintenance schedule will help you stay on top of these potential issues, ensuring your home remains protected without unexpected disruptions.
Essential Maintenance Practices
Keeping your wireless system in top condition requires just a few simple, regular checks.
Battery Replacement: This is arguably the most critical maintenance task. Most sensors will provide a low-battery alert, but it’s good practice to replace all batteries annually, or even bi-annually, depending on usage and battery type. Keep a stock of common battery sizes on hand.
Sensor Cleaning: Dust and grime can accumulate on motion sensors, potentially affecting their accuracy or triggering false alarms. Gently wipe down all sensors with a soft, dry cloth every few months.
Connectivity Checks: Periodically test each sensor’s communication with the control panel. This can be as simple as opening a door or walking past a motion sensor to ensure it registers.
Software Updates: If your system uses a mobile app or has firmware that can be updated, ensure you install these updates promptly. They often contain bug fixes, security enhancements, and new features.
Physical Inspection: Check that all sensors are securely mounted and haven’t shifted. Ensure wires (if any for the control panel) are not frayed or damaged.
Addressing minor issues as they arise prevents them from escalating into larger problems. For example, a loose sensor might eventually fall off, creating a security gap.
A low battery might cause the sensor to fail when needed most. Consistent maintenance ensures that your DIY wireless security system remains a vigilant guardian of your home, providing continuous, reliable protection.
By dedicating a small amount of time to routine checks and upkeep, you can significantly extend the lifespan and effectiveness of your under-$200 security system, allowing you to sleep soundly tonight and for many nights to come.
| Key Aspect | Brief Description |
|---|---|
| Budget Focus | Achieve robust home security for under $200 by prioritizing essential wireless components and smart shopping. |
| DIY Installation | Wireless systems are designed for easy self-installation, eliminating the need for professional help and complex wiring. |
| Strategic Placement | Effective planning of sensor locations is crucial for optimal coverage and deterrence against intruders. |
| Ongoing Maintenance | Regular battery checks and sensor cleaning ensure long-term reliability and continuous protection for your home. |
Frequently Asked Questions About DIY Wireless Security
Yes, absolutely. Many reputable brands offer starter kits within this budget that include a control panel, door/window sensors, and a motion detector. By focusing on essential coverage and strategic placement, you can achieve robust and effective home protection without overspending.
The core components include a central control panel or hub, several door/window sensors for entry points, and at least one motion detector for high-traffic areas. Some kits also include key fobs for easy arming/disarming, which are highly convenient.
No, most DIY wireless systems are designed for easy self-installation. They typically use adhesive mounts for sensors and require minimal tools. The instructions are usually straightforward, making it accessible for anyone to set up their own home security.
It’s recommended to test your system at least once a month. This ensures all sensors are communicating correctly with the control panel and that batteries are still functioning optimally. Regular testing helps maintain the system’s reliability and your peace of mind.
Most DIY wireless security systems are modular and expandable. You can typically purchase additional sensors, motion detectors, or even compatible cameras separately and easily integrate them into your existing system as your needs or budget allows.
Conclusion
Securing your home effectively doesn’t have to be a costly or complex endeavor. As we’ve explored, achieving robust DIY Home Security: Install a Wireless System for Under $200 and Sleep Soundly Tonight is not just a dream but a tangible reality for homeowners across the United States.
By understanding the basics, making strategic purchasing decisions, carefully planning sensor placement, and committing to routine maintenance, you can create a formidable defense against potential threats.
The peace of mind that comes from knowing your home and loved ones are protected, without breaking the bank, is invaluable. Embrace the power of DIY and take control of your home’s safety today, ensuring a sounder sleep tonight and for years to come.


