Energy-Efficient DIY: Cut Your Electricity Bill by 20% This Winter
 Implementing practical DIY projects this winter can significantly reduce your electricity bill by 20% by focusing on improved insulation, efficient heating, and comprehensive home weatherization strategies.
As winter approaches, many homeowners in the United States brace for higher utility bills. However, proactively embracing winter energy savings through simple, effective do-it-yourself projects can help you cut your electricity bill by a significant 20%.
Understanding Your Home’s Energy Leaks
Before diving into specific DIY projects, it’s crucial to understand where your home loses energy. Identifying these culprits is the first step toward effective energy savings. Many older homes, and even some newer constructions, have hidden vulnerabilities that allow warm air to escape and cold air to infiltrate, leading to your heating system working overtime.
A simple energy audit can reveal surprising insights into your home’s thermal performance. You don’t need expensive equipment; often, a visual inspection and a few basic tools are enough to pinpoint problem areas. Understanding these vulnerabilities empowers you to prioritize your DIY efforts where they will have the greatest impact on your electricity bill.
Common Sources of Heat Loss
Heat doesn’t just escape through open windows; it finds its way out through numerous pathways. Understanding these common culprits helps in targeted interventions.
- Drafty Windows and Doors: Gaps around frames and under doors are major offenders, allowing significant heat transfer.
- Poor Attic Insulation: Heat rises, so an inadequately insulated attic acts like a chimney, drawing warm air out of your living space.
- Unsealed Electrical Outlets and Switches: Small cracks around these fixtures can create surprising drafts.
- Gaps in Ductwork: Leaky ducts in unconditioned spaces, like basements or attics, can lose a substantial amount of heated air before it reaches your rooms.
By systematically addressing these common energy leaks, you lay the groundwork for substantial energy savings. Each small fix contributes to a cumulative reduction in your home’s energy demand, directly impacting your winter electricity bill.
Sealing the Envelope: Weatherstripping and Caulking
The most immediate and impactful DIY projects often involve sealing your home’s envelope. This means preventing air leaks around windows, doors, and other penetrations. These simple, inexpensive tasks can yield significant results, making your home noticeably warmer and reducing the strain on your heating system.
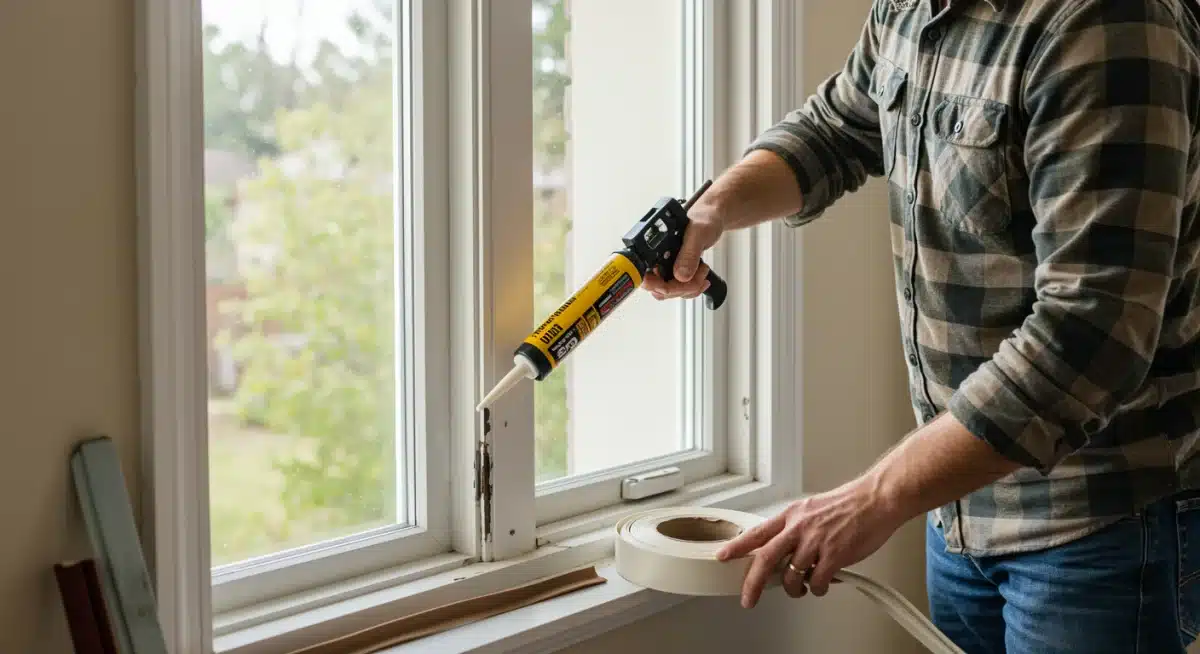
Weatherstripping and caulking are your primary tools in this endeavor. They create a barrier against cold air infiltration and warm air exfiltration, ensuring that the heat you pay for stays inside your home. These materials are readily available at any hardware store and require minimal skill to install, making them perfect for a weekend project.
Proper application is key. Ensure surfaces are clean and dry before applying. For caulk, cut the tip at a 45-degree angle to create a consistent bead. For weatherstripping, measure carefully and press firmly to ensure a good seal. These small efforts combine to create a much tighter, more energy-efficient home, directly contributing to a lower electricity bill.
Optimizing Insulation: Attic, Walls, and Floors (Expanded with energy)
Insulation is your home’s primary defense against heat loss and one of the smartest ways to boost efficiency. While some projects require professional installation, many impactful upgrades are completely achievable for DIY homeowners. By improving insulation in critical areas—such as the attic, accessible wall cavities, and crawl spaces—you create a stronger thermal envelope that significantly reduces energy waste.
The main objective is to build a continuous thermal barrier that slows heat transfer. During winter, this means keeping warm air inside and preventing cold air from penetrating. Proper insulation directly reduces the workload on your heating system, lowering overall energy consumption and helping you cut your electricity bill. Even adding a few extra inches of insulation to the attic can produce noticeable improvements in performance.
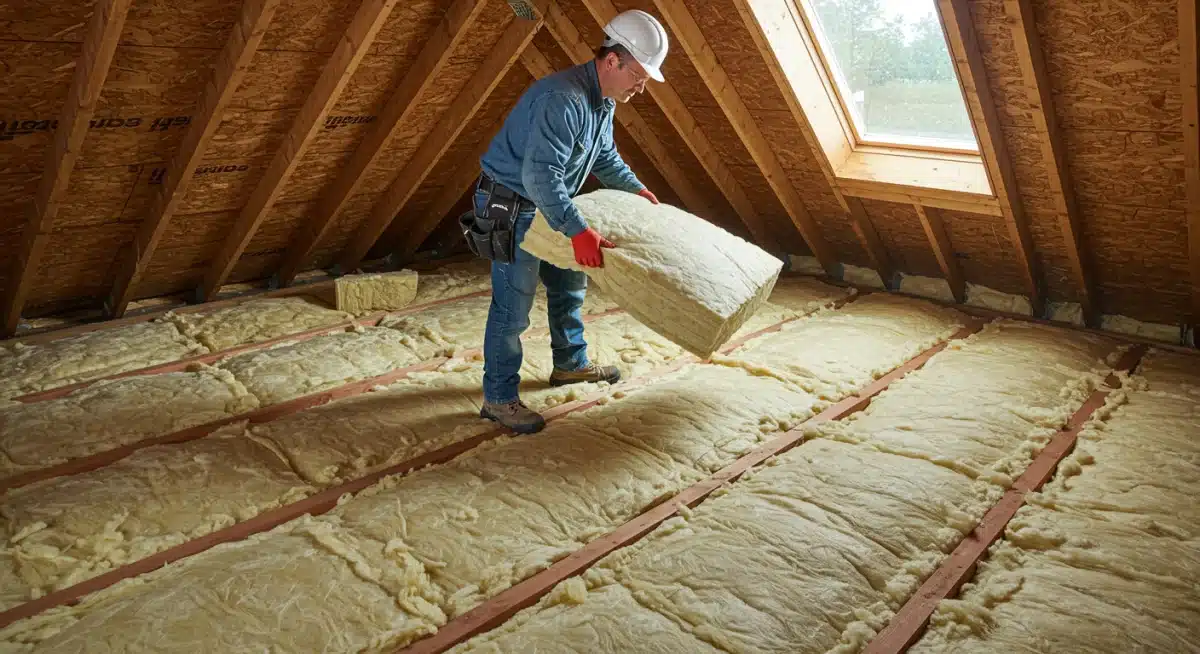
Attic Insulation: A Top Priority for Energy Savings
Because heat rises, the attic is the first place where warmth escapes. Strengthening attic insulation is one of the highest-impact DIY upgrades for both comfort and efficiency.
Assessing Current Levels:
Review your attic’s insulation depth and verify whether it meets recommended R-values for your climate zone. In many U.S. regions, this ranges from 12–18 inches—ideal for optimal energy conservation.
Types of DIY Insulation:
Batt Insulation (fiberglass or mineral wool): Easy to cut, transport, and install between joists—perfect for homeowners wanting a quick energy-saving upgrade.
Blown-in cellulose or fiberglass: Excellent for filling irregular spaces; equipment can be rented from home improvement stores.
Sealing Air Leaks First:
Before adding insulation, seal leaks around plumbing vents, electrical fixtures, and attic hatches using caulk or expanding foam. This step prevents warm air from escaping and boosts energy retention inside your home.
Once leaks are sealed and insulation is added, your attic becomes a powerful barrier against winter cold—leading to reduced heating demands and meaningful energy savings on your monthly bill.
Smart Heating Strategies and Thermostat Management for Maximum Energy Efficiency
Even with excellent insulation, your home can still consume unnecessary if heating isn’t managed thoughtfully. Implementing smart thermostat strategies is one of the simplest and most cost-effective ways to optimize winter heating.
These adjustments allow you to control your home’s temperature with precision—maximizing comfort while minimizing waste. Small changes in thermostat habits can accumulate into major reductions in winter energy consumption.
Leveraging Programmable Thermostats
A programmable thermostat is a powerful tool that automates temperature adjustments throughout the day.
Schedule Setup: Lower temperatures when you’re away or asleep. A 7–10°F setback for 8 hours daily can cut heatingusage by up to 10%.
Smart Thermostat Advantages: These devices learn your patterns, optimize heating cycles, and allow remote control—helping avoid unnecessary energy expenditure.
Zoned Heating: If your home offers multiple heating zones, heat only the areas in active use. This prevents waste in empty rooms.
Combined with mindful routines—like opening curtains to let in solar warmth and replacing dirty HVAC filters—you gain greater command over your winter consumption.
DIY Window and Door Upgrades for Enhanced Energy Efficiency
Windows and doors are among the largest contributors to heat loss. Fortunately, cost-effective DIY upgrades can significantly enhance their performance, minimizing drafts and strengthening thermal insulation.
These improvements offer an excellent return on investment and play a crucial role in lowering winter energy bills.
Cost-Effective Window Solutions for Better Energy Control
You don’t need entirely new windows to enhance efficiency. Several simple upgrades can transform the performance of your existing setup:
Window Insulation Kits: Applying shrink-film kits creates an insulating air pocket that boosts retention.
Heavy Curtains or Thermal Blinds: Add a protective layer that helps keep warm air inside—especially effective during long winter nights.
Repairing Window Sashes: Ensure frames close tightly, replace loose glazing compound, and fix broken latches to eliminate draining gaps.
Draft Snakes: A budget-friendly way to block cold air at the base of drafty windows and doors.
For doors, inspect for visible light around the frame—any visible light is an eak. Tighten hinges, replace damaged weather stripping, or consider installing a storm door for an additional thermal barrier.
When combined, these targeted upgrades greatly enhance comfort, reduce draft penetration, and support substantial winter energy savings across your home.
Maintaining Your Heating System and Air Ducts
An efficient heating system is paramount for keeping your home warm without excessive energy consumption. Regular maintenance, often overlooked, is a simple yet highly effective DIY task that ensures your system runs optimally. This not only extends the life of your equipment but also directly impacts your winter electricity bill by preventing inefficiencies.
Beyond the heating unit itself, your home’s ductwork plays a crucial role in distributing warm air. Leaky or poorly insulated ducts can waste a significant amount of heated air before it even reaches your living spaces. Addressing these issues is a smart DIY investment that pays off in lower energy bills and improved comfort.
Essential Heating System DIY Maintenance (Expanded)
Taking the time to maintain your heating system—especially during winter—is one of the most effective ways to prevent breakdowns, extend equipment lifespan, and reduce unnecessary energy consumption. These routine DIY checks ensure your system runs efficiently, keeping your home warm while lowering your electricity bill.
Regular maintenance doesn’t require advanced skills; most tasks are simple, quick, and incredibly impactful. By staying proactive, you can avoid costly repairs, improve indoor air quality, and ensure your heating system delivers consistent performance throughout the season.
Change Air Filters Regularly
A clean filter is essential for proper airflow and efficient heating.
Why it matters: A clogged or dirty filter forces your furnace to work harder, consuming more energy and reducing overall system efficiency. Restricted airflow can also lead to overheating, premature wear, and higher monthly heating costs.
Best practice: Replace or clean your filter every 30 days during peak heating season—especially if you have pets, allergies, or use your system frequently.
Bonus benefit: Fresh filters improve indoor air quality by trapping dust, pollen, and airborne particles.
This single habit can cut energy use by up to 5–15%, making it one of the easiest ways to improve heating efficiency.
Clear Vents and Registers
The heated air from your system needs a clear path to circulate properly.
Check for blockages: Ensure no furniture, rugs, or long drapes block vents or registers. Even partial obstruction can restrict airflow, forcing the heating system to consume more energy.
Improve circulation: Open vents in main living areas to ensure balanced airflow. Closing too many vents can disrupt system pressure and reduce efficiency.
Enhance comfort: Proper airflow results in more consistent temperatures throughout your home.
This simple DIY step boosts comfort and prevents unnecessary strain on your heating system.
Clean Around the Furnace
A clean furnace area improves safety and system performance.
-
Dust control: Dust buildup around your furnace can impede airflow and become a fire hazard.
-
Safe clearance: Maintain at least 2–3 feet of open space around the furnace to ensure proper ventilation and easy access for maintenance.
-
Visual inspection: While clearing debris, check for signs of rust, moisture, or unusual odors—early indicators of potential issues.
Keeping the surrounding space clean helps your system operate smoothly and safely.
Inspect and Seal Ductwork
Your heating system is only as efficient as the ducts that carry warm air through your home.
Look for visible gaps: In attics, basements, and crawl spaces, inspect duct joints and seams for holes, disconnections, or loose fittings.
Seal leaks: Use mastic sealant or aluminum foil HVAC tape to close gaps. (Avoid regular duct tape—it deteriorates quickly.)
Insulate ducts: In unconditioned areas, wrap ducts with fiberglass insulation or foam sleeves to prevent heat loss as air travels through the system.
Boost efficiency: Well-sealed ducts prevent up to 20–30% of heated air from escaping, directly lowering your electricity bill.
By maximizing airflow and minimizing heat loss, duct maintenance dramatically enhances your system’s energy performance.
Why Heating Maintenance Matters
These essential DIY maintenance steps play a crucial role in:
enhancing energy efficiency
improving airflow
reducing monthly electricity costs
preventing expensive repairs
extending the lifespan of your heating equipment
With just a few proactive habits, you can keep your home warm, lower your winter energy consumption, and ensure your heating system works reliably all season long.
Embracing Energy-Saving Habits and Technologies
Beyond physical home improvements, adopting energy-saving habits and integrating smart technologies can significantly contribute to cutting your electricity bill. These aren’t one-time fixes but ongoing practices that foster a more sustainable and cost-effective lifestyle. Small changes in daily routines, combined with smart device utilization, create a powerful synergy for energy reduction.
The goal is to be mindful of energy consumption in all aspects of your home life. From lighting to device usage, every decision impacts your overall energy footprint. By consciously choosing energy-efficient options and behaviors, you reinforce the gains made by your DIY projects, propelling you closer to, or even beyond, your 20% savings target.
Daily Habits for Lower Bills
Unplug “Vampire” Electronics: Devices like phone chargers, TVs, and coffee makers still draw power when plugged in, even if turned off. Unplug them when not in use.
Use LED Lighting: Replace incandescent bulbs with LED equivalents. LEDs use significantly less energy and last much longer, reducing both electricity and replacement costs.
Optimize Laundry Usage: Wash clothes in cold water whenever possible and always run full loads. Air-dry clothes when feasible to reduce dryer energy consumption.
Smart Power Strips: Use smart power strips to automatically cut power to devices when they are not in use, eliminating phantom load.
Consider investing in energy-efficient appliances when replacements are necessary. Look for the Energy Star label, which indicates products meeting strict energy efficiency guidelines. By combining these smart habits with your DIY home improvements, you create a comprehensive strategy for significant energy savings and a noticeably lower electricity bill this winter.
| Key DIY Action | Expected Benefit |
|---|---|
| Seal Drafts (Caulk & Weatherstrip) | Prevents significant heat loss through gaps around windows and doors. |
| Boost Attic Insulation | Reduces heat escape through the roof, a major source of energy waste. |
| Program Thermostat Smartly | Optimizes heating schedules to match occupancy, avoiding wasted energy. |
| Maintain Heating System | Ensures furnace and ducts run efficiently, preventing energy overconsumption. |
Frequently Asked Questions About Winter Energy Savings
With consistent effort across multiple DIY areas like sealing drafts, improving insulation, and smart thermostat usage, homeowners can realistically expect to cut their winter electricity bill by 15-25%. The exact savings depend on your home’s current efficiency and the extent of improvements made.
Sealing air leaks with caulk and weatherstripping around windows and doors offers one of the highest returns on investment. Adding insulation to your attic and ensuring your heating system’s air filter is clean are also incredibly cost-effective ways to reduce energy consumption.
During peak heating season (winter), it’s recommended to check and change your furnace filter monthly. A clean filter ensures proper airflow, allowing your heating system to operate efficiently and prevent unnecessary energy consumption, thus saving you money.
Yes, smart thermostats can significantly reduce your electricity bill. They allow for precise scheduling, remote control, and some even learn your habits to optimize heating. By automatically adjusting temperatures when you’re away or asleep, they prevent wasted energy and contribute to substantial savings.
Window insulation films are surprisingly effective and a very affordable DIY solution. They create an insulating air pocket between the film and the window pane, significantly reducing drafts and heat loss. They are an excellent temporary measure for older, less efficient windows during the colder months.
Conclusion
Achieving a 20% reduction in your winter electricity bill through energy-efficient DIY projects is not just a pipe dream; it’s an attainable goal for motivated homeowners. By systematically addressing energy leaks, optimizing insulation, implementing smart heating strategies, and adopting mindful habits, you can transform your home into a warmer, more cost-effective sanctuary. These efforts not only provide immediate financial benefits but also contribute to a more sustainable lifestyle. Embrace these practical steps this winter to enjoy a cozier home and a significantly lighter electricity bill.


