Furniture Flips: Transform Thrift Finds into Stylish pieces
 Transforming thrift store furniture into stylish home decor involves creative vision, practical DIY techniques, and a commitment to sustainable interior design, breathing new life into forgotten pieces.
The allure of discovering a hidden gem at a thrift store and reimagining its potential is a joy many home enthusiasts share.
Furniture flips: transform thrift store finds into stylish home decor with these DIY techniques,
offering a sustainable and budget-friendly way to personalize your living space.
This guide will walk you through the process, from selection to the final flourish, empowering you to create unique pieces that reflect your style.
The thrill of the hunt: finding your perfect piece
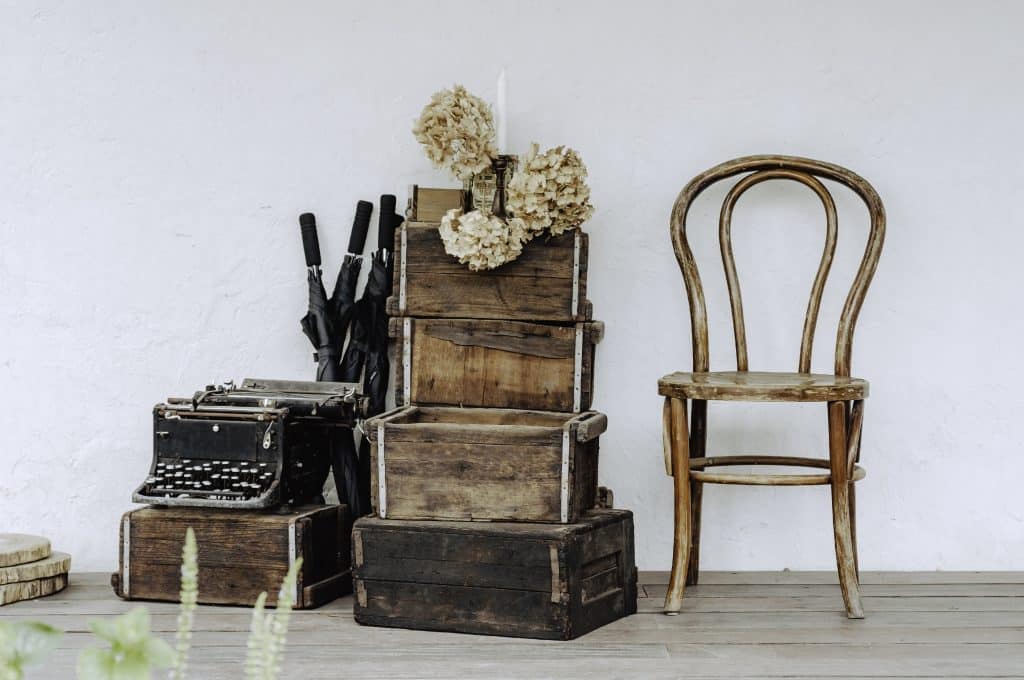
Embarking on a furniture flip project begins with the exciting quest of finding the right item.
Thrift stores, flea markets, garage sales, and even curbside pickups are treasure troves for potential projects.
The key is to look beyond superficial imperfections and envision the piece’s hidden beauty and structural integrity.
A discerning eye can spot the difference between a diamond in the rough and a money pit.
What to look for in furniture finds
When browsing, prioritize pieces with good bones. Solid wood construction is often more durable and easier to work with than particle board or veneer that’s extensively damaged.
Check for stability, ensuring legs are not wobbly and drawers slide smoothly.
Minor cosmetic flaws like scratches or outdated finishes are easily remedied, but significant structural damage might require more advanced repairs than a typical flip project.
Solid construction: Prioritize sturdy frames and joints.
Minimal structural damage: Avoid pieces requiring extensive carpentry.
Desirable shape/style: Consider the inherent design potential.
Reasonable price: Ensure the cost aligns with your project budget.
Don’t be afraid to open drawers, lift cushions, and even give a gentle shake.
The goal is to find something that, with a bit of love and effort, can be transformed into a functional and beautiful item for your home.
Sometimes, the most unassuming pieces hold the greatest potential for a stunning transformation.
Once you’ve identified a promising candidate, consider its size and how it will fit into your space.
A piece that is too large or too small for its intended location might not be the best investment, even if the price is right.
Measure your space beforehand and keep those dimensions in mind as you hunt.
Essential tools and materials for furniture flips
Before diving into any furniture flip, gathering the right tools and materials is crucial for a smooth and successful project.
Having everything at hand will save you time and frustration, allowing you to focus on the creative aspects of the transformation.
The specific items you need will depend on the type of flip, but some basics are universally helpful.
Basic toolkit for every flipper
A well-stocked toolbox is a flipper’s best friend.
You’ll need items for cleaning, sanding, painting, and potentially minor repairs.
Investing in quality tools, even if they are basic, will make the process more efficient and yield better results.
Safety gear is also non-negotiable to protect yourself throughout the project.
Cleaning supplies: Degreaser, all-purpose cleaner, rags.
Sanding equipment: Sandpaper (various grits), orbital sander, sanding blocks.
Painting essentials: Paintbrushes, rollers, paint trays, painter’s tape, primer, paint.
Repair items: Wood filler, wood glue, clamps, screwdriver set.
Safety gear: Gloves, safety glasses, dust mask.
Beyond these basics, you might also consider a heat gun for stripping old paint, a drill for hardware changes, or even a stencil kit for decorative touches.
The more complex your vision, the more specialized tools you might require.
However, many stunning transformations can be achieved with just the fundamental items.
Choosing the right type of paint is also critical. Chalk paint is popular for its forgiving nature and matte finish, often requiring minimal prep.
However, other options like latex, acrylic, or oil-based paints offer different finishes and durability.
Factor in the piece’s intended use and the desired aesthetic when making your selection.
Don’t forget a good quality topcoat or sealant to protect your hard work and ensure longevity.
Preparation is key: cleaning, repairing, and sanding
The success of any furniture flip hinges significantly on thorough preparation.
Skipping steps like cleaning, repairing, or sanding can lead to a less durable and aesthetically pleasing finish.
This foundational work ensures that your paint or stain adheres properly and that the final piece looks professionally done, not just quickly updated.
Step-by-step prep for a flawless finish
Start with a deep clean. Years of grime, dust, and unknown residues can accumulate on thrifted furniture.
A good degreaser and a scrub brush can work wonders.
Once clean, inspect the piece for any damage.
Loose joints, chips, or gouges should be addressed before moving on to sanding.
Wood filler and wood glue are your allies here, providing a stable and smooth surface for subsequent steps.
Sanding is perhaps the most crucial step for paint adhesion.
It creates a slightly rough surface, giving the primer and paint something to grip onto.
Begin with a coarser grit sandpaper (around 80-100) to remove old finishes or smooth out significant imperfections, then move to a finer grit (180-220) for a silky-smooth finish.
Always sand in the direction of the wood grain to avoid unsightly scratches.
Clean thoroughly: Remove all dirt, grease, and residue.
Repair damage: Fill holes, fix loose joints, and smooth imperfections.
Sand meticulously: Create a smooth and even surface for adhesion.
Prime strategically: Use a good quality primer, especially for darker pieces or challenging surfaces.
After sanding, wipe down the piece with a tack cloth or a damp rag to remove all dust.
Any remaining dust can compromise the paint’s adhesion and result in a bumpy finish.
Finally, apply a high-quality primer.
Primer not only helps the paint stick better but also covers existing colors, blocks stains, and creates a uniform base for your chosen color.
For dark wood or pieces with strong odors, a stain-blocking primer is highly recommended.
Allow adequate drying time between each step, following the manufacturer’s instructions for all products.
Patience during this preparation phase will undoubtedly pay off with a superior final product that looks both beautiful and lasts for years to come.
It’s the unsung hero of any successful furniture flip.
Techniques for painting and finishing
Once your piece is prepped, the fun part begins: applying paint and finishes.
This is where your creative vision truly comes to life, as you choose colors, textures, and techniques to transform an old item into a stylish statement piece.
There are numerous methods to achieve different looks, each with its own charm and application.
Exploring various painting and finishing methods
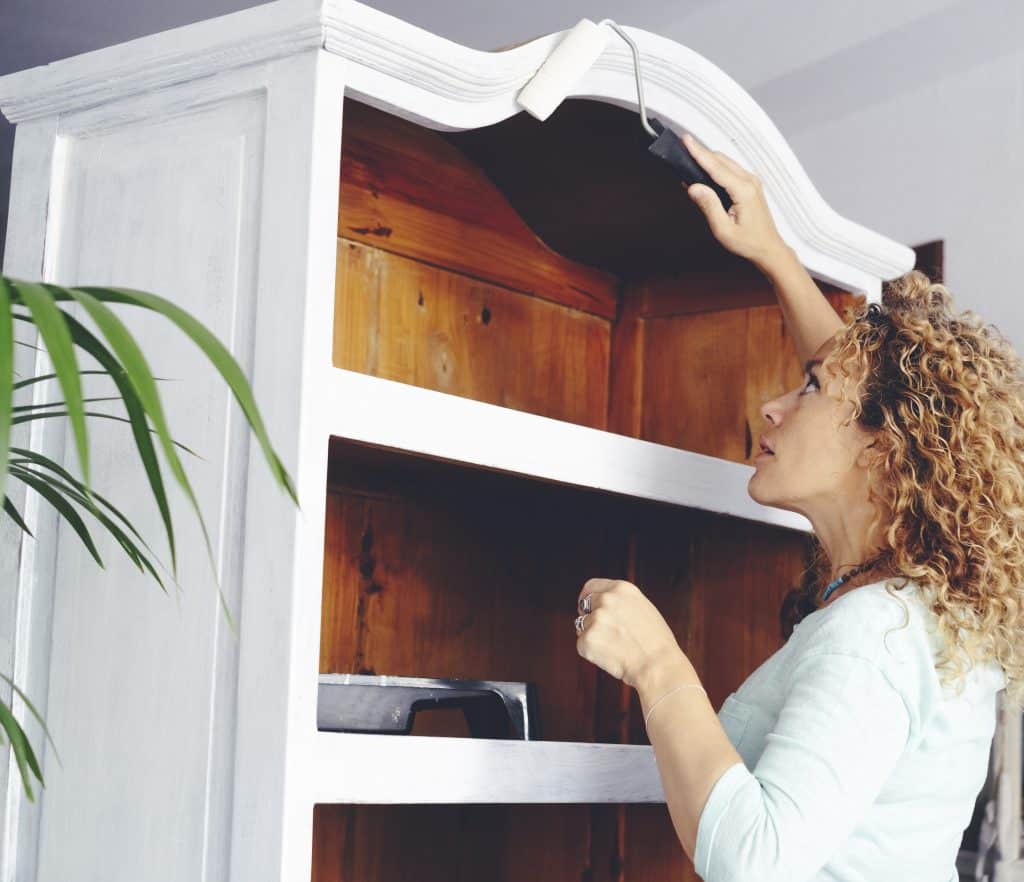
For a classic, smooth finish, apply several thin coats of paint, allowing each coat to dry completely before applying the next.
Using a high-quality brush or a foam roller can minimize brush strokes.
If you’re aiming for a distressed or shabby chic look, consider techniques like dry brushing or sanding back the edges after painting to reveal the original wood or a base coat.
![]()
Smooth finish: Multiple thin coats with a quality brush or roller.
Distressed look: Dry brushing or light sanding after painting.
Stenciling: Adding patterns and designs for unique flair.
Glazing: Creating depth and an aged appearance.
Hardware updates: Replacing knobs and pulls for a fresh feel.
Beyond paint, stains and varnishes can enhance natural wood grain, offering a rich and elegant finish.
If you opt for staining, ensure the wood is evenly sanded and clean for uniform absorption.
Don’t forget the topcoat – a polyurethane, wax, or lacquer finish protects your painted or stained surface from wear and tear, ensuring durability and a lasting shine.
Always apply topcoats in thin, even layers for the best results.
Consider adding new hardware like knobs, pulls, or hinges.
This small change can dramatically update the look of a piece, making it feel brand new.
There’s a vast array of styles available, from vintage to modern, allowing you to perfectly match your desired aesthetic.
Experimentation is encouraged; sometimes the most unexpected combinations yield the most stunning results in your furniture flips: transform thrift store finds into stylish home decor with these DIY techniques journey.
Beyond paint: creative embellishments and functional upgrades
While a fresh coat of paint can work wonders, true furniture flipping artistry often involves going beyond the brush.
Creative embellishments and functional upgrades can elevate a piece from merely refreshed to truly bespoke, adding personality and enhancing its utility.
This is where you can let your imagination run wild and infuse your unique style into the project.
Adding character and utility to your flipped furniture
Think about what else the piece could be. A dresser can become a bathroom vanity with a simple sink cut-out and plumbing.
An old bookshelf might be repurposed into a stylish bar cart with added wheels and a painted finish.
Consider adding decorative elements such as stencils, decoupage with interesting papers, or even applying fabric to drawer fronts for a touch of texture and color.
Stenciling: Apply intricate patterns or geometric designs.
Decoupage: Use decorative paper, fabric, or even old maps.
Fabric upholstery: Re-cover chair seats or add fabric panels.
New hardware: Swap out old knobs and pulls for modern or antique alternatives.
Functional modifications: Add wheels, shelves, or charging stations.
Upholstery is another fantastic way to transform chairs or benches.
Even a simple re-covering of a seat cushion can drastically change the look and feel of a piece.
Don’t shy away from learning basic upholstery techniques; there are plenty of online tutorials to guide you through the process.
Choose fabrics that complement your home’s existing decor or introduce a bold new pattern.
For functional upgrades, think about how the piece will be used.
Adding discreet charging stations to a nightstand, installing soft-close drawer slides, or incorporating hidden storage solutions can make a flipped piece even more valuable.
These thoughtful additions not only improve the item’s utility but also demonstrate a high level of craftsmanship and attention to detail, making your furniture flips: transform thrift store finds into stylish home decor with these DIY techniques truly stand out.
Styling your flipped furniture: integration into home decor
Successfully flipping a piece of furniture is only half the journey; the other half is seamlessly integrating it into your existing home decor.
A beautifully transformed item deserves to be showcased in a way that enhances its appeal and contributes to the overall aesthetic of your space.
Thoughtful placement and complementary styling can make all the difference.
Making your flipped pieces shine in your home
Consider the scale and proportion of the flipped item within the room.
A large statement piece might be best placed as a focal point, while smaller items can fill in gaps or serve as accent pieces.
Think about how the color and style of your flipped furniture interact with the surrounding walls, rugs, and other decor.
Does it blend harmoniously, or does it offer a striking contrast?
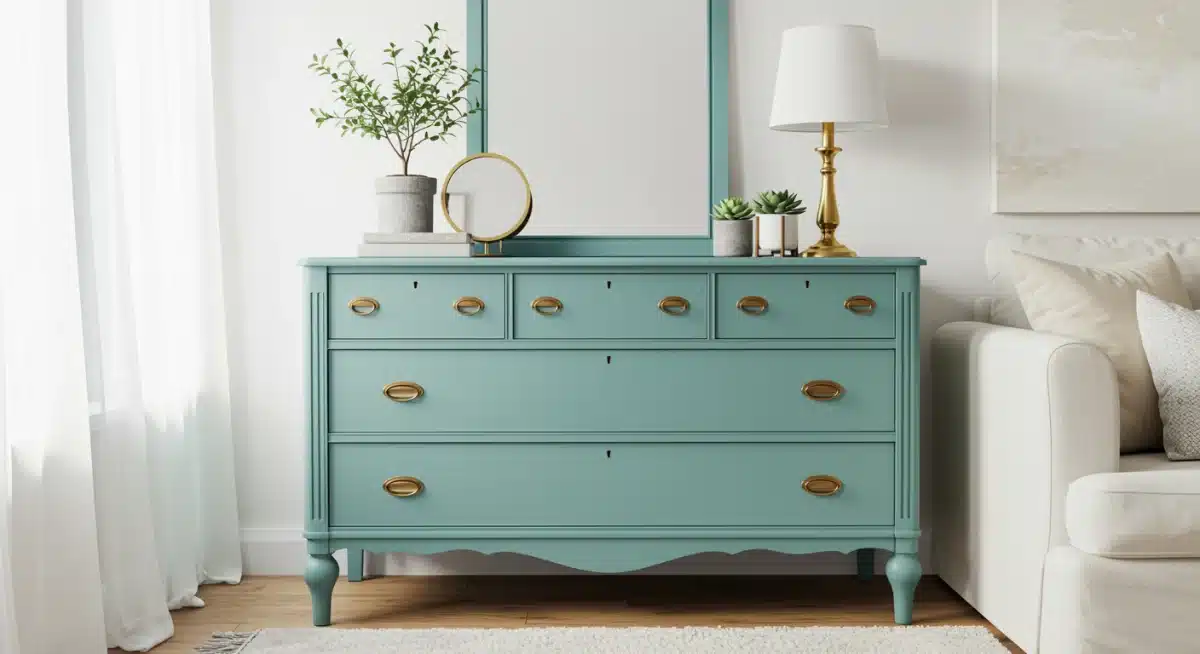
Accessorizing plays a vital role in styling.
On a flipped dresser, you might place a curated collection of books, a unique lamp, or a vase of fresh flowers.
For a coffee table, consider decorative trays, coasters, and perhaps a few art books.
The goal is to create vignettes that draw the eye and tell a story, making the piece feel intentional and integrated rather than just placed.
Strategic placement: Position the piece to maximize visual impact.
Color coordination: Ensure it complements or contrasts effectively with existing decor.
Thoughtful accessorizing: Use decorative items to enhance its beauty.
Lighting: Highlight the piece with appropriate lighting.
Functionality: Arrange items to reflect the piece’s purpose.
Don’t underestimate the power of lighting.
A well-placed lamp or even natural light can dramatically alter how a piece looks and feels in a room.
Experiment with different arrangements until you find what feels right.
Remember, your home is a reflection of your personality, and your flipped furniture should contribute to that narrative, creating a space that feels uniquely yours and celebrates your creativity.
Ultimately, the beauty of furniture flips: transform thrift store finds into stylish home decor with these DIY techniques lies in creating something truly unique.
Each piece tells a story, not just of its past life, but of the care and creativity you invested in its transformation.
Embrace the process, enjoy the results, and let your refreshed pieces inspire your everyday living.
Common challenges and troubleshooting tips
Even the most experienced furniture flippers encounter hurdles.
From unexpected wood damage to paint adhesion issues, challenges are a natural part of the DIY process.
Knowing how to troubleshoot common problems can save you time, frustration, and ensure your project stays on track for a successful outcome.
Patience and persistence are key when things don’t go exactly as planned.
Overcoming obstacles in your furniture flipping journey
One frequent issue is dealing with stubborn old finishes.
If sanding isn’t enough, chemical strippers can be effective, but always use them in a well-ventilated area and with proper safety gear.
Another common problem is paint not adhering properly, leading to peeling or chipping.
This is almost always due to inadequate cleaning or insufficient priming.
Re-sanding, re-cleaning, and re-priming are often the best solutions.
Peeling paint: Likely due to poor prep; re-clean, re-sand, re-prime.
Uneven finish: Apply thinner coats, use a quality brush/roller, sand lightly between coats.
Bleed-through: Use a stain-blocking primer, especially for dark woods.
Wobbly joints: Disassemble, re-glue with wood glue, and clamp securely.
Strong odors: Clean thoroughly, use an odor-blocking primer, and air out the piece.
Wood filler can shrink or crack if applied too thickly.
For deeper repairs, apply wood filler in thin layers, allowing each to dry completely before adding the next.
Sanding between layers will also help create a seamless repair.
When dealing with wobbly joints, sometimes the best approach is to fully disassemble the joint, clean out old glue, apply fresh wood glue, and clamp it tightly until dry.
Don’t be discouraged by imperfections.
Sometimes, a slight flaw can add character to a piece, contributing to its unique story.
However, for those issues that truly detract from the desired aesthetic, taking the time to properly troubleshoot and rectify them will lead to a more satisfying and professional-looking result.
Every challenge overcome adds to your expertise in furniture flips: transform thrift store finds into stylish home decor with these DIY techniques.
| Key Aspect | Brief Description |
|---|---|
| Thrift Store Hunting | Look for solid construction, minimal structural damage, and a desirable shape, prioritizing pieces with good bones over perfect aesthetics. |
| Preparation Steps | Thorough cleaning, repairing damage with wood filler, and meticulous sanding are crucial for paint adhesion and a flawless final finish. |
| Painting & Finishing | Apply thin coats of paint, explore distressing or staining, and always use a protective topcoat for durability and desired aesthetic. |
| Creative Embellishments | Enhance pieces with stenciling, decoupage, new hardware, or functional modifications to add unique character and utility. |
Frequently asked questions about furniture flips
Beginners should start with small, solid wood pieces like nightstands, small tables, or picture frames. These items are less complex structurally, require fewer materials, and offer a manageable introduction to cleaning, sanding, and painting techniques without overwhelming the new flipper.
The best paint depends on the desired finish and prep work. Chalk paint requires minimal prep and offers a matte, distressed look.
Latex or acrylic paints are versatile for a smooth finish, while milk paint provides a chippy, antique appearance. Always consider the piece’s use for durability.
While some paints, like chalk paint, claim no sanding is needed, a light scuff sand (or ‘keying’) is almost always recommended.
It creates a better surface for paint adhesion, especially on glossy finishes, ensuring a more durable and professional-looking result that lasts longer without chipping or peeling.
Applying a high-quality topcoat or sealant is essential. Options include polyurethane (water or oil-based), wax, or lacquer.
Choose based on the desired sheen and durability needed for the piece’s function. Multiple thin coats are usually better than one thick coat for optimal protection.
Pinterest, Instagram, and YouTube are excellent resources for inspiration. Search for ‘furniture flips,’ ‘DIY furniture,’ or ‘upcycled furniture’ to find countless ideas.
Home decor blogs and magazines also offer a wealth of creative approaches and styling tips for various types of furniture.
Conclusion
The journey of furniture flips: transform thrift store finds into stylish home decor with these DIY techniques is more than just a creative endeavor; it’s a sustainable practice that brings character and individuality to your living space.
By understanding the basics of selection, preparation, execution, and styling, you can unlock the hidden potential of forgotten pieces and create unique, personalized decor that tells a story.
Embrace the process, learn from each project, and enjoy the immense satisfaction of transforming the old into something wonderfully new and reflective of your personal style. Your home will thank you for it.


