Install a Ceiling Fan: Improve Air Circulation, Save 15% on Cooling
Installing a ceiling fan is a practical home improvement that significantly enhances air circulation and can reduce your summer cooling bills by up to 15%. This guide walks you through the entire process, making energy efficiency attainable for any homeowner.
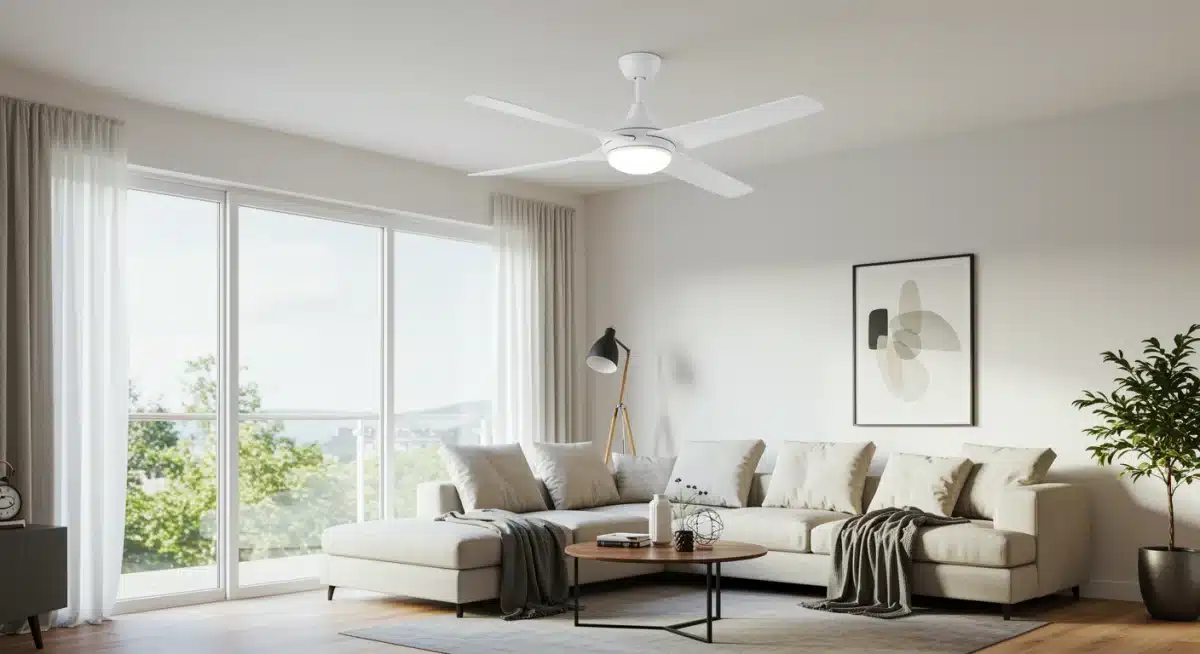
As summer approaches, many homeowners in the United States look for effective ways to stay cool without breaking the bank. One of the most impactful and often overlooked solutions is to install a ceiling fan. This simple upgrade can dramatically improve air circulation in your home, leading to a noticeable reduction in your cooling costs—potentially saving you up to 15% on your energy bills. Beyond the financial benefits, a well-placed ceiling fan offers enhanced comfort and can even contribute to your home’s aesthetic appeal.
Understanding the Benefits of Ceiling Fans
Ceiling fans are far more than just decorative fixtures; they are functional appliances designed to enhance comfort and energy efficiency within your home. By creating a gentle breeze, they make a room feel cooler, allowing you to set your thermostat a few degrees higher without sacrificing comfort. This seemingly small adjustment can lead to significant savings on your monthly utility bills, especially during the peak summer months.
The principle behind a ceiling fan’s effectiveness is simple: evaporative cooling. As the fan blades rotate, they move air across your skin, accelerating the evaporation of perspiration. This process efficiently removes heat from your body, making you feel cooler. Unlike air conditioners, which actually lower the air temperature, ceiling fans work by improving thermal comfort, making them an excellent complement to your existing HVAC system or a standalone solution for milder days.
Energy efficiency and cost savings
One of the primary motivations for many homeowners to install a ceiling fan is the potential for energy savings. Air conditioning units consume a considerable amount of electricity, especially when battling high summer temperatures. By using a ceiling fan, you can often raise your thermostat setting by 2-4 degrees Fahrenheit without feeling warmer. This small change translates into substantial reductions in your cooling load, directly impacting your electricity bill.
- Reduced reliance on air conditioning.
- Lower energy consumption from HVAC systems.
- Potential savings of up to 15% on cooling costs.
- Extended lifespan for your AC unit due to less frequent use.
These savings accumulate over time, making the initial investment in a ceiling fan quickly pay for itself. Furthermore, ceiling fans can be used year-round. In winter, by reversing the blade direction, they can gently push warm air that has risen to the ceiling back down into the living space, contributing to better heat distribution and further energy efficiency.
Improved air circulation and comfort
Beyond the financial benefits, ceiling fans play a crucial role in improving overall air circulation and comfort in any room. Stagnant air can feel stuffy and uncomfortable, even if the temperature isn’t excessively high. A ceiling fan keeps the air moving, preventing hot spots and ensuring a more consistent temperature throughout the space.
This improved air movement can also help distribute conditioned air more effectively, ensuring that the cool air from your AC reaches all corners of the room. In rooms with high ceilings, ceiling fans are particularly beneficial as they help to destratify the air, breaking up layers of warm and cool air for a more uniform and pleasant environment. For those who prefer natural ventilation, a ceiling fan can amplify the effect of open windows, drawing in fresh air and expelling stale air more efficiently.
Ultimately, understanding these core benefits highlights why installing a ceiling fan is not just a practical home hack but a smart investment in your home’s comfort and energy future. The blend of cost savings, enhanced air circulation, and year-round utility makes it a valuable addition to any American household.
Choosing the Right Ceiling Fan for Your Home
Selecting the appropriate ceiling fan involves more than just picking one that looks good. Several factors must be considered to ensure optimal performance, energy efficiency, and aesthetic integration with your home’s decor. The right fan will complement your space while effectively moving air to keep you comfortable and save energy.
Before making a purchase, assess the size of the room where the fan will be installed. This is perhaps the most critical factor, as an undersized fan won’t effectively cool the space, and an oversized fan can create an uncomfortable downdraft. Also, consider the ceiling height, as this will influence the downrod length needed for proper clearance and air movement.
Room size and fan dimensions
Matching the fan size to your room dimensions is crucial for effective air circulation. A general guideline helps in making the right choice:
- Small rooms (up to 75 sq ft): Fans with blade spans of 29-36 inches.
- Medium rooms (76-144 sq ft): Fans with blade spans of 36-48 inches.
- Large rooms (145-225 sq ft): Fans with blade spans of 48-54 inches.
- Great rooms (over 225 sq ft): Fans with blade spans of 54 inches or more, or multiple fans.
These recommendations ensure that the fan can adequately circulate air throughout the entire room without being either too weak or overly powerful. Measuring your room accurately before shopping will prevent common installation and performance issues.
Features to consider: lights, controls, and energy efficiency
Modern ceiling fans come equipped with a variety of features that can enhance their functionality and convenience. Beyond just moving air, many fans now integrate lighting, advanced control options, and superior energy efficiency ratings.
When it comes to lighting, consider whether you need ambient light, task lighting, or both. Many fans offer integrated LED light kits, which are energy-efficient and long-lasting. Controls have also evolved beyond simple pull chains; remote controls, wall controls, and even smart home integration are now common, offering greater convenience in adjusting fan speed and light settings.
Energy efficiency is paramount. Look for fans with an ENERGY STAR rating, which indicates that the fan meets strict energy efficiency guidelines set by the U.S. Environmental Protection Agency. These fans typically use less energy than conventional models, further contributing to your savings. Factors like motor type (DC motors are generally more efficient), blade pitch, and blade material all play a role in a fan’s overall energy performance.
By carefully evaluating your room’s needs and considering these key features, you can select a ceiling fan that not only looks great but also performs optimally, helping you to improve air circulation and save on cooling costs effectively.
Pre-Installation Checklist: Safety First
Before you embark on the journey to install a ceiling fan, a thorough pre-installation checklist is essential. Safety should always be your top priority when dealing with electrical wiring and working at height. Proper preparation not only minimizes risks but also ensures a smoother and more successful installation process. Rushing through these preparatory steps can lead to dangerous situations or costly mistakes.
This section will guide you through the critical steps you need to take before touching any tools or electrical components. From gathering the right tools to ensuring the electrical box can support the fan’s weight, each step is designed to make your DIY project safe and efficient. Remember, if at any point you feel uncomfortable or unsure, it’s always best to consult with a qualified electrician.
Gathering the necessary tools and materials
Having all your tools and materials ready before you start will save you time and frustration. A well-prepared workspace is a safe workspace.
- Screwdrivers: Phillips and flathead.
- Wire strippers/cutters: Essential for electrical connections.
- Voltage tester: Crucial for ensuring power is off.
- Adjustable wrench or pliers: For tightening nuts and bolts.
- Stepladder: Sturdy and tall enough to reach the ceiling comfortably.
- Drill with various bits: If new mounting holes are needed.
- Electrical tape and wire nuts: For secure electrical connections.
- Safety glasses and gloves: For personal protection.
- New ceiling fan: Unboxed and components organized.
- Ceiling fan-rated electrical box: If replacing a light fixture or installing in a new location.
Ensure all tools are in good working condition. A damaged tool can be a hazard. Additionally, having a helper on hand can make the process significantly easier, especially when lifting the fan into place.
Checking electrical wiring and support structure
This is perhaps the most critical safety step. Ceiling fans are heavier than typical light fixtures and require a specialized electrical box that can support their weight and movement. Standard light fixture boxes are usually not designed for this load and could fail, leading to the fan falling.
- Turn off power: Locate the circuit breaker that controls the lighting circuit in the room where you’ll be working and switch it off. Use your voltage tester to confirm that the power is indeed off at the fixture.
- Inspect the electrical box: If you’re replacing an existing light fixture, remove it and inspect the electrical box. It should be clearly marked as “fan-rated” or “for ceiling fan support.” If it’s not, you’ll need to replace it with a fan-rated box, which typically attaches directly to a ceiling joist or a brace between joists.
- Assess ceiling joists: Ensure there’s adequate structural support in the ceiling to hold the fan’s weight. If you’re installing a fan where there currently isn’t an electrical box, you’ll need to locate a joist or install a fan-rated brace.
- Wiring check: Confirm that your wiring includes a ground wire, typically bare copper or green. If not, consult an electrician.
Neglecting these checks can lead to serious safety issues, including electrical shock or the fan detaching from the ceiling. Taking the time to properly prepare and ensure your electrical and structural components are up to code is non-negotiable for a safe and successful installation. With these steps completed, you’re ready to proceed with confidence.
Step-by-Step Installation Guide
Once your pre-installation checklist is complete and you have all the necessary tools and safety measures in place, you are ready to begin the actual process to install a ceiling fan. This guide breaks down the installation into manageable steps, focusing on clarity and safety. While instructions may vary slightly depending on your specific fan model, these general steps will provide a solid foundation for your DIY project.
Remember to always refer to your fan’s manufacturer’s instructions for precise details and wiring diagrams, as these are tailored to your specific unit. Taking your time and carefully following each step will ensure a successful and safe installation, allowing you to enjoy improved air circulation and lower cooling costs in no time.
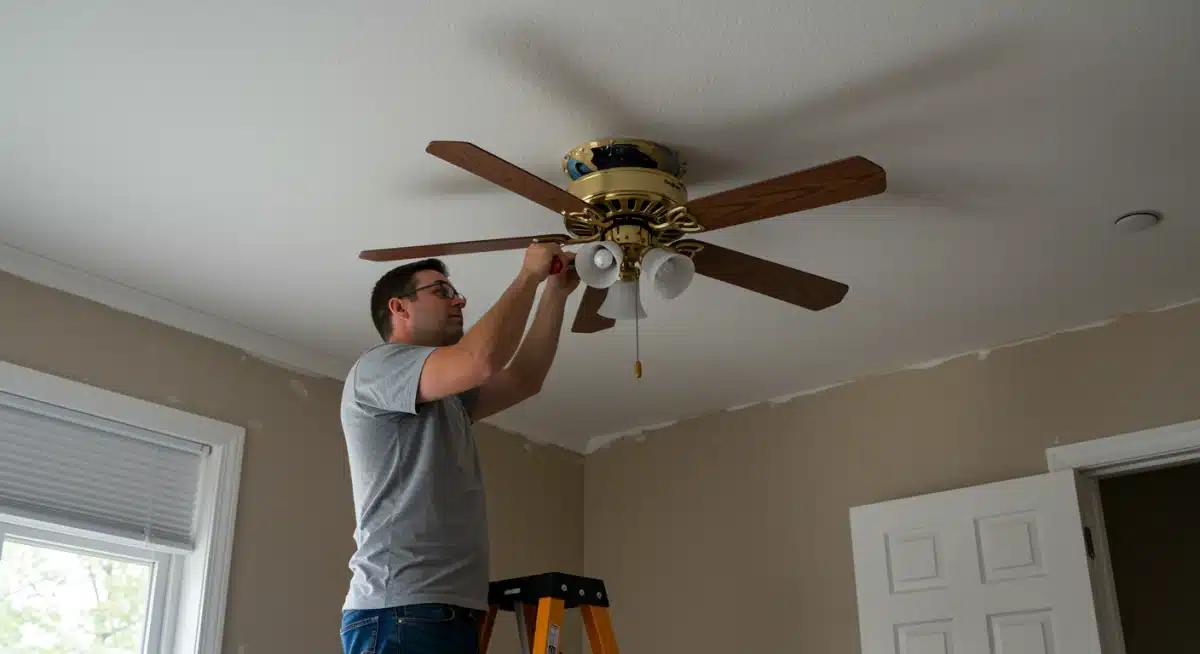
Mounting the bracket and motor assembly
The first physical step in installing your ceiling fan is to securely mount the fan’s support bracket to the electrical box. This bracket is what will bear the entire weight of the fan, so it must be installed correctly and firmly.
- Attach the mounting bracket: Align the mounting bracket with the holes on your fan-rated electrical box. Use the screws provided with the fan to securely fasten the bracket to the box. Ensure it is tight and does not wobble.
- Hang the motor assembly: Most modern ceiling fans are designed with a hook or a ball-and-socket system on the mounting bracket that allows you to temporarily hang the fan’s motor assembly. This frees up your hands to make the electrical connections safely and comfortably. Carefully lift the motor assembly and place it onto the bracket’s hook or into the socket.
This stage is crucial for ensuring the fan is stable and safe once operational. Double-check all connections and fastenings before moving to the next step. A secure mounting bracket is the foundation of a safe ceiling fan installation.
Wiring the fan: connecting electrical components
Wiring is often the most intimidating part of ceiling fan installation for DIYers, but by following proper safety protocols and clear instructions, it can be done safely. Always ensure the power is off at the circuit breaker before beginning any wiring.
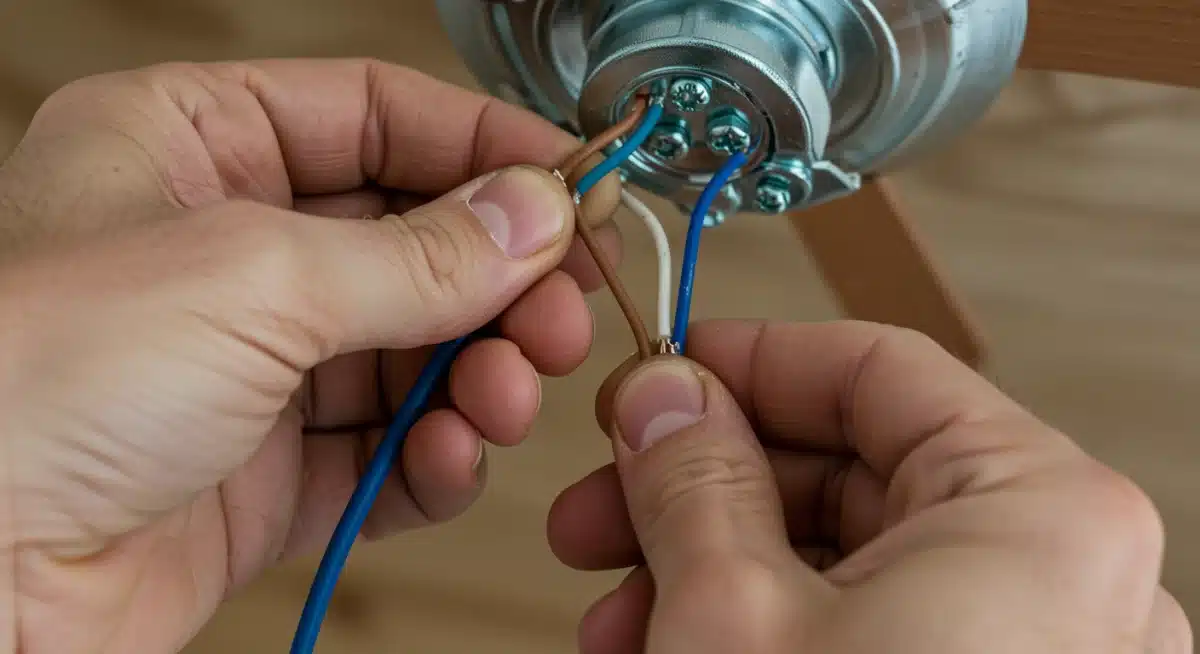
- Identify wires: You will typically find three sets of wires: the house wires (from the electrical box), the fan motor wires, and the light kit wires (if applicable). Standard house wiring colors are usually black (hot), white (neutral), and bare copper or green (ground). Fan wires will typically match these colors.
- Connect ground wires: Connect all bare copper or green ground wires together using a wire nut. This includes the ground wire from the house, the fan, and the mounting bracket (if it has one).
- Connect neutral wires: Connect all white (neutral) wires together using a wire nut. This usually includes the neutral wire from the house, the fan motor, and the light kit.
- Connect hot wires: Connect the black (hot) wire from the house to the black (hot) wire(s) from the fan motor and light kit. If your fan has separate wires for fan and light control (e.g., a blue wire for the light), connect the blue wire to the designated light switch wire from the house, and the fan’s black wire to the designated fan switch wire from the house. Use wire nuts for all connections.
After making each connection, gently tug on the wires to ensure they are secure within the wire nuts. Once all connections are made, carefully tuck the wires into the electrical box, ensuring no bare wires are exposed. This step is critical for preventing electrical hazards and ensuring the fan functions correctly.
Attaching fan blades and light kit
With the motor assembly mounted and wired, the final steps involve attaching the fan blades and the light kit, if your fan includes one.
- Attach the fan blades: Most fan blades attach to blade irons, which then attach to the motor housing. Secure each blade to its blade iron using the screws provided. Then, attach the blade irons to the motor housing, making sure all screws are tightened evenly and securely.
- Install the light kit (if applicable): If your fan has a light kit, connect its wires to the corresponding wires from the fan motor assembly, typically using quick-connect plugs or wire nuts. Then, secure the light kit housing to the bottom of the fan motor assembly with screws.
- Install light bulbs and globe: Screw in the recommended light bulbs (usually LED for energy efficiency) and then attach the light globe or cover according to the manufacturer’s instructions.
Once all components are securely attached, restore power at the circuit breaker. Test the fan and light (if applicable) to ensure everything is working correctly. Check for any wobbling at different speed settings. If there’s excessive wobble, ensure all blades are securely attached and balanced. Congratulations, you’ve successfully completed the installation! You are now ready to enjoy the benefits of improved air circulation and reduced cooling costs that come with your newly installed ceiling fan.
Troubleshooting Common Installation Issues
Even with careful planning and execution, DIY projects like installing a ceiling fan can sometimes present unexpected challenges. Encountering an issue during or after installation is not uncommon, but with a systematic approach to troubleshooting, most problems can be resolved without needing professional help. Understanding common issues and their solutions can save you time, frustration, and potentially additional costs.
This section addresses some of the most frequent problems homeowners face when they install a ceiling fan, from electrical non-functionality to annoying wobbles. Equipped with this knowledge, you’ll be better prepared to diagnose and fix minor glitches, ensuring your new ceiling fan operates smoothly and efficiently.
Fan not working after installation
The most disheartening issue after completing an installation is when the fan simply doesn’t turn on. This usually points to an electrical problem, which can often be traced back to a few common culprits.
- No power: Double-check that the circuit breaker for the room is switched to the ‘on’ position. Sometimes, it might have tripped during installation or was simply left off.
- Loose wire connections: Re-open the canopy and carefully inspect all wire connections. Ensure that all wire nuts are tight and that no bare wires are exposed. A loose neutral or hot wire connection is a frequent cause of non-operation.
- Incorrect wiring: Verify that the black (hot), white (neutral), and ground wires are connected correctly according to the fan’s instructions and standard electrical codes. An incorrectly wired connection will prevent the fan from receiving power.
- Faulty switch or remote: If you’re using a wall switch or remote control, ensure they are functioning correctly. Test the wall switch by temporarily connecting a known working light fixture to the same wires. Replace batteries in remotes.
- Motor overload protection: Some fans have internal overload protection that may trip if there’s a short or excessive load. Turn off power, wait a few minutes, then restore power.
If after checking these points the fan still doesn’t work, it might indicate a defect in the fan itself or a more complex electrical issue, at which point calling a licensed electrician is advisable.
Fan wobbles and noise issues
A wobbling or noisy fan can be incredibly annoying and can also indicate a potential safety hazard. Most wobbling issues are due to imbalance or loose components.
- Loose blades or blade holders: Ensure all screws attaching the blades to the blade holders, and the blade holders to the motor housing, are tightened securely. Even a slightly loose screw can cause significant wobble.
- Unbalanced blades: Over time, or due to manufacturing inconsistencies, fan blades can become unevenly weighted. Many fans come with a blade balancing kit. Follow the kit’s instructions to identify the unbalanced blade and add small weights to correct it.
- Loose mounting bracket: The mounting bracket must be securely fastened to the electrical box and ceiling joist. A loose bracket will cause the entire fan to sway. Tighten all screws connecting the bracket.
- Bent blade holders: If a blade holder is bent, it can affect the pitch and balance of the blade. Visually inspect all blade holders to ensure they are straight and aligned. Gently bend them back into place if necessary, but be careful not to break them.
- Noise from loose components: Rattling or clicking noises often come from loose screws in the light kit, canopy, or even within the motor housing. Systematically check and tighten all visible screws.
Addressing wobbling and noise issues promptly is important not just for comfort but also for the longevity and safety of your ceiling fan. A well-balanced and quiet fan will provide years of efficient air circulation and comfort, making your effort to install a ceiling fan truly worthwhile.
Maximizing Efficiency and Savings with Your New Fan
Once you successfully install a ceiling fan, the journey to enhanced comfort and reduced energy bills doesn’t end there. To truly maximize the benefits of your new appliance, it’s important to understand how to operate it most efficiently. Simple adjustments and maintenance practices can significantly impact its performance, extend its lifespan, and ensure you’re getting the most out of your investment in improved air circulation and cost savings.
This section delves into practical tips for operating your ceiling fan throughout the year, combining it effectively with your air conditioning, and performing routine maintenance. By adopting these strategies, you can optimize your fan’s contribution to a comfortable and energy-efficient home environment.
Optimal fan usage for summer and winter
Ceiling fans are versatile appliances that can be used effectively in both warm and cool seasons, provided they are operated in the correct direction. Understanding this seasonal adjustment is key to maximizing their energy-saving potential.
- Summer operation: During warmer months, your ceiling fan should rotate counter-clockwise. This direction pushes air downwards, creating a direct breeze that accelerates the evaporation of perspiration from your skin, making you feel cooler. This allows you to raise your thermostat setting by 2-4 degrees Fahrenheit without compromising comfort, leading to significant energy savings.
- Winter operation: In colder months, reverse the fan’s direction to clockwise rotation. This setting gently pulls air upwards, drawing warm air that rises to the ceiling down along the walls into the living space. It doesn’t create a direct draft but rather helps to redistribute warm air, preventing heat from pooling at the ceiling and improving heating efficiency. Remember to set the fan to its lowest speed in winter to avoid creating a chilling effect.
Checking and adjusting your fan’s direction seasonally is a simple yet impactful way to ensure it’s always working to your advantage, contributing to year-round comfort and energy efficiency.
Combining ceiling fans with air conditioning
Ceiling fans are not meant to replace air conditioning but rather to complement it, creating a powerful synergy that maximizes comfort while minimizing energy consumption. Using them together is a smart strategy for cooling your home more efficiently.
When your air conditioner is running, a ceiling fan helps to distribute the cooled air more effectively throughout the room. This means your AC unit doesn’t have to work as hard or run as long to achieve and maintain your desired temperature. By allowing you to set your thermostat higher, the combination of a ceiling fan and AC can lead to substantial energy savings, often reaching that 15% mark or even more.
It’s important to remember that ceiling fans cool people, not rooms. Therefore, turn off the fan when you leave the room. There’s no benefit to running a fan in an empty room, and it will only consume unnecessary electricity. This mindful usage ensures that you’re only using energy when and where it’s most effective.
Maintenance tips for longevity and performance
Like any home appliance, regular maintenance will ensure your ceiling fan operates at peak performance and lasts for many years. A few simple tasks can prevent common issues and keep your fan running smoothly.
- Regular cleaning: Dust can accumulate on fan blades and motor housing, reducing efficiency and potentially causing imbalance. Wipe down blades and the motor housing regularly with a damp cloth.
- Check for loose screws: Periodically inspect all screws on the blade attachments, mounting bracket, and light kit. Tighten any that appear loose to prevent wobbling and noise.
- Lubrication (for older models): Some older ceiling fan models require occasional lubrication of the motor bearings. Consult your fan’s manual to determine if yours needs this and what type of lubricant to use. Most modern fans have sealed, maintenance-free bearings.
- Blade balancing: If your fan develops a wobble, use a blade balancing kit to rebalance the blades. This is a quick fix that can prevent further issues and extend the life of the motor.
By incorporating these simple maintenance tips into your routine, you can ensure your ceiling fan continues to provide efficient air circulation and contribute to significant savings on your cooling costs for years to come. This proactive approach safeguards your investment and enhances your home’s comfort.
When to Call a Professional
While installing a ceiling fan can be a rewarding DIY project for many homeowners, there are specific situations where calling a professional electrician is not just recommended but often necessary. Recognizing these instances ensures your safety, complies with local building codes, and guarantees the job is done correctly and efficiently. Attempting to tackle complex electrical work without the proper expertise can lead to serious hazards, including electrical fires or personal injury.
Knowing your limits and when to seek expert help is a hallmark of a responsible DIYer. This section outlines key scenarios where it’s best to put down your tools and pick up the phone to consult with a licensed professional, safeguarding both your home and your well-being.
Complex wiring or no existing fixture
One of the primary reasons to call an electrician is if your installation scenario involves complex wiring or the absence of an existing electrical fixture in the desired location. Simply put, if you’re not comfortable or experienced with electrical work beyond basic wire connections, it’s time to bring in the pros.
- No existing electrical box: If you plan to install a ceiling fan in a location where there is currently no electrical box or wiring, an electrician will need to run new wiring from a power source, install a fan-rated electrical box, and potentially cut into drywall. This process requires specialized knowledge and tools to ensure it’s done safely and up to code.
- Outdated or faulty wiring: Older homes might have outdated wiring that isn’t compatible with modern ceiling fans or doesn’t meet current safety standards. An electrician can assess the existing wiring, upgrade it if necessary, and ensure all connections are safe and secure.
- Switching from a single switch to dual control: If you want to control the fan and light independently but only have a single wall switch, an electrician can run additional wiring to accommodate a dual switch, providing greater convenience and control.
These tasks go beyond a typical DIY installation and involve a deeper understanding of electrical systems. A professional can ensure that new wiring is properly installed, circuits are correctly loaded, and all work adheres to local electrical codes, preventing future issues.
Structural concerns or high ceilings
Beyond electrical considerations, structural concerns and the practical challenges of high ceilings are significant reasons to enlist professional help. The safety and stability of your ceiling fan depend heavily on a robust mounting structure.
- Unsupported electrical box: As discussed, ceiling fans require a fan-rated electrical box securely attached to a ceiling joist or a brace. If your existing electrical box is not fan-rated or isn’t properly supported, an electrician or handyman can replace it with the correct type, ensuring it can safely bear the fan’s weight and movement.
- Weak ceiling structure: If you suspect your ceiling joists are not strong enough to support the fan, or if you’re installing a particularly heavy fan, a professional can assess the structural integrity and reinforce the ceiling if needed. This prevents the dangerous possibility of the fan falling.
- Very high ceilings: Installing a fan on a very high ceiling (e.g., vaulted ceilings, two-story great rooms) presents practical challenges in terms of reaching the installation point safely. Professionals have specialized ladders, scaffolding, and tools to perform these installations safely and efficiently, minimizing the risk of falls or damage.
In these situations, the cost of hiring a professional is a worthwhile investment in safety and peace of mind. They possess the expertise and equipment to handle complex installations, ensuring your ceiling fan is installed correctly, safely, and ready to provide years of improved air circulation and energy savings without incident.
Long-Term Impact: Comfort, Savings, and Home Value
The decision to install a ceiling fan extends far beyond the immediate gratification of a cooler room. It’s an investment that yields significant long-term benefits in terms of enhanced home comfort, substantial financial savings, and even an increase in your property’s overall value. Understanding this broader impact can solidify your decision and highlight why this relatively simple home improvement is a smart choice for any homeowner.
As we’ve explored the installation process and troubleshooting tips, it’s equally important to reflect on how this upgrade contributes to a more sustainable and enjoyable living environment. From consistent comfort to a greener footprint, ceiling fans offer a multifaceted return on investment that resonates through seasons and years.
Consistent comfort throughout the year
One of the most enduring benefits of installing a ceiling fan is the provision of consistent comfort, regardless of the season. Unlike air conditioners that provide a burst of cool air, or heaters that generate warmth, ceiling fans work by improving air movement, creating a more stable and pleasant ambient temperature. This subtle yet effective approach to climate control leads to a more consistently comfortable home environment.
In summer, the perceived cooling effect allows you to relax without feeling stuffy or overheated, even when the thermostat is set a few degrees higher. In winter, the gentle redistribution of warm air prevents cold spots and ensures that the heat generated by your furnace is utilized more efficiently throughout the room. This year-round functionality means you’re always benefiting from improved air circulation, contributing to a more comfortable and inviting home for you and your family.
This consistent comfort is a key factor in enhancing the quality of life within your home, making every room feel more livable and enjoyable, whether you’re reading a book, entertaining guests, or simply unwinding after a long day.
Sustainable energy savings and environmental impact
The financial savings derived from installing a ceiling fan are a compelling reason for many homeowners. By reducing the reliance on energy-intensive air conditioning, you can significantly cut down on your monthly electricity bills. The potential to save up to 15% on cooling costs adds up over time, turning the initial investment into a smart financial decision.
Beyond the personal financial benefits, these energy savings have a broader positive impact on the environment. Lower electricity consumption means a reduced carbon footprint, as less energy needs to be generated by power plants, which often rely on fossil fuels. Choosing ENERGY STAR-rated ceiling fans further amplifies this positive environmental contribution, as these models are designed for maximum efficiency.
Embracing ceiling fans as part of your home’s cooling strategy is a step towards a more sustainable lifestyle. It demonstrates a commitment to energy conservation and contributes to a healthier planet, aligning with modern values of environmental responsibility and resource management.
Enhancing home value and aesthetic appeal
Finally, installing a ceiling fan can also contribute to your home’s market value and aesthetic appeal. A well-chosen ceiling fan can serve as an attractive focal point in a room, complementing the existing decor and adding a touch of sophistication or modernity, depending on the style.
From a functional standpoint, prospective buyers often look for homes that are energy-efficient and comfortable. A home equipped with ceiling fans in key rooms signals to buyers that the property is well-maintained and thoughtfully upgraded for comfort and cost savings. This can be a significant selling point, distinguishing your home in a competitive market.
Moreover, the variety of styles, finishes, and features available today means you can select a fan that not only performs exceptionally but also enhances the visual appeal of your living spaces. Whether you prefer a sleek, contemporary design or a more traditional look, there’s a ceiling fan to match every aesthetic, ensuring that your investment in comfort and energy efficiency also elevates your home’s overall charm and marketability. The long-term impact of installing a ceiling fan thus encompasses a holistic improvement to your home’s livability, financial efficiency, and intrinsic worth.
| Key Aspect | Benefit/Description |
|---|---|
| Cost Savings | Reduce cooling costs by up to 15% by allowing higher thermostat settings. |
| Improved Comfort | Enhanced air circulation makes rooms feel cooler and more comfortable year-round. |
| DIY Feasibility | Manageable for most homeowners with proper tools, safety, and guidance. |
| Home Value | Adds aesthetic appeal and functional value, attractive to potential buyers. |
Frequently asked questions about ceiling fan installation
A ceiling fan can help reduce your cooling costs by making a room feel 2-4 degrees Fahrenheit cooler. This allows you to set your air conditioner thermostat higher, potentially saving up to 15% on your summer electricity bills. Actual savings depend on usage and local energy rates.
Yes, you must use a fan-rated electrical box. These boxes are specifically designed to support the weight and movement of a ceiling fan, unlike standard light fixture boxes which are not strong enough. Ensure it’s securely attached to a ceiling joist or brace.
Many homeowners can install a ceiling fan as a DIY project if they have basic electrical knowledge and the right tools. However, if you’re dealing with complex wiring, no existing fixture, or structural concerns, hiring a licensed electrician is highly recommended for safety and compliance.
The fan size depends on the room’s square footage. For rooms up to 75 sq ft, use 29-36 inch fans. For 76-144 sq ft, 36-48 inch fans are suitable. Large rooms (145-225 sq ft) need 48-54 inch fans, and larger spaces may require bigger fans or multiple units.
It’s advisable to clean your ceiling fan blades and motor housing regularly, ideally once a month during heavy usage seasons, or at least quarterly. Dust accumulation can reduce efficiency, cause imbalance, and affect air quality. Use a damp cloth for best results.
Conclusion
Deciding to install a ceiling fan is a tangible step towards a more comfortable, energy-efficient, and aesthetically pleasing home. As this comprehensive guide illustrates, the benefits extend from immediate relief from summer heat and significant savings on cooling costs to long-term improvements in air circulation and even an increase in your home’s value. While the installation process requires careful attention to safety and detail, it’s a rewarding DIY project for many, bringing tangible results that enhance daily living. By choosing the right fan, ensuring proper installation, and maintaining it diligently, you’re not just adding a fixture; you’re investing in a smarter, cooler, and more sustainable home environment for years to come.


