Smartphone Camera Tricks: Unlock Pro-Level Photography

 Are you ready to transform your ordinary phone pictures into extraordinary works of art? You don’t need to splurge on the latest flagship device or a bulky DSLR camera to capture breathtaking moments.
With a few insider smartphone camera tricks, you can unlock pro-level photography using the equipment you already own.
This guide will delve into the hidden potential of your device, revealing techniques and settings that professional photographers often employ, all accessible right from your pocket.
Mastering Your Smartphone’s Native Camera App Features
Before diving into third-party applications or accessories, it’s crucial to fully understand and utilize the capabilities built into your smartphone’s native camera app.
Many users overlook these powerful features, assuming they are basic, when in reality, they offer a surprising degree of control and flexibility for capturing high-quality images.
Getting to grips with these foundational elements is the first step towards elevating your mobile photography.
Every smartphone camera, regardless of its brand, comes equipped with a suite of features designed to enhance your photos.
These often include various shooting modes, grid overlays, focus controls, and exposure adjustments. Learning how to manipulate these settings effectively can dramatically improve the clarity, composition, and overall aesthetic of your pictures.
Understanding Exposure and Focus Controls
One of the most fundamental aspects of photography is exposure, which dictates how bright or dark your image will appear. Your smartphone’s camera typically offers touch-to-focus and touch-to-expose functionalities.
By tapping on different areas of your screen, you can tell the camera where to focus and, often, adjust the exposure for that specific point. This is particularly useful in challenging lighting conditions where automatic settings might struggle.
Manual Exposure Adjustment: After tapping to focus, a small sun icon or slider usually appears. Dragging this up or down allows you to manually brighten or darken your shot, preventing overexposed skies or underexposed shadows.
Focus Lock (AE/AF Lock): For static subjects, pressing and holding on the screen often activates an AE/AF Lock. This locks both the exposure and focus, giving you consistency if you need to slightly reframe your shot without losing your desired settings.
Spot Metering: Some advanced native apps offer spot metering, allowing you to measure exposure from a very small, specific area of your frame, ensuring that your main subject is perfectly exposed.
Utilizing Grid Lines and Aspect Ratios
Composition is key to a compelling photograph, and grid lines are an invaluable tool for achieving this. Most native camera apps allow you to enable a grid overlay, typically a 3×3 grid, which helps you apply compositional rules like the rule of thirds.
This simple addition can drastically improve the balance and visual interest of your images.
Furthermore, understanding aspect ratios can help you frame your shots for specific purposes. While 4:3 is common, switching to 16:9 for landscapes can create a more cinematic feel, or 1:1 for social media platforms like Instagram.
Experimenting with these ratios allows you to pre-visualize your final output, saving editing time later.
By thoroughly exploring and mastering the functionalities present in your smartphone’s default camera application, you lay a strong foundation for more advanced photographic endeavors.
These built-in tools are often more powerful than given credit for and are designed to be intuitive, making them accessible to photographers of all skill levels. A deep understanding of these features is the first critical step in unlocking your device’s full photographic potential.
Harnessing the Power of Manual Mode and Pro Settings
While auto mode is convenient, it often limits creative control. Many modern smartphones, even older models, offer a ‘Pro’ or ‘Manual’ mode within their native camera app, or through third-party applications.
This mode allows you to fine-tune settings typically found on professional cameras, giving you unprecedented control over your image capture. Embracing manual mode is a game-changer for serious mobile photographers.
Stepping into manual mode can seem daunting at first, with a plethora of sliders and numbers. However, understanding what each setting does will empower you to make deliberate creative choices rather than relying on the camera’s algorithms.
This hands-on approach is what truly distinguishes a casual snapshot from a thoughtfully crafted photograph.
ISO, Shutter Speed, and White Balance Explained
These three settings form the exposure triangle, fundamental to photography. In manual mode, you can adjust each independently:
ISO: This controls the camera sensor’s sensitivity to light. Lower ISO (e.g., 50-200) is ideal for bright conditions, producing cleaner images. Higher ISO (e.g., 800-3200) is for low light but introduces digital noise (grain).
Shutter Speed: This determines how long the camera’s sensor is exposed to light. Fast shutter speeds (e.g., 1/1000s) freeze motion, while slow shutter speeds (e.g., 1/2s) create motion blur, perfect for artistic effects like light trails or silky water.
White Balance (WB): This adjusts the color temperature of your image, ensuring whites appear white regardless of the light source. Presets like ‘Daylight,’ ‘Cloudy,’ ‘Fluorescent,’ or ‘Custom’ help you achieve accurate colors and set the mood.

Utilizing RAW Format for Maximum Flexibility
Many pro modes also offer the option to shoot in RAW format, in addition to or instead of JPEG. A JPEG image is a compressed file with in-camera processing applied, meaning some data is discarded.
A RAW file, however, is an unprocessed, uncompressed image file that contains all the data captured by the camera’s sensor. This gives you significantly more flexibility during post-processing, allowing for greater adjustments to exposure, color, and detail without degradation.
While RAW files are larger and require editing software (even basic mobile editors can handle them), the benefits for serious photographers are immense.
You can recover details in blown-out highlights or deep shadows, fine-tune white balance, and apply sharpening with much more precision than with a JPEG. This is a powerful tool for anyone serious about elevating their mobile photography.
Exploring and experimenting with manual mode settings is paramount for understanding how light and motion interact with your camera.
It allows you to move beyond the limitations of automatic settings and start creating images with a distinct personal vision.
Once you grasp these controls, your smartphone becomes a much more versatile and capable photographic instrument.
Creative Composition: Beyond the Rule of Thirds
While the rule of thirds is a fantastic starting point for beginners, truly compelling photography often involves moving beyond basic guidelines and exploring more advanced compositional techniques.
These methods help guide the viewer’s eye, create depth, and evoke specific emotions, transforming a simple snapshot into a visually engaging story.
Understanding and applying these principles can dramatically enhance your smartphone camera tricks repertoire.
Composition is essentially the art of arranging elements within your frame. It’s about deciding what to include, what to exclude, and how to position everything to create a harmonious and impactful image.
Developing a keen eye for composition takes practice, but the rewards are significant, leading to photographs that resonate more deeply with your audience.
Leading Lines and Framing for Visual Impact
Leading lines are powerful compositional tools that draw the viewer’s eye through the image to the main subject. These can be roads, fences, rivers, or even patterns in architecture. By incorporating leading lines, you create a sense of depth and direct the viewer’s attention precisely where you want it.
Natural Frames: Look for natural elements in your environment that can frame your subject. This could be an archway, a window, tree branches, or even people. Framing adds context, depth, and can isolate your subject, making it stand out more prominently.
Symmetry and Patterns: Our brains are naturally drawn to symmetry and repeating patterns. Incorporating these elements into your photographs can create a strong sense of order, balance, and visual appeal. Reflections are a great way to achieve symmetry.
Negative Space: Don’t be afraid of empty space! Negative space, the area around and between subjects, can highlight your main subject, reduce clutter, and create a minimalist, powerful image.
Perspective and Point of View
Changing your perspective can completely transform an ordinary scene. Instead of always shooting from eye level, try getting low to the ground to capture a unique angle, or find a higher vantage point.
A different point of view can add drama, reveal new details, and make your photographs more dynamic and interesting.
Consider shooting through objects, using foreground elements to add depth, or even experimenting with reflections.
The goal is to break away from conventional viewpoints and offer a fresh interpretation of your subject. This creative exploration is where true photographic artistry begins to shine, making your images stand out from the crowd.
By consciously applying these compositional techniques, you move beyond merely documenting a scene to actively crafting an image.
It’s about telling a story, evoking a mood, and guiding the viewer’s experience. Mastering these elements will undoubtedly make your smartphone photographs more sophisticated and engaging.
Essential Editing Techniques: Polishing Your Shots
Even the most perfectly composed and exposed photograph can benefit from a touch of post-processing.
Editing isn’t about altering reality; it’s about enhancing the natural beauty of your original capture, correcting minor flaws, and bringing out the best in your image.
With powerful editing apps readily available on smartphones, you can perform professional-grade adjustments right from your device, completing your smartphone camera tricks toolkit.
Think of editing as the final stage of your photographic process. It’s where you refine your vision, adjust colors, sharpen details, and crop for maximum impact.
The goal is to make your photos pop, ensuring they look their best before sharing them with the world.
Understanding Basic Adjustments: Exposure, Contrast, and Saturation
Most editing apps offer a core set of adjustments that are crucial for improving any photograph:
Exposure: Fine-tune the overall brightness of your image. This is your chance to correct slight over or underexposure.
Contrast: Adjusts the difference between the light and dark areas. Increasing contrast can add punch and depth, while decreasing it can create a softer, more subtle look.
Highlights and Shadows: These allow for more granular control over the brightest and darkest parts of your image. You can recover detail in blown-out highlights or lift details from deep shadows.
Saturation and Vibrance: Saturation uniformly increases the intensity of all colors. Vibrance intelligently boosts muted colors without over-saturating already vibrant ones, often leading to a more natural look.
Cropping, Straightening, and Sharpening for Impact
Beyond color and light, structural adjustments play a vital role. Cropping can dramatically improve composition by removing distracting elements or reframing your subject for greater impact.
Don’t be afraid to crop aggressively if it serves the image.
Straightening ensures your horizons are level and vertical lines are true, giving your photos a professional finish.
A slightly tilted horizon can be incredibly distracting. Finally, sharpening adds definition to details, making your images crisper and more professional.
Be careful not to over-sharpen, as this can introduce an unnatural, grainy effect.
With a little practice, these editing techniques become second nature. They empower you to transform good photos into great ones, giving them that polished, professional look without needing expensive software or a desktop computer.
Embrace the editing process as an integral part of your mobile photography journey.
Harnessing Third-Party Apps and External Accessories
While native camera apps are becoming increasingly sophisticated, a vibrant ecosystem of third-party applications and affordable external accessories can further expand your smartphone’s photographic capabilities.
These tools provide specialized functions, advanced controls, and creative effects that can truly push the boundaries of what your mobile device can achieve. Integrating these into your workflow is a powerful way to enhance your smartphone camera tricks.
From apps that offer granular manual control to clip-on lenses that change your focal length, these additions can mimic the versatility of traditional camera setups without the significant investment. Exploring these options opens up new creative avenues and allows for a more tailored photographic experience.
Top Third-Party Camera Apps for Advanced Control
Many apps offer features beyond what native cameras provide, such as full manual control over shutter speed, ISO, focus, and white balance, even on phones where these aren’t natively exposed. Some also offer advanced features like focus peaking, zebras for exposure warnings, and custom presets.
Moment Pro Camera (iOS/Android): Widely regarded for its comprehensive manual controls and intuitive interface, often paired with Moment’s high-quality external lenses.
Halide Mark II (iOS): Known for its exceptional RAW capture, advanced manual controls, and powerful computational photography features.
ProShot (iOS/Android): Offers a DSLR-like interface with extensive control over every camera parameter, including video features.
These apps not only give you more control during capture but often integrate seamlessly with external accessories, creating a more cohesive photographic system.
Exploring External Lenses and Stabilizers
External lenses clip onto your smartphone’s existing camera, offering different focal lengths and effects:
Wide-Angle Lenses: Expand your field of view, perfect for landscapes or fitting more into a tight space.
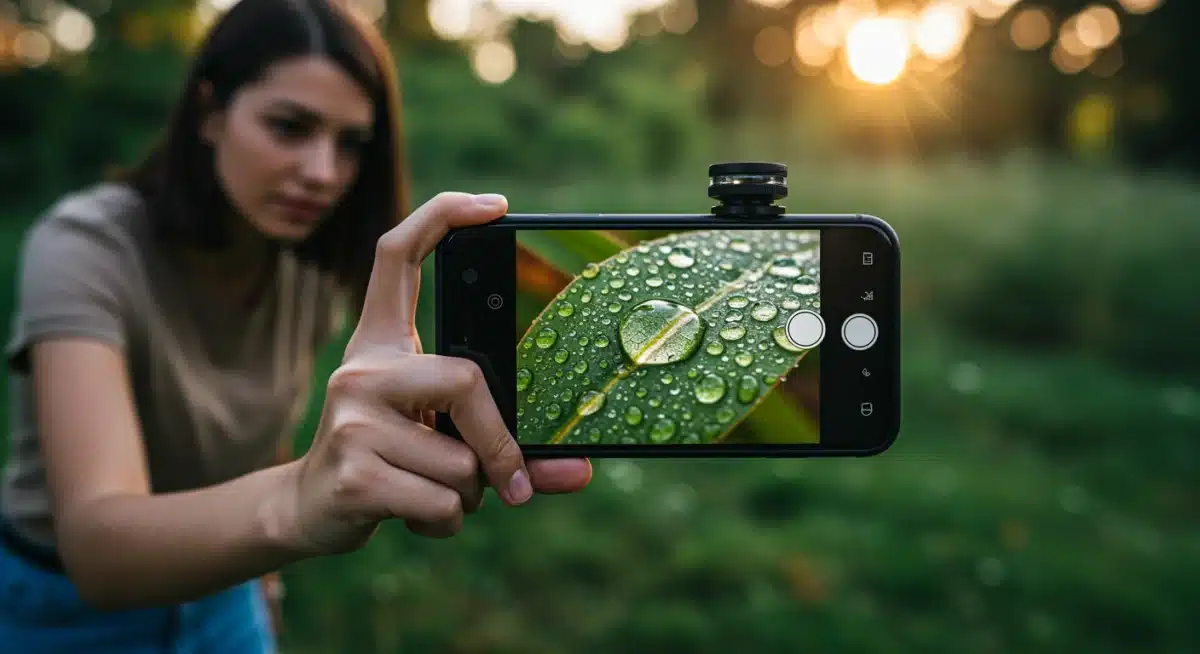
Macro Lenses: Allow for extreme close-ups, revealing intricate details of small subjects like insects or flowers.
Telephoto Lenses: Provide optical zoom, bringing distant subjects closer without digital degradation.
Fisheye Lenses: Create a highly distorted, spherical effect for unique artistic shots.
For video and low-light photography, a gimbal or a small tripod can make a huge difference. Gimbals provide smooth, cinematic footage by counteracting shakes and movements, while tripods enable long-exposure photography, perfectly sharp night shots, and stable time-lapses.
These accessories are relatively inexpensive and can dramatically improve the quality and versatility of your mobile imaging.
By judiciously choosing and utilizing third-party apps and external accessories, you can overcome many of the inherent limitations of smartphone cameras.
They transform your device into a more versatile and professional tool, capable of capturing a wider range of subjects and styles with enhanced precision and creativity.
Advanced Techniques: Long Exposure, HDR, and Panorama
Once you’ve mastered the basics and explored manual controls, it’s time to delve into more advanced photographic techniques that are surprisingly achievable with a smartphone.
Features like long exposure, High Dynamic Range (HDR), and panorama mode are often built into your native camera app or available through third-party solutions, allowing you to capture scenes that would traditionally require specialized equipment.
These advanced smartphone camera tricks add a professional polish to your portfolio.
These techniques are not just about making pictures; they’re about expanding your creative vision and capturing moments in ways that transcend the ordinary. They allow you to manipulate light, space, and time to create truly unique and memorable images.
Capturing Motion with Long Exposure
Long exposure photography involves leaving the camera’s shutter open for an extended period, allowing more light to enter the sensor.
This technique is famous for creating silky smooth water effects, ethereal cloud movements, and mesmerizing light trails from moving vehicles at night.
While traditional long exposure requires a tripod and ND filters, many smartphones now offer ‘Live Photo’ or similar modes that can simulate long exposure by merging multiple frames.
Dedicated Long Exposure Apps: Apps like ‘Slow Shutter Cam’ (iOS) or ‘Camera FV-5’ (Android) give you precise control over shutter speed, enabling true long exposure shots.
Tripod is Essential: For any long exposure, a stable tripod is non-negotiable to prevent camera shake and ensure sharp static elements.
Experiment with Light: Long exposure works best in low light or with strong contrasts, allowing you to play with light sources as creative elements.
High Dynamic Range (HDR) for Balanced Lighting
HDR photography combines multiple exposures of the same scene (one underexposed, one correctly exposed, and one overexposed) into a single image.
This process helps to retain detail in both the brightest highlights and darkest shadows, which is particularly useful in high-contrast scenes like sunsets or backlit portraits. Most smartphones have an automatic HDR mode, but some allow for manual control.
While auto HDR is convenient, understanding when to use it and how it works can prevent unnatural-looking results.
HDR is not always necessary and can sometimes flatten an image if used improperly. Practice discerning when a scene truly benefits from the dynamic range enhancement.
Panoramic Shots for Expansive Views
Panorama mode stitches together multiple photos horizontally or vertically to create a single, wide-angle image.
This is perfect for capturing sweeping landscapes, city skylines, or tall buildings that wouldn’t fit into a single frame. Most native camera apps include a panorama feature that guides you through the process.
For best results, aim for a steady, continuous movement while taking the panorama. Avoid moving subjects, as they can appear distorted.
Practice makes perfect with panoramas, ensuring smooth transitions and accurate stitching for a seamless final image.
By integrating long exposure, HDR, and panorama into your photographic toolkit, your smartphone becomes capable of capturing a much broader range of scenes and effects.
These techniques elevate your photography from simple snapshots to thoughtfully crafted images that showcase a deeper understanding of light and composition.
Accessorizing Smartly: Beyond Lenses and Tripods
While external lenses and tripods are popular choices for enhancing smartphone photography, there’s a world of other smart accessories designed to further elevate your creative potential without breaking the bank.
These tools address specific challenges, from lighting to remote control, and can significantly improve the quality and versatility of your mobile captures. Knowing which accessories to invest in is another key component of advanced smartphone camera tricks.
Choosing the right accessories depends on your photographic interests and the types of shots you aim to achieve.
Thoughtful additions can bridge the gap between casual phone photography and more professional-level results, making your smartphone an even more capable imaging device.
Improving Lighting with Portable LED Lights and Reflectors
Good lighting is paramount for any photograph. While natural light is often ideal, it’s not always available or perfectly positioned.
Portable LED lights, often small and USB-rechargeable, can provide fill light, illuminate subjects in low light, or add creative effects. They offer adjustable brightness and color temperature, allowing you to fine-tune your lighting setup.
Small Reflectors: Simple, foldable reflectors can bounce natural light back onto your subject, filling in shadows and creating a softer, more flattering illumination, especially useful for portraits.
Ring Lights: Popular for vlogging and portraits, ring lights provide even, shadow-reducing illumination that is flattering for faces. Many are designed to hold smartphones directly in their center.
Diffusers: These translucent panels soften harsh light, whether from a natural source or an artificial one, preventing harsh shadows and creating a more pleasing aesthetic.
Remote Shutters and Mounts for Stability and Control
Eliminating camera shake is crucial for sharp images, especially in low light or during long exposures. A remote shutter release, typically a small Bluetooth device, allows you to trigger your phone’s camera without touching the screen, thus preventing any movement that could blur your shot.
This is invaluable when your phone is mounted on a tripod.
Beyond tripods, various mounts exist to secure your phone in creative ways. Flexible ‘gorilla pod’ style tripods can wrap around objects, opening up unique perspectives. Magnetic mounts allow for quick attachment to metal surfaces.
These mounts provide stability and enable hands-free operation, expanding your photographic possibilities significantly.
By strategically adding these relatively inexpensive accessories to your kit, you gain greater control over your lighting and stability. This empowers you to tackle more complex photographic scenarios and achieve higher-quality resu
lts that stand out. Smart accessorizing is a practical step towards professional-level mobile photography.
| Key Technique | Brief Description |
|---|---|
| Manual Mode Mastery | Gain control over ISO, shutter speed, and white balance for precise exposure and creative effects. |
| Creative Composition | Utilize leading lines, framing, and unique perspectives to create visually compelling and dynamic images. |
| Smart Editing | Enhance photos with exposure, contrast, saturation, cropping, and sharpening using mobile editing apps. |
| Strategic Accessories | Employ external lenses, stabilizers, and portable lighting to overcome limitations and broaden creative scope. |
Frequently Asked Questions About Smartphone Photography
Understanding exposure, which is controlled by ISO, shutter speed, and aperture (though aperture is often fixed on smartphones), is crucial.
Mastering how these three interact allows you to control the brightness and motion blur in your photos, giving you creative freedom beyond automatic settings.
While smartphones have made incredible strides, they generally cannot fully replace professional cameras for all scenarios, especially in extreme low light or for very specific optical needs.
However, for most everyday photography and content creation, modern smartphones, with the right techniques, can produce professional-quality results.
Several excellent free editing apps are available. Snapseed by Google offers powerful tools for detailed adjustments.
Adobe Lightroom Mobile (free tier) provides robust color correction and organizational features. VSCO also offers a good range of filters and basic editing tools, making them great choices for enhancing your photos.
For better low-light photos, use manual mode to lower ISO (to reduce noise) and extend shutter speed (requires a tripod).
Utilize your phone’s night mode if available, and consider external portable LED lights. Avoid digital zoom, which degrades image quality in dim conditions.
Yes, external smartphone lenses can be a worthwhile investment, especially if you’re looking to explore specific photographic styles like macro or wide-angle without buying a new phone.
They offer optical advantages over digital zoom and can significantly expand your creative options for a relatively low cost.
Conclusion
The journey to unlocking pro-level photography with your existing smartphone is one of exploration and practice.
By delving into the native camera app’s features, mastering manual controls, understanding advanced compositional techniques, and leveraging powerful editing tools, you can dramatically elevate the quality and artistic impact of your images.
Furthermore, strategically integrating third-party apps and affordable accessories can broaden your creative horizons, allowing you to capture a diverse range of subjects and scenes with precision and flair.
Remember, the best camera is the one you have with you, and with these smartphone camera tricks, your pocket-sized device is more capable than you ever imagined, proving that exceptional photography is truly within everyone’s reach.


