DIY Home Bar: Stylish Entertainment Under $500
 Ever dreamed of having a dedicated space to mix drinks, entertain guests, or simply unwind with your favorite beverage? Creating a DIY home bar is not only achievable but can also be incredibly budget-friendly.
Imagine transforming an underutilized corner of your home into a stylish and functional entertainment hub, all without breaking the bank.
This guide will show you how to build an impressive home bar for under $500, proving that luxury and convenience can be crafted with a little ingenuity and a smart approach to materials.
Planning Your Budget-Friendly Bar Space
Before diving into construction, thoughtful planning is crucial, especially when working with a strict budget.
Identifying the right location and understanding your needs will streamline the entire process, preventing costly mistakes and ensuring a functional outcome.
A well-planned bar not only serves its purpose but also integrates seamlessly into your home’s aesthetic.
Location, Location, Location: Finding the Perfect Spot
The first step in any DIY project is selecting the ideal location. Consider areas with existing plumbing or electrical outlets if you plan for a sink or mini-fridge, though these can often be added later or worked around.
Look for underutilized spaces like a corner in your living room, a section of your dining area, or even a spacious hallway. The size and shape of your chosen spot will dictate the bar’s dimensions and design.
Living Room Corner: Offers easy access for guests and integrates into social gatherings.
Dining Room Wall: Can serve as an extension of your dining experience, perfect for after-dinner drinks.
Basement Nook: Ideal for a more dedicated entertainment zone, potentially allowing for more elaborate setups.
Kitchen Extension: Utilizes existing utilities and can complement your kitchen island or countertop.
Defining Your Bar’s Functionality and Style
What kind of drinks will you primarily serve? Are you a cocktail connoisseur, a wine enthusiast, or a craft beer aficionado?
Your preferences will influence the storage and equipment needed. A cocktail bar requires space for shakers, strainers, and various spirits, while a wine bar might focus on bottle storage and stemware. Consider the overall style of your home as well.
A rustic bar might use reclaimed wood, whereas a modern bar could feature sleek lines and minimalist design. Defining these elements early helps in material selection and prevents impulsive purchases that don’t fit your vision or budget.
To conclude this section, careful consideration of your bar’s placement and intended use lays the groundwork for a successful and cost-effective project.
A clear vision from the outset ensures your efforts are focused and your resources are maximized, leading to a home bar that perfectly suits your lifestyle and budget.
Sourcing Affordable Materials and Furniture
Building a stylish home bar on a budget means getting creative with materials. Forget expensive custom cabinetry; there are countless ways to achieve a high-end look without the premium price tag. This section explores smart sourcing strategies that keep your costs down while maintaining quality and aesthetics.
Repurposing and Upcycling: Your Best Friends
One of the most effective ways to save money is to repurpose existing furniture or materials. An old dresser can be transformed into a chic bar cabinet with a fresh coat of paint and new hardware.
A sturdy bookshelf can become open shelving for bottles and glassware. Look for items at thrift stores, yard sales, or even curbside for free. Sanding, painting, or adding a new top can completely revitalize an old piece, giving it a new life as part of your bar.
Old Dressers: Excellent for base cabinets with drawer storage for tools.
Bookshelves: Perfect for open display of bottles and decorative items.
Pallets: Can be dismantled for rustic wood accents or built into a basic bar frame.
Console Tables: Offer a narrow profile, ideal for smaller spaces or as a serving station.
Budget-Friendly New Materials and DIY Kits
If repurposing isn’t an option, or you need specific components, explore affordable new materials. Plywood, MDF, and basic pine lumber are much cheaper than hardwoods and can be painted or stained to mimic more expensive finishes.
Laminate countertops offer durability and a wide range of styles at a fraction of the cost of granite or quartz.
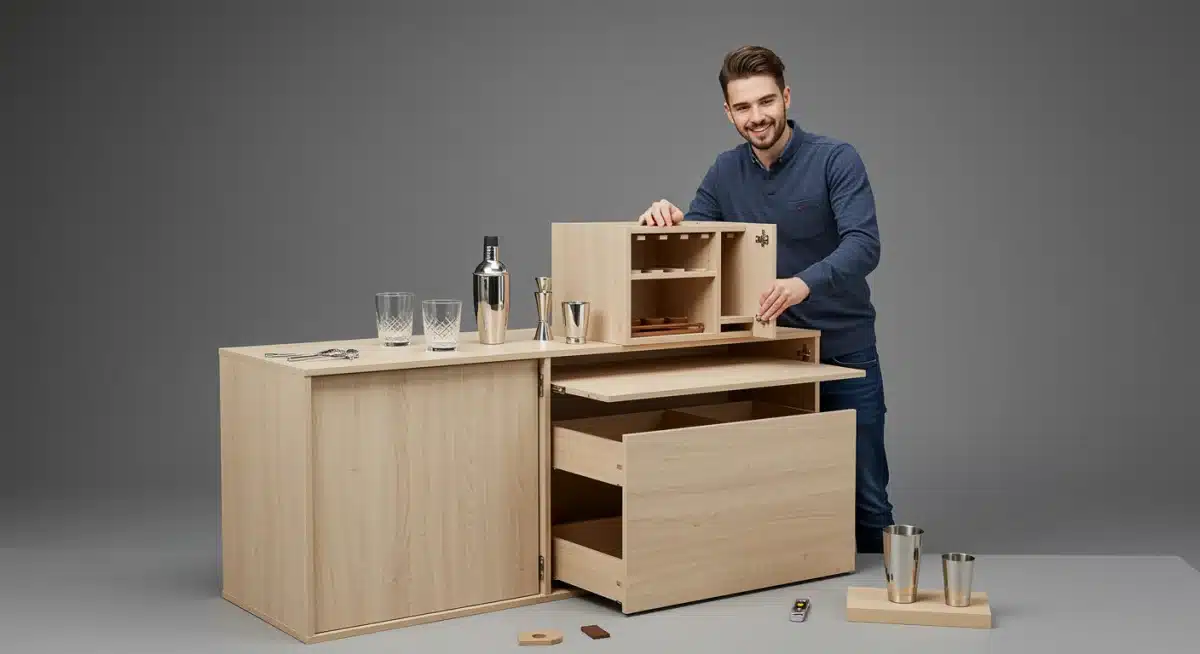
Flat-pack furniture from stores like IKEA can also be customized and integrated into your design. Many online retailers and hardware stores offer DIY bar kits that provide a basic structure, which you can then personalize.
Consider looking for clearance items or discounted materials at your local hardware store. Often, perfectly good lumber or countertop remnants are sold at a reduced price simply because they are end-of-batch or slightly damaged in a non-visible area.
Combining these finds with your repurposed pieces can create a unique and personalized bar that reflects your style without the hefty investment.
In summary, smart sourcing is the cornerstone of a budget-friendly DIY home bar. By embracing repurposing and seeking out affordable new materials, you can create a high-quality, stylish bar that looks far more expensive than it actually is.
This approach not only saves money but also injects character and individuality into your project.
Essential Tools and Basic Construction Techniques
Even if you’re a novice DIYer, building a functional home bar is well within reach with a few essential tools and basic construction knowledge.
You don’t need a professional workshop; a modest set of tools will suffice for most budget-friendly projects. Understanding fundamental techniques will empower you to tackle common challenges and build with confidence.
Must-Have Tools for Your DIY Project
Before you begin, gather the necessary tools. Many of these are common household items, and any specialized tools can often be rented or borrowed.
Investing in a few quality hand tools will serve you well for future projects too. Safety should always be a priority, so ensure you have appropriate protective gear.
Measuring Tape and Pencil: For accurate measurements and markings.
Drill/Driver: Essential for pre-drilling holes and driving screws.
Saw (Hand Saw or Circular Saw): For cutting wood to size. A miter saw is a bonus for precise angle cuts.
Screwdriver Set: For various screw types.
Level: To ensure your bar is straight and stable.
Sandpaper or Electric Sander: For smoothing surfaces before finishing.
Safety Glasses and Gloves: Non-negotiable for personal protection.
Basic Joinery and Finishing Techniques
For most DIY bar projects, simple joinery methods like screwing and gluing will be sufficient. When attaching pieces of wood, always pre-drill pilot holes to prevent splitting, especially near edges.
Wood glue adds significant strength to joints, so use it generously before screwing pieces together. For finishing, proper sanding is key to a smooth, professional look.
Start with a coarser grit sandpaper (e.g., 80-100 grit) to remove imperfections, then move to finer grits (e.g., 150-220 grit) for a silky-smooth finish.
After sanding, apply your chosen stain, paint, or sealant according to the manufacturer’s instructions, ensuring even coats and adequate drying time between applications.
Consider using wood filler for any gaps or imperfections before sanding and painting. This step significantly improves the final appearance, making your DIY project look more professionally finished.
Don’t rush the drying times for paints or sealants; patience here will pay off in the longevity and aesthetics of your bar.
To summarize, a basic set of tools combined with an understanding of simple construction and finishing techniques is all you need to bring your DIY home bar vision to life. Focus on accuracy, safety, and proper finishing for a durable and attractive result.
Designing for Storage and Organization
A functional home bar goes beyond just a surface for mixing; it requires smart storage and organization to keep everything tidy and accessible.
When designing your bar, think about how you’ll store bottles, glassware, and accessories efficiently, especially within a limited budget and space. Effective organization enhances both the usability and the aesthetic appeal of your bar.
Maximizing Space with Shelving and Cabinets
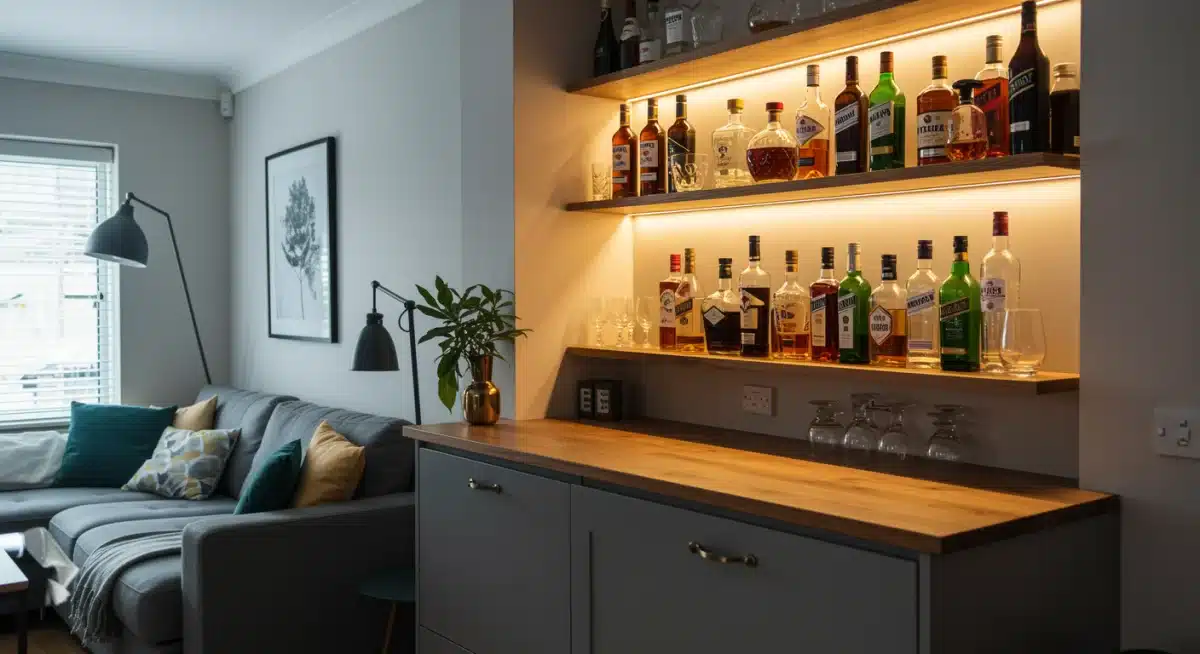
Open shelving is a budget-friendly and stylish way to display your liquor collection and glassware. Floating shelves can be installed easily and cost-effectively, adding a modern touch.
For a more enclosed look, repurposed cabinets or DIY box shelves can provide discreet storage for less-used items or supplies. Consider the height of your bottles when planning shelf spacing to avoid wasted vertical space.
Creative Storage Solutions:
Wall-mounted wine racks: Save counter space and display bottles elegantly.
Under-shelf stemware holders: Keep wine and cocktail glasses safe and organized.
Drawer organizers: Perfect for small bar tools like jiggers, bottle openers, and stirrers.
Rolling utility carts: Offer flexible storage and can be moved wherever needed.
Incorporating Lighting and Decorative Touches
Lighting can dramatically enhance the ambiance of your home bar. LED strip lights, which are inexpensive and easy to install, can be placed under shelves or along the bar top to create a warm, inviting glow.
Battery-operated puck lights offer flexibility without needing an electrical outlet. Decorative touches, such as small plants, framed artwork, or unique coasters, personalize your space and make it feel more inviting. Remember, these elements don’t have to be expensive; often, DIY decor or thrift store finds can add significant character.
Think about the overall mood you want to create. Soft, warm lighting is often preferred for a cozy bar atmosphere, while brighter, more direct lighting might be better for a utilitarian mixing station.
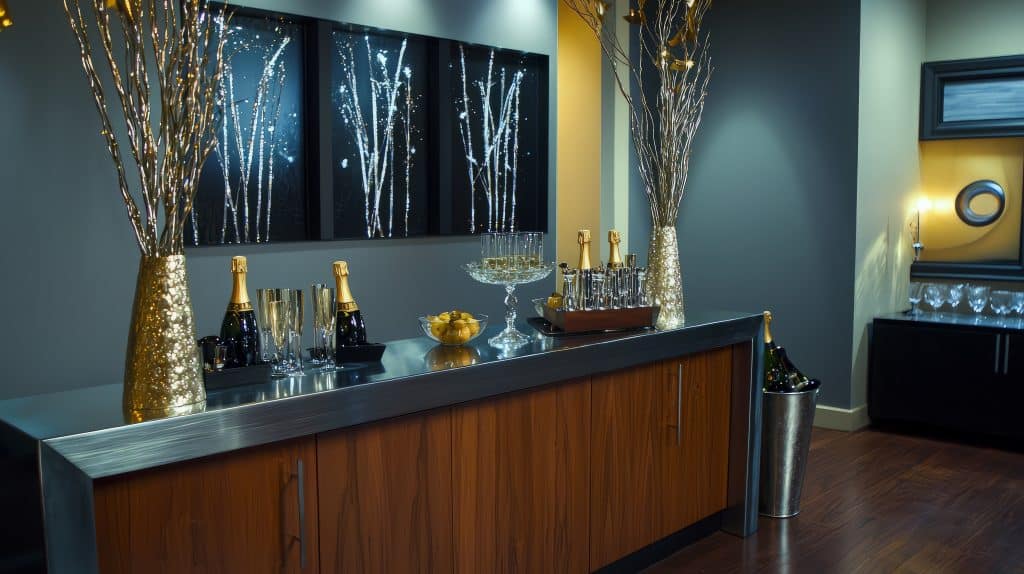
Small details like a vintage tray for holding bottles or a stylish ice bucket can elevate the entire setup. These finishing touches are where your personality truly shines through, making your bar uniquely yours.
In conclusion, smart storage solutions, combined with thoughtful lighting and decorative elements, are key to creating a home bar that is both highly functional and aesthetically pleasing. By focusing on these aspects, you can craft a space that is as organized as it is inviting, all within your budget.
Stocking Your Bar on a Budget
Once your DIY home bar is built and organized, the next exciting step is stocking it. However, filling your bar with spirits, mixers, and glassware can quickly become expensive if not approached strategically.
This section focuses on how to stock your bar efficiently and economically, ensuring you have the essentials without overspending.
Building a Core Liquor Collection
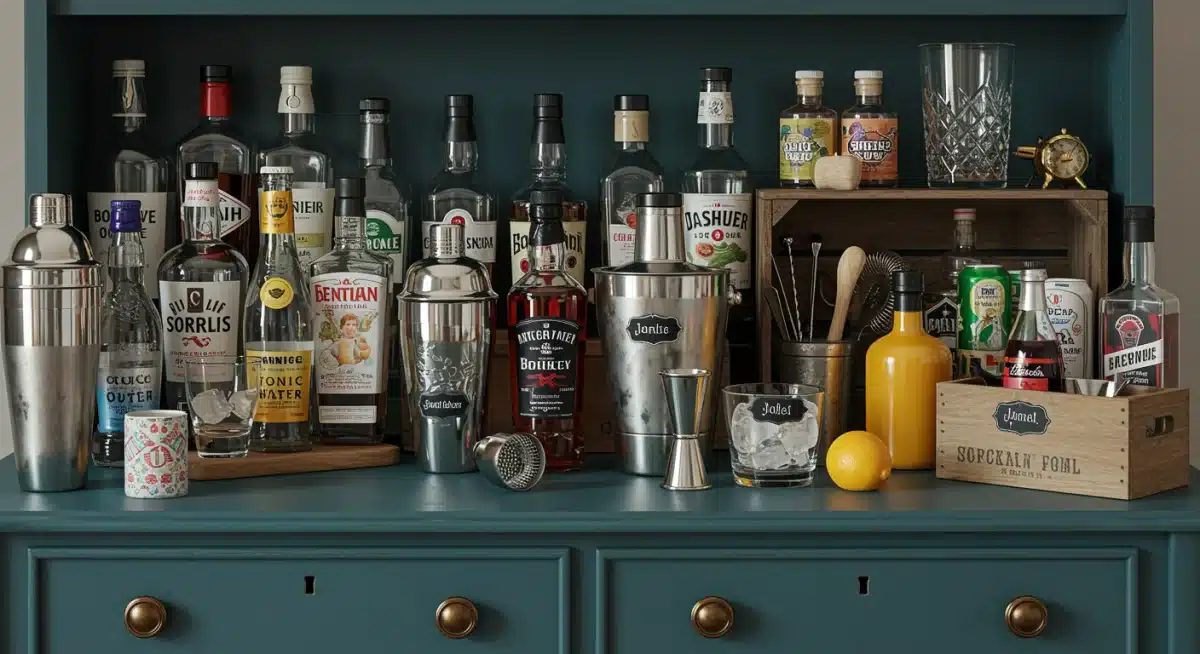
You don’t need every spirit under the sun to start. Begin with a few versatile, high-quality basics that form the foundation of many classic cocktails.
Look for sales, consider store brands, or buy smaller bottles if you’re unsure about a particular spirit. A well-rounded core collection will allow you to mix a wide variety of drinks without a huge initial investment.
Vodka: A versatile base for many cocktails.
Gin: Essential for martinis, gin and tonics, and other botanical drinks.
Rum (Light and Dark): Covers a range from mojitos to darker, spiced cocktails.
Tequila (Blanco): For margaritas and other tequila-based drinks.
Whiskey (Bourbon or Rye): Great for Old Fashioneds, Manhattans, or neat sips.
Vermouth (Sweet and Dry): Crucial for many classic cocktails.
Affordable Mixers, Garnishes, and Glassware
Mixers are just as important as spirits. Stock up on common sodas, juices, and bitters. Many mixers can be bought in bulk or on sale. For garnishes, focus on fresh citrus (lemons, limes, oranges) and perhaps some cherries or olives.
These are relatively inexpensive and add a professional touch to your drinks. For glassware, don’t feel pressured to buy a full set of every type.
Start with a few versatile options like highball glasses, rocks glasses, and perhaps some wine glasses. Thrift stores and discount retailers are excellent places to find unique and affordable glassware.
Making your own simple syrup is another budget-friendly trick. It’s incredibly easy to do with just sugar and water, and it saves you money compared to buying pre-made syrups.
For garnishes, consider growing a small herb garden with mint or basil, which are perfect for many cocktails and add a fresh, vibrant touch.
When it comes to glassware, a mismatched collection can actually add character and a curated feel to your bar, so don’t be afraid to mix and match styles you find at a good price.
To summarize, stocking your DIY home bar on a budget involves prioritizing core spirits, making smart choices for mixers and garnishes, and being resourceful with glassware.
This approach ensures you can create a wide range of delicious drinks without overspending, allowing your efforts to be enjoyed to the fullest.
Elevating Your Bar with Personal Touches
Once the basic structure and essential stock are in place, it’s time to infuse your DIY home bar with personality.
These personal touches are what transform a functional space into a truly inviting and memorable entertainment area.
They don’t have to be expensive; often, the most impactful details are those that reflect your unique style and interests.
DIY Decor and Thematic Elements
Embrace your creativity by crafting some of your bar’s decor. Repurpose old frames for custom cocktail menus or art prints. Create unique coasters from tile samples or wood scraps.
Consider a theme that resonates with you – whether it’s a speakeasy vibe, a tropical oasis, or a modern minimalist aesthetic.
Thematic elements can be introduced through color schemes, specific lighting, or curated accessories that reinforce the chosen style. For instance, vintage travel posters could enhance a worldly theme, while bright colors and faux plants could evoke a tropical feel.
Custom Cocktail Menu: Design and print your own menu of signature drinks.
Personalized Signage: Create a custom bar sign using stencils and paint.
Themed Coasters: Craft coasters from cork, wood, or even ceramic tiles.
Upcycled Planters: Turn old cans or bottles into unique holders for small plants or bar tools.
Comfort and Ambience: Seating and Music
A great home bar isn’t just about the drinks; it’s about the experience. If space allows, add comfortable seating options like bar stools or a small lounge chair. Look for affordable options at second-hand stores or online marketplaces.
A small Bluetooth speaker can provide background music, setting the perfect mood for entertaining or relaxing.
Consider a playlist tailored to your bar’s theme or your preferred music genre. The right lighting, as discussed earlier, plays a huge role in creating ambiance, so experiment with dimmer switches or different light temperatures to find what works best.
Adding a small rug or a comfortable throw can also enhance the coziness of the space, making it feel more like a dedicated retreat.
Don’t underestimate the power of scent; a subtle diffuser with a sophisticated aroma can elevate the overall experience for you and your guests. These elements contribute significantly to the bar’s character and make it a place where people genuinely want to spend time.
In conclusion, personalizing your DIY home bar with handcrafted decor, thematic elements, and thoughtful additions like comfortable seating and music transforms it into a truly special space. These details elevate the ambiance and make your bar a reflection of your unique taste, all while staying within your budget.
Maintaining Your Home Bar and Future Upgrades
Building your DIY home bar is just the beginning. Proper maintenance ensures its longevity and continued appeal, while strategic future upgrades can evolve the space as your needs or budget change. Thinking long-term allows you to enjoy your creation for years to come, continually refining it to perfection.
Cleaning and Organization for Longevity
Regular cleaning is essential to keep your bar looking its best and functioning efficiently. Wipe down surfaces after each use to prevent sticky residue from building up. Periodically clean glassware and bar tools, ensuring they are dry before storage to prevent water spots or rust.
Keep bottles neatly arranged and check expiration dates on mixers or garnishes. A well-maintained bar not only looks better but also makes the drink-making process more enjoyable and hygienic.
For wooden surfaces, use appropriate wood cleaners or polishes to protect the finish. If you have any fabric elements, such as bar stool cushions, spot clean them as needed.
Establishing a simple routine for tidying up after each use will prevent clutter and make larger cleaning tasks less daunting. This proactive approach ensures your bar remains a welcoming and pristine space for all your entertaining needs.
Smart Upgrades When Your Budget Allows
While you started with a budget-friendly approach, there may come a time when you want to enhance your bar further.
Plan for future upgrades that add value and functionality without having to rebuild entirely. These could include a small bar fridge for chilling beverages, a dedicated ice maker, or even custom shelving for a growing collection.
Consider adding a small sink if plumbing is feasible, or upgrading to more durable countertops down the line. Each upgrade can be budgeted for individually, allowing you to continually improve your bar without financial strain.
For example, you might initially use a simple bucket for ice, but later invest in a countertop ice maker.
Your initial lighting might be basic LED strips, which could eventually be replaced with more sophisticated recessed lighting or stylish pendant fixtures.
Thinking about these potential upgrades during the initial planning phase can help you design a bar that is adaptable and ready for future enhancements.
This foresight ensures that your DIY home bar remains a dynamic and evolving space, always meeting your entertainment needs.
In summary, consistent maintenance and a forward-thinking approach to upgrades are key to enjoying your DIY home bar for many years.
By keeping it clean and planning for future enhancements, your budget-friendly creation will continue to be a source of pride and enjoyment, evolving with your lifestyle and tastes.
| Key Aspect | Budget-Friendly Tip |
|---|---|
| Planning & Design | Choose a compact space; define functionality to avoid overspending on unnecessary features. |
| Materials Sourcing | Repurpose old furniture, use budget lumber/laminates, check thrift stores for unique finds. |
| Tools & Construction | Utilize basic hand tools; focus on simple joinery and proper finishing for a professional look. |
| Stocking & Decor | Buy core spirits on sale, make own syrups, find affordable glassware, DIY decor items. |
Frequently Asked Questions About DIY Home Bars
At a minimum, you need a sturdy surface (like a repurposed console table or small cabinet), basic shelving for bottles, a few versatile glasses, and a core set of spirits and mixers.
Focus on functionality over elaborate design to keep costs low and maximize utility in a small footprint.
Absolutely! The key is smart sourcing, which includes repurposing old furniture, using budget-friendly new materials like plywood or MDF, and shopping for deals on spirits and glassware. DIY decor also significantly reduces costs while adding personal flair.
Thrift stores, yard sales, and online marketplaces are excellent for finding inexpensive furniture to repurpose.
Hardware stores often have clearance sections for lumber and countertop remnants. Discount retailers are great for glassware and bar accessories.
Focus on clean lines, good finishing (sanding and painting/staining), and thoughtful organization. Strategic lighting, like LED strips, and a few well-chosen decorative accents can elevate the look significantly, making it appear more polished and high-end.
Consider making your own cocktail menu, crafting custom coasters, or repurposing old bottles as vases. Wall art made from vintage prints or even framed photos can add character. Small plants or unique serving trays also contribute to a personalized and inviting atmosphere.
Conclusion
Creating a DIY home bar for under $500 is not just an attainable goal; it’s a rewarding project that adds significant value and enjoyment to your home.
By embracing thoughtful planning, resourceful material sourcing, basic construction techniques, and creative personal touches, you can transform an ordinary space into an extraordinary entertainment hub. The satisfaction of crafting your own stylish bar, tailored to your tastes and budget, is immense.
It proves that with a little ingenuity and effort, a luxurious amenity can be brought to life without the need for a hefty investment. So, gather your tools, unleash your creativity, and get ready to toast to your new, budget-friendly home bar.


