Build a Compost Bin DIY: Sustainable Gardening & 10% Waste Reduction
 Are you looking for a practical way to embrace sustainability, enrich your garden, and significantly cut down on household waste?
Learning to build a compost bin is an accessible and rewarding DIY project that offers all these benefits and more. Imagine transforming kitchen scraps and yard trimmings into valuable soil amendments, all while reducing your landfill contributions by an estimated 10%.
Understanding the Basics of Composting
Composting is nature’s recycling process, where organic materials decompose into a dark, crumbly, earth-smelling substance called humus or compost. This rich material is a gardener’s best friend, improving soil structure, retaining moisture, and providing essential nutrients for plant growth.
Before you start building, it’s crucial to grasp the fundamental principles that govern successful composting. It’s not just about throwing organic matter into a pile; it’s about creating the right conditions for microorganisms to thrive.
The core of composting relies on balancing four key ingredients: greens, browns, air, and water. Greens provide nitrogen, fueling microbial growth, while browns supply carbon, which is the energy source.
Without the right balance, your compost pile can become either a smelly, slimy mess or a dry, inactive heap. Aeration is vital for oxygen-loving microbes, and adequate moisture keeps the decomposition process moving smoothly. Understanding these elements is the first step towards a thriving compost system.
The “” and “” Balance
Achieving the correct carbon-to-nitrogen ratio is perhaps the most critical aspect of effective composting.
A general rule of thumb is to aim for a 25-30 parts carbon to 1 part nitrogen ratio. This translates to roughly two to three parts brown materials for every one part green material by volume. It might sound scientific, but in practice, it means layering your materials thoughtfully.
Greens (Nitrogen-rich): Fresh grass clippings, fruit and vegetable scraps, coffee grounds, tea bags, and fresh manure. These are typically moist and break down quickly.
Browns (Carbon-rich): Dried leaves, straw, wood chips, shredded newspaper, cardboard, and sawdust. These materials are usually dry and provide structure to the pile.
Common Mistakes: Adding too many greens can lead to an odoriferous, anaerobic pile, while too many browns will slow down decomposition considerably.
By consciously mixing these components, you provide a balanced diet for the microorganisms responsible for decomposition.
This balance ensures a faster, more efficient composting process, leading to high-quality compost in a shorter amount of time. Remember, variety is key; a diverse mix of organic waste tends to break down more effectively.
Essential Conditions for Decomposition
Beyond the greens and browns, air and water are non-negotiable for a healthy compost pile. Microorganisms need oxygen to do their work.
Without it, anaerobic bacteria take over, producing foul odors and a much slower decomposition rate. Regular turning of your compost pile introduces oxygen, preventing compaction and promoting even breakdown.
Water content is equally important. A compost pile should feel like a wrung-out sponge—moist but not soggy. Too dry, and decomposition halts; too wet, and it becomes anaerobic. Rain often helps, but in dry climates or during drought, you may need to add water manually.
The combined efforts of balancing materials, aerating, and maintaining moisture will ensure a vibrant ecosystem within your bin, breaking down organic matter efficiently and without unpleasant smells. This foundational knowledge empowers you to manage your compost effectively, regardless of the bin design you choose.
Choosing the Right Compost Bin Design
Selecting the appropriate compost bin design is a crucial step in your DIY composting journey. The best choice depends on several factors, including the amount of organic waste you generate, the space available in your yard, your budget, and your desired level of involvement.
There’s a wide array of designs, from simple open piles to elaborate multi-chamber systems, each with its own advantages and disadvantages. Considering these aspects will help you pick a design that fits your lifestyle and composting goals.
For many homeowners, a DIY approach to building a compost bin offers the perfect balance of cost-effectiveness and customization.
Whether you opt for a basic pallet design or a more robust wooden structure, the act of constructing your own bin creates a deeper connection to the composting process.
This section will explore popular DIY compost bin designs, guiding you through the considerations for each, ensuring you make an informed decision for your sustainable gardening efforts.
Single-Chamber Bin: Simplicity and Ease
A single-chamber compost bin is the simplest and most common design for beginners. It involves a single enclosed space where all organic materials are added and allowed to decompose.
This design is excellent for smaller households or those with limited space, as it requires minimal construction effort and materials. Its straightforward nature makes it easy to manage, but it does have some limitations when it comes to continuous composting.
Advantages: Easy to build, low cost, suitable for small volumes of waste, requires minimal maintenance once set up.
Disadvantages: New materials are added to partially decomposed ones, which can slow down the overall process. You’ll need to empty it completely before starting a new batch.
Ideal For: Gardeners who produce moderate amounts of waste and don’t mind waiting for a batch to fully decompose before using the compost.
Despite its simplicity, a well-managed single-chamber bin can produce excellent compost. Regular turning and proper layering of greens and browns are still essential for optimal results.
The key is to be consistent with your additions and maintenance to keep the decomposition process active. This design serves as a great entry point into composting, allowing you to gain experience before potentially scaling up to more complex systems.
Multi-Chamber Bin: Continuous Composting
For those generating larger volumes of organic waste or seeking a more continuous composting cycle, a multi-chamber bin is an ideal solution. Typically consisting of two or three interconnected compartments, this design allows you to manage different stages of decomposition simultaneously.
You can add fresh materials to the first chamber, let the second chamber actively decompose, and allow the third chamber to cure, producing a steady supply of finished compost.
The flexibility of a multi-chamber system makes it highly efficient for continuous composting. As material moves from one chamber to the next, it undergoes different stages of breakdown, ensuring that you always have a batch of ready-to-use compost.
This design does require more space and a slightly more involved construction process, but the benefits of a continuous supply of nutrient-rich soil amendment are often well worth the effort for dedicated gardeners.
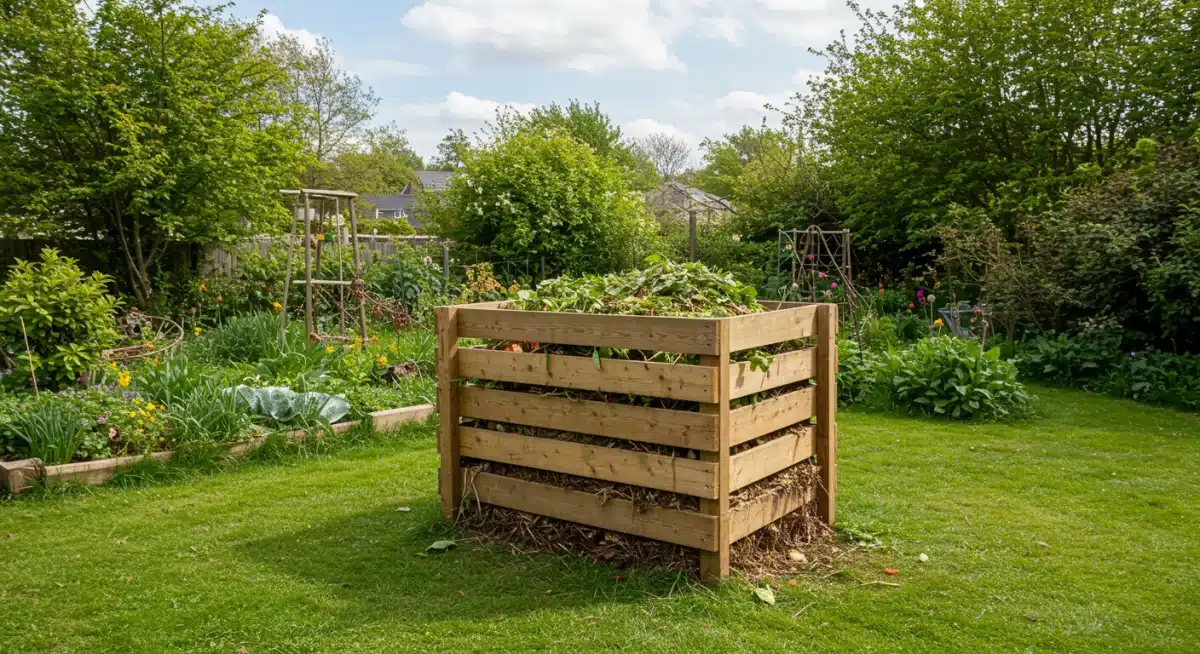
Step-by-Step Guide to Building a Simple Pallet Compost Bin
Building a compost bin from repurposed wooden pallets is one of the most popular, cost-effective, and environmentally friendly DIY projects.
Pallets are often available for free from local businesses or construction sites, making this a budget-friendly option.
This guide will walk you through the process of constructing a sturdy and functional single-chamber pallet compost bin, perfect for beginners and seasoned composters alike. The simplicity of this design makes it an excellent starting point for anyone looking to reduce waste and enrich their garden.
Before you begin, gather all your materials and ensure you have a safe, level workspace. Safety is paramount, so wear appropriate protective gear, including gloves and eye protection.
The beauty of a pallet compost bin lies in its modular nature; you can easily expand it later if your composting needs grow. This hands-on project not only provides a practical solution for organic waste but also instills a sense of accomplishment.
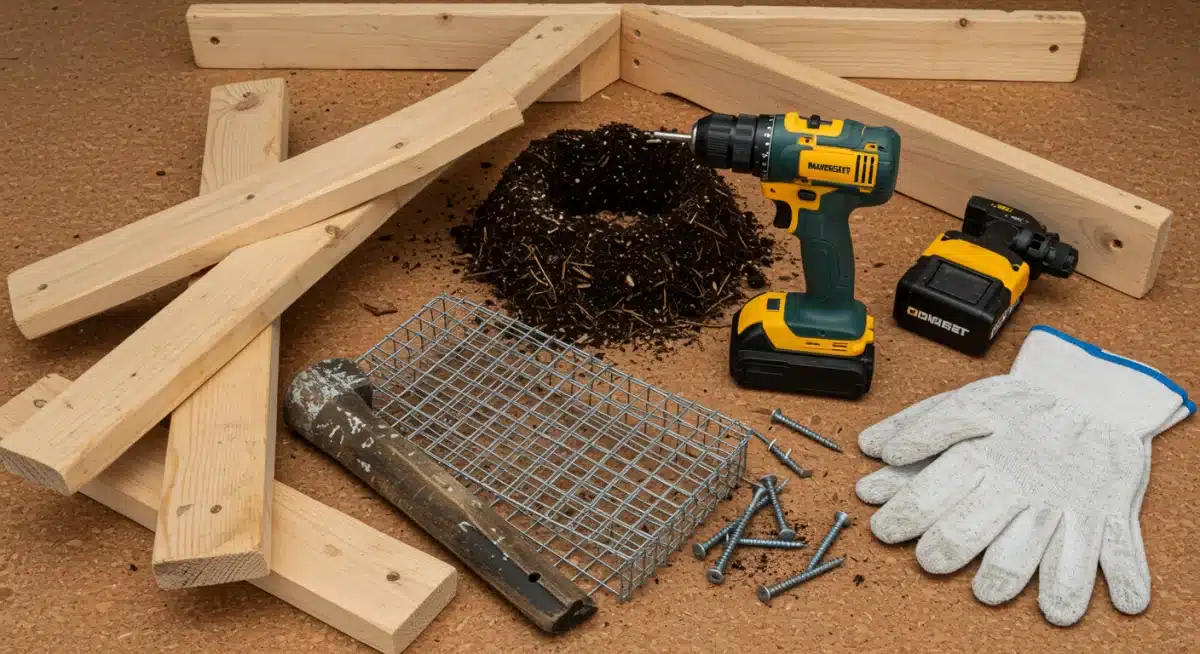
Gathering Your Materials and Tools
The success of your pallet compost bin starts with selecting the right materials and having the necessary tools at hand. Look for pallets that are in good condition, free from significant rot, and ideally, heat-treated (marked with “”) rather than chemically treated (marked with “”).
Chemically treated pallets can leach harmful substances into your compost, which you want to avoid.
Materials:
4-5 wooden pallets (standard size, approximately 40″ x 48″)
Zip ties, strong wire, or hinges (for connecting pallets)
Optional: Corner braces or additional lumber for added stability
Tools:
Work gloves
Safety glasses
Drill with appropriate bits
Wire cutters (if using wire)
Pliers
Ensuring you have all these items before you start will streamline the building process and prevent unnecessary interruptions. Remember, the quality of your materials directly impacts the durability and longevity of your compost bin. Taking a little extra time to source good pallets will pay off in the long run.
Assembly Instructions for a Pallet Bin
Once you have your materials, assembly is straightforward. This method creates a three-sided bin with an open front for easy access, or you can add a fourth pallet as a removable front panel.
Start by arranging three pallets to form a “” shape, ensuring they are flush at the corners. The goal is to create a stable structure that can withstand the weight of decomposing organic matter.
Position the First Three Pallets: Stand three pallets upright, forming a “” shape. Make sure the most solid side of each pallet faces outwards for better containment.
Connect the Pallets: Use heavy-duty zip ties, strong wire, or hinges to securely fasten the pallets together at each corner. If using zip ties or wire, thread them through the gaps in the pallet slats and twist or tighten them firmly. For hinges, screw them into the adjacent pallet frames.
Add the Fourth Pallet (Optional Front): If you want a more enclosed bin, attach the fourth pallet to one side with hinges, creating a door. Alternatively, you can simply lean it against the front and remove it for turning or emptying.
Secure to the Ground (Optional): For extra stability, you can drive stakes into the ground at each corner and attach them to the pallets, or use L-brackets and concrete anchors if placing on a concrete slab.
This simple assembly creates a robust structure that allows for good airflow, essential for aerobic decomposition.
The gaps in the pallet slats provide natural ventilation, while the open top allows for easy addition of materials and rainfall. With your pallet compost bin built, you’re ready to start filling it with organic waste and begin your composting journey.
Maintaining Your Compost Pile for Optimal Results
Building a compost bin is just the beginning; the real magic happens through consistent and proper maintenance of your compost pile.
A well-maintained pile actively breaks down organic matter, producing rich compost in a relatively short period. Neglecting the pile, however, can lead to slow decomposition, unpleasant odors, and an influx of pests.
Regular attention to your compost bin ensures that the microorganisms are thriving and doing their job efficiently, transforming waste into a valuable resource for your garden.
Effective compost maintenance involves a few key practices: monitoring moisture levels, turning the pile for aeration, and ensuring a balanced mix of green and brown materials.
These simple steps, when performed consistently, will accelerate the composting process and yield high-quality humus.
Think of it as nurturing a living ecosystem; the more care you put in, the better the output. This section will delve into the specifics of maintaining your compost pile, guiding you toward optimal results.
Monitoring Moisture and Aeration
The two most critical factors for a thriving compost pile are moisture and aeration. Without adequate moisture, the microorganisms responsible for decomposition cannot function properly, and the pile will dry out and become inactive.
Conversely, a pile that is too wet will become anaerobic, leading to foul odors and a sluggish breakdown process. The ideal moisture content is similar to that of a wrung-out sponge—damp but not dripping.
Aeration is equally vital. Composting relies on aerobic bacteria, which require oxygen to survive and work efficiently. A dense, compacted pile starves these bacteria of oxygen, allowing anaerobic bacteria to take over, which produce methane and other unpleasant smells.
Regular turning of the compost pile introduces oxygen, mixes the materials, and helps regulate temperature. Aim to turn your pile every few days or at least once a week, especially in the early stages of decomposition, to keep it actively working.
Turning and Mixing Your Compost
Turning your compost pile is more than just aeration; it’s also about mixing and distributing the materials evenly.
When you turn the pile, you bring the outer, cooler material to the center, where decomposition is most active, and expose new surfaces to air and moisture. This ensures that all organic matter eventually gets its turn in the ” zone” of the pile, leading to more uniform decomposition.
Frequency: Turn every 3-7 days during active composting. Less frequently once the pile cools down and decomposition slows.
Tools: A pitchfork or compost aerator is ideal for turning. These tools allow you to easily lift and mix the materials without excessive effort.
Technique: Aim to move material from the edges to the center, and from the top to the bottom. Break up any large clumps to improve airflow.
Regular turning also helps you identify any imbalances. If the pile is too dry, you can add water as you turn. If it’s too wet, adding more brown, dry materials can help absorb excess moisture.
This continuous feedback loop of monitoring and adjusting is key to maintaining a healthy, productive compost pile.
With consistent turning and proper moisture management, you’ll be well on your way to producing nutrient-rich compost for your garden.
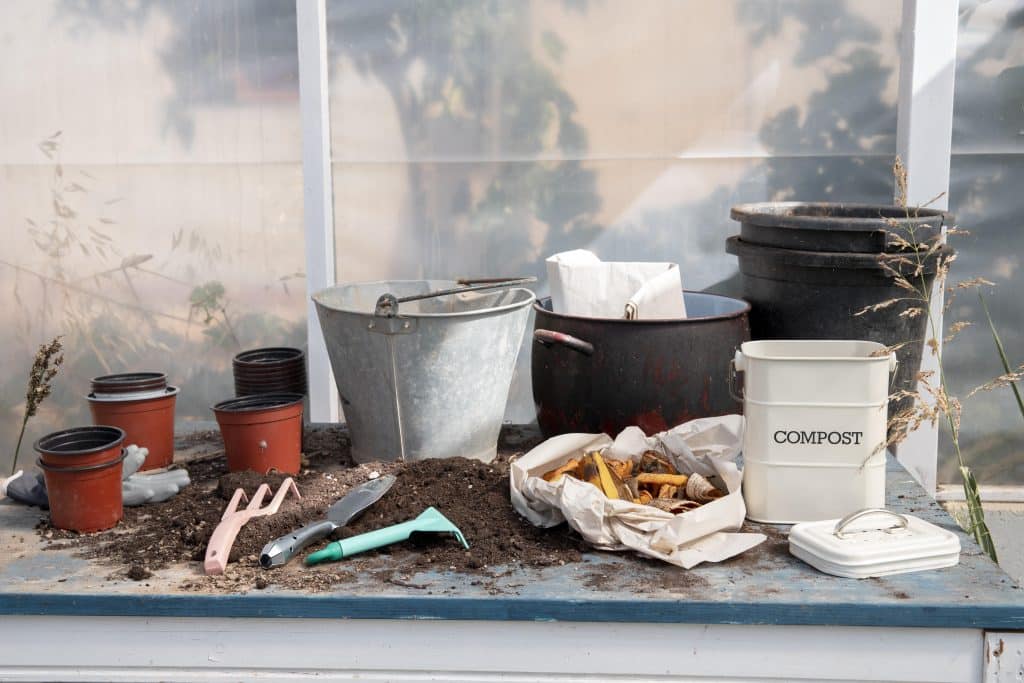
What to Compost and What to Avoid
Knowing what materials are suitable for your compost bin and what should be kept out is fundamental to successful composting.
The right ingredients ensure a healthy, active pile that breaks down efficiently and produces high-quality compost. Conversely, adding incorrect items can introduce pests, create unpleasant odors, or even harm your garden when the compost is used.
This knowledge is crucial for anyone looking to build a compost bin and embark on a sustainable waste reduction journey.
A diverse mix of appropriate organic materials contributes to a richer, more balanced compost. By carefully selecting what goes into your bin, you not only accelerate the decomposition process but also prevent potential problems that could arise from unsuitable additions.
This section will provide a clear guide on what to embrace and what to steer clear of, helping you maintain a clean, efficient, and productive composting system.
Compost-Friendly Materials (Greens & Browns)
A wide variety of organic materials can be safely added to your compost bin, contributing to a rich and balanced finished product.
These materials are generally categorized into “” and “,” as discussed earlier, and a good mix of both is essential. Understanding what falls into each category will help you maintain the ideal carbon-to-nitrogen ratio.
Greens:
Fruit and vegetable scraps (peels, cores, wilted produce)
Coffee grounds and filters
Tea bags (remove staples)
Fresh grass clippings
Plant trimmings (non-diseased)
Eggshells (crushed)
Browns:
Dried leaves
Straw and hay
- Shredded newspaper and cardboard (non-glossy, non-colored)
- Sawdust and wood chips (in moderation)
- Small twigs and branches (chopped into small pieces)
By focusing on these compost-friendly materials, you’ll create a diverse and nutritious environment for the beneficial microorganisms in your bin.
Always aim to chop larger items into smaller pieces to speed up decomposition. The smaller the pieces, the more surface area is available for microbial action, leading to faster composting.
Materials to Avoid in Your Compost Bin
Just as important as knowing what to compost is understanding what should never go into your bin. Certain materials can attract pests, introduce pathogens, create foul odors, or simply not break down effectively, compromising the quality and safety of your compost.
Avoiding these items is key to maintaining a healthy and manageable composting system.
Meat, bones, and dairy products: Attract pests (rodents, flies) and produce strong, unpleasant odors.
Oils, fats, and greases: Also attract pests, slow down decomposition, and can become rancid.
Diseased or pest-infested plants: Can spread diseases or pests back into your garden when compost is used.
Weeds with seeds: Weed seeds can survive the composting process and germinate in your garden.
Pet waste (dog/cat feces): May contain harmful pathogens that can contaminate your compost and garden.
Chemically treated wood or sawdust: Can leach toxins into your compost.
Glossy paper or colored inks: May contain heavy metals or other harmful chemicals.
By strictly adhering to this list of materials to avoid, you ensure that your compost remains safe, effective, and free from undesirable elements.
A clean and well-managed compost bin is a cornerstone of sustainable gardening and significantly contributes to reducing your household’s waste footprint.
Benefits of Composting for Your Garden and the Environment
Composting offers a multitude of benefits that extend far beyond simply reducing household waste. It’s a powerful practice that enriches your garden, improves soil health, and contributes positively to the environment.
When you build a compost bin and commit to composting, you’re not just recycling; you’re actively participating in a regenerative cycle that minimizes your ecological footprint and fosters a healthier ecosystem. The advantages are tangible, from vibrant plant growth to a reduction in greenhouse gas emissions.
Embracing composting is a simple yet profound way to make a difference. It transforms what would otherwise be considered trash into a valuable resource, creating a closed-loop system in your home.
Understanding these diverse benefits can provide additional motivation and reinforce the value of your DIY composting efforts. Let’s explore how composting can revolutionize your garden and contribute to a more sustainable planet.
Enhanced Soil Health and Plant Growth
The most immediate and noticeable benefit of composting for gardeners is the incredible improvement in soil health. Compost is often referred to as ” gold” because of its remarkable ability to transform lifeless soil into a rich, living medium.
When added to garden beds, compost acts as a slow-release fertilizer, providing essential nutrients that plants need to thrive, without the risk of chemical burn associated with synthetic fertilizers.
Improved Soil Structure: Compost breaks up heavy clay soils, making them more workable and improving drainage. In sandy soils, it helps bind particles together, increasing water retention.
Increased Nutrient Availability: It slowly releases a wide range of micronutrients and macronutrients, feeding plants consistently over time.
Enhanced Microbial Life: Compost introduces beneficial microorganisms, fungi, and earthworms to the soil, which further break down organic matter and make nutrients available to plants.
Disease Suppression: A healthy soil microbiome, fostered by compost, can help suppress plant diseases and pests, reducing the need for chemical interventions.
By regularly incorporating compost into your garden, you create a vibrant, resilient ecosystem that supports robust plant growth, higher yields, and healthier plants overall. This natural approach to soil enrichment reduces reliance on external inputs and creates a more sustainable and productive garden.
Environmental Impact: Waste Reduction and Emissions
Beyond the garden, composting has a significant positive impact on the environment, primarily through waste reduction and the mitigation of greenhouse gas emissions.
In the United States, organic waste constitutes a substantial portion of municipal solid waste, much of which ends up in landfills.
When organic materials decompose in anaerobic landfill conditions, they produce methane, a potent greenhouse gas far more impactful than carbon dioxide.
By diverting kitchen scraps and yard waste to your compost bin, you directly reduce the amount of material sent to landfills, thereby decreasing methane emissions. This simple act can contribute to a 10% reduction in your household’s overall waste, making a tangible difference in waste management efforts.
Furthermore, using compost reduces the need for chemical fertilizers, which often have high energy costs associated with their production and can lead to water pollution from runoff.
Composting also plays a role in carbon sequestration. Healthy, compost-rich soil can store significant amounts of carbon, helping to offset atmospheric carbon dioxide levels.
This makes composting a powerful tool in combating climate change, demonstrating that small actions at home can collectively lead to substantial environmental benefits. It’s a testament to how building a compost bin isn’t just a home hack but a meaningful step towards a greener planet.
Troubleshooting Common Composting Problems
Even with the best intentions and a well-designed compost bin, you might encounter some common issues during your composting journey. These problems are usually easy to diagnose and fix, and understanding how to troubleshoot them is a valuable skill for any composter.
Don’t be discouraged if your pile isn’t behaving exactly as expected; it’s all part of the learning process. Addressing these issues promptly ensures your compost bin remains an efficient and pleasant part of your sustainable home efforts.
Most composting problems stem from an imbalance in the key ingredients: greens, browns, air, and water. Once you learn to recognize the symptoms of these imbalances, you can quickly adjust your approach and get your pile back on track.
This section will cover the most frequent composting challenges, offering practical solutions to help you maintain a healthy and productive compost system, ensuring you continue to reduce waste effectively.
Dealing with Unpleasant Odors
One of the most common complaints about composting is the presence of foul odors. A healthy compost pile should have an earthy, pleasant smell, similar to forest soil.
If your compost bin is emitting strong, unpleasant odors, it’s usually a sign that something is out of balance, most often an excess of nitrogen or a lack of oxygen.
Rotten Egg Smell (Sulfur): Often indicates an anaerobic pile, usually due to too much moisture or not enough aeration.
Ammonia Smell: Points to too much nitrogen (greens) in relation to carbon (browns).
Solutions:
For Rotten Egg Smell: Turn the pile thoroughly to introduce oxygen. If too wet, add dry, brown materials like shredded leaves or newspaper.
For Ammonia Smell: Add more carbon-rich brown materials such as dry leaves, straw, or shredded cardboard. Mix well.
- Avoid: Do not add meat, dairy, or oily foods, which are major contributors to bad smells.
By addressing these imbalances, you can quickly neutralize unpleasant odors and restore your compost pile to a healthy, active state.
Regular monitoring of the smell of your compost bin is a good indicator of its health and can help you catch problems early.
Attracting Pests and How to Prevent Them
Another common concern for composters is the attraction of pests such as rodents, insects, and other critters. While some insects like ants and earwigs are natural inhabitants of a healthy compost pile, larger pests can be problematic.
The presence of pests usually indicates that certain materials are being added inappropriately or that the bin itself isn’t secure enough.
Common Pests: Rodents (rats, mice), raccoons, flies, and sometimes stray animals.
Causes: Adding meat scraps, dairy products, cooked foods, and oily residues are major attractants. An open or easily accessible bin can also invite pests.
Prevention:
Do not add prohibited items: Strictly avoid meat, dairy, cooked foods, and oily waste.
Bury food scraps: Always bury fresh kitchen scraps deep within the pile, covering them with a layer of brown materials.
Secure your bin: Ensure your compost bin is enclosed and difficult for pests to access. For pallet bins, adding wire mesh around the exterior can help.
Maintain an active pile: A hot, actively decomposing pile is less attractive to pests.
By following these preventive measures, you can significantly reduce the likelihood of pests becoming an issue. A well-managed and secure compost bin should seamlessly integrate into your backyard without attracting unwanted visitors, allowing you to enjoy the benefits of composting without concern.
Advanced Composting Techniques and Tips
Once you’ve mastered the basics of building a compost bin and maintaining a healthy pile, you might be interested in exploring more advanced composting techniques.
These methods can accelerate the decomposition process, allow for a wider range of materials, or simply make composting more efficient for your specific needs.
Moving beyond the fundamentals can be a rewarding next step for those committed to maximizing their composting efforts and achieving even better results for their garden and the environment.
Advanced techniques often involve a deeper understanding of microbial activity, temperature management, and specialized equipment.
While not strictly necessary for successful composting, they can offer significant advantages, especially for avid gardeners or those with larger volumes of organic waste.
This section will introduce you to some of these techniques, providing insights into how you can further optimize your composting system and enhance its productivity.
Hot Composting vs. Cold Composting
Composting can generally be divided into two main approaches: hot composting and cold composting. The method you choose depends on your goals, the time you have available, and the volume of materials you’re processing. Both methods effectively break down organic matter, but they differ significantly in speed and management requirements.
Cold Composting (Passive):
Process: Simply piling organic materials and letting nature take its course.
Timeframe: Can take anywhere from several months to a year or more.
Maintenance: Minimal turning or monitoring required.
Best for: Gardeners with less time or smaller amounts of waste, willing to wait longer for finished compost.
Hot Composting (Active):
Process: Requires careful balancing of greens and browns, consistent moisture, and frequent turning to maintain high temperatures (130-160°F).
Timeframe: Can produce finished compost in as little as 3-4 weeks.
Maintenance: Requires more active management, including regular turning and monitoring of temperature and moisture.
Best for: Gardeners who want compost quickly, can process larger volumes of waste, and are willing to be more hands-on.
Hot composting is highly effective at killing weed seeds and pathogens due to the high temperatures achieved. Cold composting, while less demanding, may not reach temperatures sufficient to eradicate these unwanted elements. Choosing between hot and cold composting depends on your priorities and commitment to the process.
Compost Accelerators and Activators
For those looking to speed up the composting process, especially with cold composting, compost accelerators and activators can be useful tools.
These products are designed to boost microbial activity, helping organic materials break down more quickly. While not strictly necessary for successful composting, they can be particularly beneficial when starting a new pile or trying to rejuvenate a sluggish one.
Compost accelerators typically contain a concentrated mix of nitrogen-rich materials or beneficial microorganisms. Nitrogen-rich activators, such as alfalfa meal, blood meal, or even fresh manure, act as “” to kickstart microbial growth.
Microbial activators, on the other hand, introduce specific strains of bacteria and fungi that are highly efficient at decomposing organic matter. These can be particularly helpful if your compost pile lacks a diverse microbial population.
When using accelerators, it’s important to follow the product’s instructions and integrate them thoroughly into your pile.
Remember that a balanced mix of greens and browns, along with proper aeration and moisture, remains the most critical factor for rapid decomposition. Accelerators merely give Mother Nature a little extra nudge.
By incorporating these advanced tips, you can fine-tune your composting process, making it even more efficient and productive for your sustainable gardening endeavors.
| Key Aspect | Brief Description |
|---|---|
| Green/Brown Balance | Crucial 2:1 or 3:1 brown to green ratio for efficient decomposition and preventing odors. |
| Moisture & Aeration | Maintain a wrung-out sponge dampness and turn regularly for oxygen to prevent anaerobic conditions. |
| Pest Prevention | Avoid meat, dairy, and oils; bury food scraps and secure your bin to deter unwanted critters. |
Frequently Asked Questions About Composting
The time it takes to get finished compost varies significantly. With hot composting and diligent management, you can have usable compost in as little as 3-4 weeks.
Cold composting, which is more passive, can take several months to over a year. Factors like material size, balance, and environmental conditions also play a role.
While most fruit and vegetable scraps are excellent for composting, you should avoid adding meat, bones, dairy products, and oily foods.
These items can attract pests like rodents and flies, create foul odors, and potentially introduce harmful pathogens into your compost pile, making it less safe for your garden.
For an actively decomposing hot compost pile, aim to turn it every 3-7 days. This introduces oxygen, mixes materials, and helps maintain high temperatures, accelerating the process. If you’re cold composting, turning is less frequent, perhaps once a month or whenever you add significant new material.
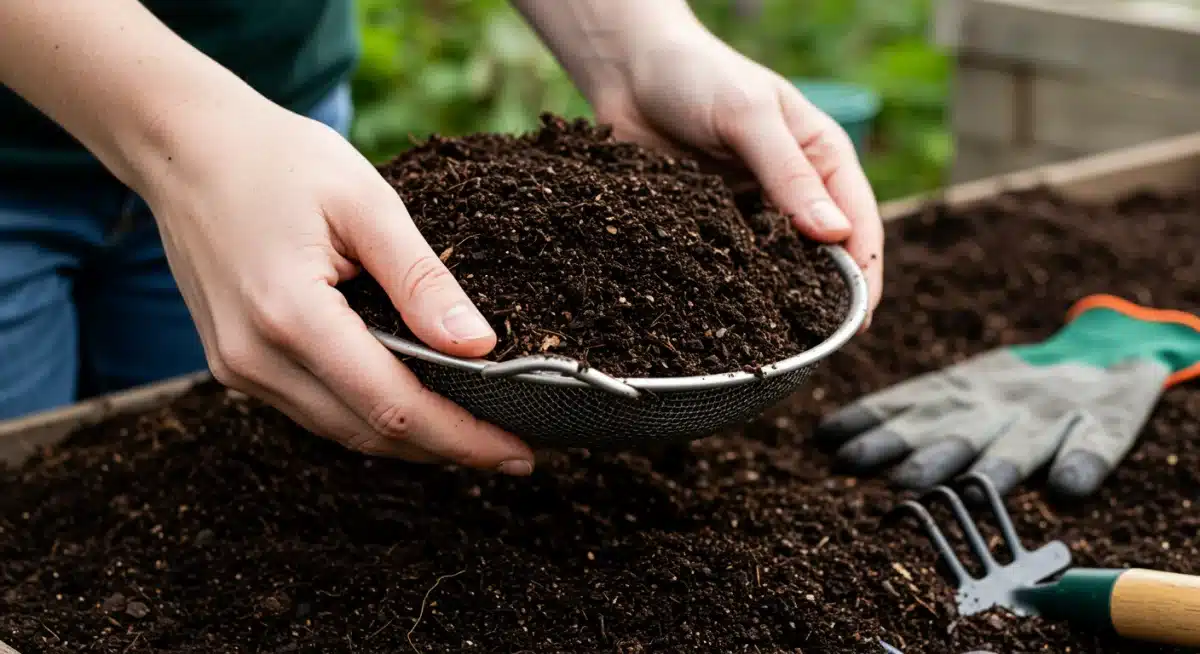
Healthy compost should be dark brown and crumbly, resembling rich soil. It should have a pleasant, earthy smell, not sour or rotten. You might also see earthworms and other beneficial insects. The original organic materials should be unrecognizable, indicating full decomposition and readiness for garden use.
Absolutely. Organic waste, including food scraps and yard trimmings, constitutes a significant portion of household waste. By composting these materials, you can realistically reduce your household’s trash output by an estimated 10% or more, significantly lessening your contribution to landfills and their associated environmental impacts.
Conclusion
Embracing the journey to build a compost bin is a truly transformative step for any homeowner committed to sustainable living and a thriving garden.
This DIY project not only empowers you to divert a significant portion of your household waste from landfills, contributing to an estimated 10% reduction, but also provides your garden with an invaluable, nutrient-rich soil amendment.
From selecting the right design to mastering the balance of greens and browns, and diligently maintaining your pile, every aspect of composting contributes to a healthier environment and more vibrant plant life.
It’s a testament to how simple, hands-on efforts can lead to profound ecological and personal rewards, fostering a deeper connection to the natural cycles of growth and renewal right in your own backyard.


