DIY Table Restoration: New Life for Under $50

 Refinishing an old table for under $50 is entirely achievable by focusing on smart material choices and embracing DIY techniques, transforming it into a functional and aesthetically pleasing piece for your home.
Are you looking to breathe new life into a tired piece of furniture without breaking the bank? The art of DIY furniture restoration: refinish an old table and give it a new life for under $50 is not just a creative endeavor; it’s a practical way to transform your living space and save money.
This comprehensive guide will walk you through every step, ensuring your old table becomes a stunning centerpiece once more.
The allure of DIY furniture restoration
There’s a unique satisfaction that comes with transforming something old and forgotten into a beautiful, functional piece. DIY furniture restoration offers an accessible entry point into home improvement, allowing individuals to express their creativity while also contributing to sustainability by upcycling.
This process is not merely about cosmetic changes; it’s about understanding materials, learning new skills, and appreciating the value of handmade work. The journey from a worn-out table to a rejuvenated one is incredibly rewarding.
Beyond the personal satisfaction, restoring furniture can significantly enhance the aesthetic appeal of your home. A well-restored piece often carries more character and history than mass-produced items, adding a unique touch to any room.
It allows for customization, ensuring the finished product perfectly matches your personal style and existing decor. This personal touch is often what elevates a house into a home, making spaces feel more lived-in and loved.
Why choose restoration over buying new?
Opting for restoration presents several compelling advantages over purchasing new furniture. Financially, it’s often far more economical, especially when adhering to a strict budget like our under-$50 goal.
Environmentally, it’s a sustainable choice, reducing waste and the demand for new resources. Many older furniture pieces were crafted with higher quality materials and superior construction techniques than modern, disposable alternatives, meaning a restored piece often offers better durability and longevity.
Cost-effectiveness: Significantly cheaper than buying new, especially for solid wood pieces.
Environmental impact: Reduces landfill waste and conserves natural resources.
Quality and durability: Older furniture often boasts superior craftsmanship and materials.
Unique character: Each restored piece tells a story and adds individuality to your home.
The process of restoration also fosters a deeper connection to your belongings. You invest time and effort, learning about the piece’s history and potential.
This hands-on experience can be incredibly therapeutic and empowering, building confidence in your DIY abilities. Ultimately, choosing restoration is a conscious decision to value craftsmanship, sustainability, and personal expression.
In conclusion, the allure of DIY furniture restoration lies in its multifaceted benefits. It’s an economical, environmentally friendly, and personally enriching endeavor that results in unique, high-quality pieces tailored to your taste.
Starting with an old table provides an excellent opportunity to experience these rewards firsthand, proving that beauty and functionality don’t always come with a hefty price tag.
Planning your budget and sourcing materials wisely
Embarking on a DIY table restoration project with a strict budget requires careful planning and smart material sourcing. The $50 limit might seem challenging, but it’s entirely achievable with a strategic approach.
The key is to prioritize essential supplies and look for cost-effective alternatives without compromising quality or safety. Every dollar saved on one item can be allocated to another, ensuring you stay within your financial goals.
Start by assessing the condition of your table. This initial inspection will dictate the types of materials you’ll need. Is it solid wood, veneer, or laminate?
Does it have deep scratches, loose joints, or just a faded finish? Understanding the extent of the damage helps you create a realistic list of necessities. Avoid impulse purchases; instead, make a comprehensive list before heading to the store.
Essential tools and materials under $50
To stay within budget, focus on multi-purpose tools and materials that offer the best value. Sandpaper is a must, and buying a variety pack with different grits is usually more economical than individual sheets.
Wood filler, if needed, comes in small, affordable containers. For finishes, consider water-based stains or paints, which tend to be less expensive and easier to clean up. Don’t forget brushes, rags, and protective gear like gloves and safety glasses.
Sandpaper: Assorted grits (e.g., 80, 120, 220) – approximately $5-10.
Wood filler/putty: Small container for minor repairs – approximately $5-8.
Protective gear: Gloves, safety glasses – approximately $5-10 (reusable).
Finish: Small can of water-based stain, paint, or clear coat – approximately $15-25.
Applicators: Brushes, foam rollers, rags – approximately $5-10.
Sourcing materials wisely also involves looking for sales, discounts, or even free resources. Check local hardware stores for clearance items or mis-tinted paints. Sometimes, community groups or online marketplaces offer leftover supplies from other DIY projects.
Don’t underestimate the power of repurposing items you already own, such as old cloths for wiping or cleaning. Every little bit helps toward hitting that $50 target.
The planning phase is crucial for a successful budget-friendly restoration. By carefully evaluating your table’s needs, creating a detailed list of materials, and actively seeking out economical options, you can equip yourself without overspending.
This strategic approach ensures that your DIY table restoration project remains both rewarding and affordable, setting the stage for a beautiful transformation.
Preparing your table for its makeover
Proper preparation is the cornerstone of any successful furniture restoration project. Skipping or rushing this stage can lead to a subpar finish and wasted effort.
For your DIY table restoration, meticulous cleaning, sanding, and minor repairs are paramount. This phase is where you address the underlying issues, creating a smooth, stable canvas for your chosen finish. Think of it as laying a strong foundation for a beautiful building.
Begin by thoroughly cleaning the table. Years of grime, wax, and old polish can accumulate, preventing new finishes from adhering properly.
Use a degreaser or a mild soap solution with warm water to scrub down all surfaces. For stubborn build-up, a stiff brush or even a plastic scraper can be effective. Rinse thoroughly and allow the table to dry completely before moving on. Any residual moisture can cause issues with wood expansion or finish adhesion.
Sanding: The key to a smooth finish
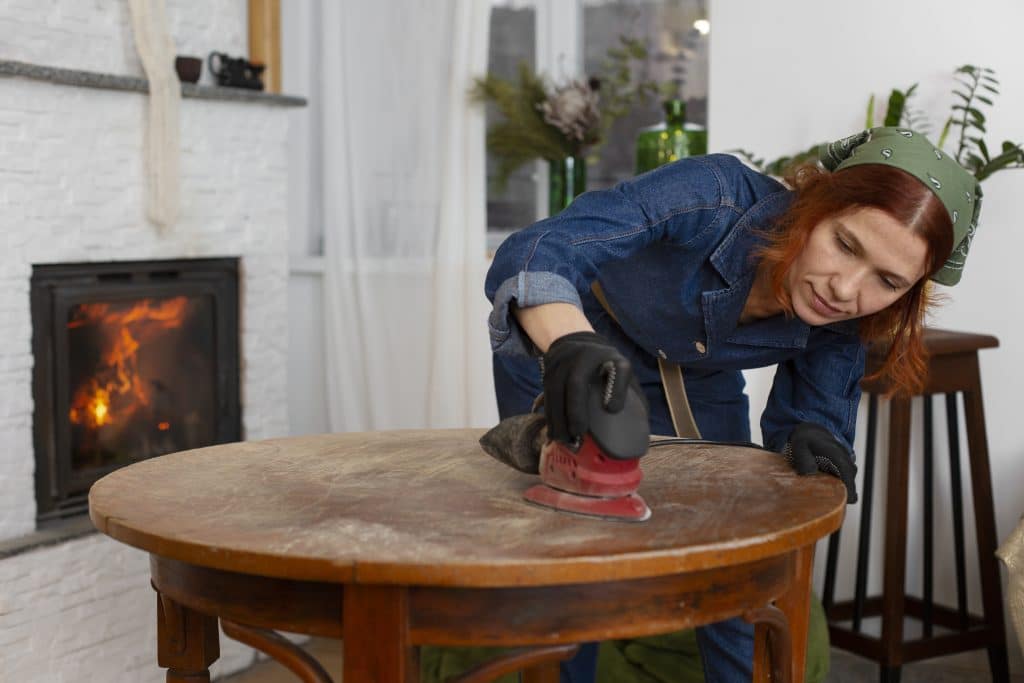
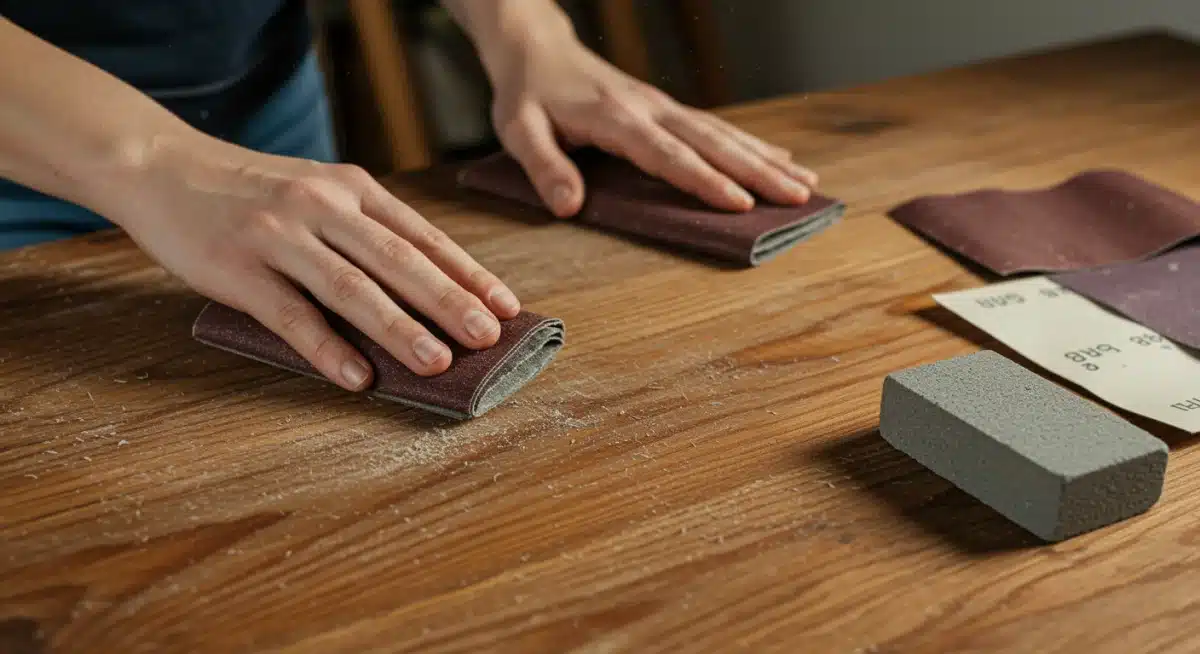
Sanding is arguably the most critical step in preparing your table. It removes old finishes, smooths out imperfections, and opens the wood grain to accept new stains or paints. Start with a coarser grit sandpaper (e.g., 80 or 100-grit) to remove old varnish or deep scratches.
Work with the grain of the wood, applying even pressure. Once the old finish is largely gone, switch to a medium grit (120-150) to smooth out the coarser sanding marks. Finish with a fine grit (180-220) for a silky-smooth surface, perfect for staining or painting.
Coarse grit (80-100): For removing old finishes and deep imperfections.
Medium grit (120-150): To smooth out scratches left by coarser paper.
Fine grit (180-220): For a final, smooth finish before applying new coatings.
Always sand with the grain: This prevents unsightly cross-grain scratches.
After sanding, carefully inspect the table for any remaining imperfections. Small dents or holes can be filled with wood filler. Apply the filler according to the manufacturer’s instructions, ensuring it’s slightly proud of the surface. Once dry, sand it flush with the surrounding wood using fine-grit sandpaper. This meticulous attention to detail during preparation will pay dividends in the final appearance of your restored table.
To conclude, preparing your table for its makeover is a labor of love that directly impacts the quality of your finished project. Through thorough cleaning, strategic sanding, and careful repairs, you create the ideal foundation for a beautiful and durable new finish. This foundational work ensures your efforts in the later stages of your DIY table restoration yield truly impressive results, staying within your budget and exceeding expectations.
Choosing your finish: stain, paint, or clear coat?
The choice of finish is where your DIY table restoration truly begins to take on its new identity. This decision impacts not only the aesthetic but also the durability and maintenance of your revitalized piece.
With a budget of under $50, selecting the right finish means balancing cost, desired look, and ease of application. Each option—stain, paint, or clear coat—offers distinct advantages and can dramatically alter the table’s character.
Wood stain is an excellent choice for highlighting the natural beauty of the wood grain. It penetrates the wood fibers, adding color while allowing the unique patterns to show through. Stains come in a vast array of shades, from light oaks to rich walnuts, enabling you to match existing furniture or create a completely new look.
When working with stain, it’s crucial to apply it evenly and wipe off excess promptly to avoid blotchiness. Always apply a protective topcoat over stain for durability.
Paint: A versatile and budget-friendly option
Painting offers the most dramatic transformation and is often the most forgiving option for pieces with less-than-perfect wood grain or repairs. It provides opaque coverage, allowing you to introduce bold colors or subtle pastels into your decor.
For budget-conscious projects, a small can of latex or chalk paint can go a long way. Chalk paint, in particular, is popular for its matte finish and minimal prep requirements, often adhering well without extensive sanding.
Latex paint: Affordable, wide color range, easy cleanup, requires a primer for best adhesion.
Chalk paint: Matte finish, excellent adhesion with minimal prep, distressed look possible.
Spray paint: Quick application, smooth finish, but can be less durable and more expensive for large areas.
Enamel paint: Durable, hard finish, good for high-traffic surfaces, but longer drying times.
A clear coat, such as polyurethane or varnish, is ideal when you want to protect the natural look of the wood or over a freshly painted surface.
It provides a durable barrier against moisture, scratches, and daily wear. Clear coats come in various sheens, from matte to high gloss, allowing you to fine-tune the final appearance. Water-based clear coats are generally preferred for DIY projects due to their lower odor, faster drying time, and easier cleanup.
The choice of finish is deeply personal and depends on the statement you wish your table to make.
Whether you opt for the classic elegance of stain, the vibrant versatility of paint, or the protective sheen of a clear coat, ensure your selection aligns with your budget and desired aesthetic. This decision is pivotal in completing your DIY table restoration, bringing your vision to life with style and practicality.
The application process: techniques for a flawless finish
Applying your chosen finish is the culmination of all your hard work in your DIY table restoration. This stage requires patience, precision, and adherence to proper techniques to achieve a flawless, professional-looking result.
Rushing or cutting corners here can undo all the meticulous preparation, so take your time and follow these guidelines carefully. The goal is an even, smooth, and durable surface that will stand the test of time.
Before you begin, ensure your workspace is clean, well-ventilated, and free of dust. Dust particles can easily settle on wet finishes, creating bumps and imperfections.
Lay down drop cloths to protect your floor and surrounding items. Always wear appropriate personal protective equipment, including gloves and a respirator, especially when working with oil-based products or sprays. Safety should always be a top priority.

Applying stain or paint evenly
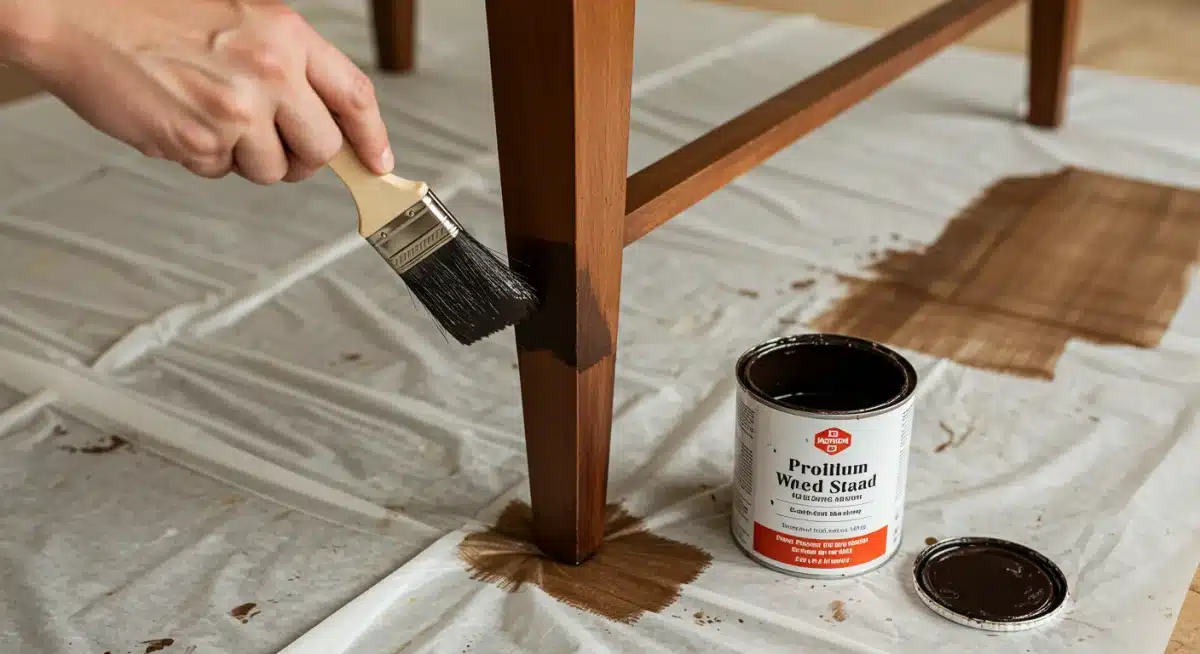
When applying stain, use a clean rag or foam brush. Apply a thin, even coat, working in small sections and always with the grain of the wood.
Allow the stain to penetrate for a few minutes (check manufacturer’s instructions), then wipe off any excess with a clean, dry rag. This prevents blotching and ensures an even color.
For paint, use a high-quality brush or foam roller for smooth coverage. Apply thin coats, allowing each to dry completely before applying the next. Multiple thin coats always yield a better, more durable finish than one thick coat.
Stain application: Apply thin coats with the grain, wipe off excess.
Paint application: Use quality brushes/rollers, apply multiple thin, even coats.
Primer (for paint): Essential for good adhesion and color vibrancy, especially on raw wood or dark surfaces.
Drying times: Adhere strictly to manufacturer’s recommendations between coats.
For clear coats, whether applied over stain or paint, the technique is similar to painting. Use a quality brush or foam applicator and apply thin, even coats. Avoid overworking the finish, as this can lead to brush marks or bubbles.
Lightly sand between clear coats with very fine-grit sandpaper (e.g., 320-400 grit) to create a smooth surface for subsequent layers, then wipe clean with a tack cloth. This ‘intercoat abrasion’ helps with adhesion and creates a glass-like finish.
The application process is where your vision truly comes to life. By applying your chosen finish with care, patience, and the correct techniques, you can achieve a durable, beautiful surface that transforms your old table into a standout piece. This meticulous approach ensures your DIY table restoration project not only looks fantastic but also withstands daily use, providing lasting enjoyment.
Adding personal touches and protective measures
Once the primary finish is dry and cured, your DIY table restoration is nearly complete, but it’s the personal touches and protective measures that truly elevate the project.
These final steps not only enhance the table’s aesthetic appeal but also ensure its longevity and resilience against daily wear and tear. This is your opportunity to infuse the piece with your unique style and make it truly your own, while safeguarding your hard work.
Consider hardware upgrades. New drawer pulls, knobs, or casters can dramatically change the look and feel of a table, adding a touch of elegance or modernity.
If your table has exposed legs, adding decorative feet or glides can protect your floors and add a subtle design element. These small details often have a significant impact on the overall perceived value and finish of the piece, making it look much more expensive than it was to restore.
Sealing and protecting your masterpiece
Applying a final protective topcoat is non-negotiable for any restored table, especially one that will see daily use. This layer acts as a shield against spills, scratches, and UV damage.
Polyurethane, polycrylic, and varnish are common choices, each offering different levels of durability and finish. Water-based polycrylic is often preferred for its clear finish that won’t yellow over time and its easy cleanup.
Apply several thin coats, allowing adequate drying time between each, and lightly sanding with fine-grit sandpaper for maximum smoothness.
Polyurethane: Very durable, good for high-traffic areas, can yellow over time.
Polycrylic: Water-based, clear finish, less durable than polyurethane but easier to use.
Varnish: Offers excellent protection, often used for outdoor furniture due to UV resistance.
Wax: Provides a soft sheen and some protection, but requires reapplication.
Beyond the finish, think about decorative accents. A custom stencil design, hand-painted details, or even decoupage can add character. For a rustic look, light distressing of the edges can create an aged aesthetic.
Remember to keep your budget in mind; often, small embellishments can be sourced affordably or created with existing craft supplies. These additions allow for creative expression, making your table truly one-of-a-kind.
In conclusion, the final stages of adding personal touches and robust protective measures are crucial for a complete DIY table restoration.
These steps not only enhance the beauty and individuality of your table but also ensure it withstands the rigors of everyday life, providing lasting enjoyment. With these thoughtful additions, your budget-friendly project transforms into a cherished, durable, and stylish piece of furniture.
Maintenance and longevity of your restored table
Successfully completing your DIY table restoration is just the beginning; ensuring its longevity requires ongoing care and proper maintenance.
A restored table, particularly one crafted with care and quality materials, can last for many years, even decades, if treated well. Understanding how to protect your investment from daily wear, environmental factors, and accidental damage is key to preserving its beauty and functionality.
Regular cleaning is fundamental. For most finishes, a soft, damp cloth is sufficient to wipe away dust and spills. Avoid harsh chemical cleaners, abrasive scrubbers, or excessive water, as these can strip finishes, cause discoloration, or warp wood.
If a tougher clean is needed, opt for a mild soap solution and always dry the surface immediately afterward. Prevention is always better than cure, so address spills as soon as they happen.
Protecting against daily wear and tear
Tables, especially dining or coffee tables, are prone to rings, scratches, and heat damage. Using coasters for drinks, placemats for meals, and trivets for hot dishes can significantly extend the life of your finish.
Consider investing in a custom-cut glass top for high-traffic tables, which provides an invisible layer of protection without obscuring the beautiful finish you worked so hard to create. Felt pads under decorative items will also prevent scratches.
Coasters and placemats: Essential for protecting against moisture rings and food spills.
Trivets: Safeguard the surface from heat damage caused by hot dishes.
Glass tops: Offer durable, transparent protection for frequently used surfaces.
Felt pads: Prevent scratches from decorative items or moving objects.
Environmental factors also play a role in furniture longevity. Wood is a natural material that can react to changes in temperature and humidity.
Extreme fluctuations can lead to cracking, warping, or expansion. Try to keep your restored table away from direct sunlight, heating vents, or air conditioning units, which can cause rapid changes. Maintaining a stable indoor environment will help preserve the integrity of the wood and its finish.
Periodically, you might consider re-applying a protective wax or a thin clear coat, depending on the original finish and level of wear. This proactive approach can refresh the surface and add an extra layer of defense.
By implementing these simple yet effective maintenance practices, your beautifully restored table will continue to be a cherished and functional part of your home for years to come, a testament to your effort in DIY table restoration.
Showcasing your revitalized table with pride
After all the hard work, planning, and meticulous execution of your DIY table restoration, the final, most satisfying step is to showcase your revitalized piece.
This isn’t just about placing it in a room; it’s about integrating it thoughtfully into your home decor, allowing it to shine as a testament to your creativity and resourcefulness. A well-placed and thoughtfully styled restored table can become a focal point, drawing admiration and sparking conversation.
Consider the table’s new purpose and location. Has a dining table been transformed into a stylish desk? Or perhaps a small side table now serves as a vibrant nightstand?
Position your table where it can be both functional and admired. Ensure it complements the existing color scheme and furniture styles in the room. Sometimes, moving other pieces around or adding small accent items can help integrate your newly restored table seamlessly.
Styling your table for maximum impact
Styling your table involves more than just placing objects on it; it’s about creating a vignette that enhances its character.
For a dining table, a simple centerpiece like a vase with fresh flowers, a decorative bowl, or a runner can add elegance without overwhelming the surface. On a coffee table, a stack of books, a small plant, and a scented candle can create an inviting atmosphere. The key is to choose items that are proportionate to the table’s size and style.
Balance: Arrange items to create visual harmony, avoiding clutter.
Texture: Incorporate different textures (wood, metal, fabric, glass) for interest.
Color: Use accent colors that complement the table’s finish and room decor.
Functionality: Ensure styling doesn’t hinder the table’s primary use.
Lighting also plays a crucial role in showcasing your restored table. Natural light can highlight its new finish and details beautifully.
In areas with less natural light, consider adding a lamp nearby to illuminate the piece and create a warm ambiance. Take photos of your finished project! Documenting the before-and-after transformation is not only satisfying but also a great way to inspire others and share your DIY journey.
In conclusion, showcasing your revitalized table is the crowning achievement of your DIY table restoration project. By thoughtfully integrating it into your home, styling it with complementary accents, and ensuring it’s well-lit, you allow your hard work to truly shine.
This final step celebrates your accomplishment, demonstrating that with a modest budget and a lot of heart, you can create something truly beautiful and enduring for your home.
| Key Restoration Phase | Brief Description |
|---|---|
| Budget & Sourcing | Plan expenses, prioritize tools, and find affordable materials to stay under $50. |
| Preparation | Thoroughly clean, sand to remove old finish, and repair imperfections for a smooth base. |
| Finishing | Apply stain, paint, or clear coat evenly with proper technique for a durable, beautiful surface. |
| Protection & Care | Add topcoats, use coasters, and clean regularly to ensure longevity and preserve beauty. |
Frequently Asked Questions About Table Restoration
Solid wood tables are generally the best candidates for budget DIY restoration because they can withstand sanding and refinishing without damage.
Veneer tables can also be restored, but require more delicate sanding to avoid damaging the thin top layer. Avoid laminate or particle board tables for extensive refinishing, as they are hard to transform.
Longevity comes from proper preparation, quality finish application, and ongoing maintenance. Ensure thorough sanding and cleaning before applying multiple thin coats of a durable topcoat like polyurethane or polycrylic.
Regularly use coasters, placemats, and trivets, and clean with a soft, damp cloth to protect the surface from daily wear.
Yes, it’s absolutely possible! The key is smart sourcing and focusing on essentials. Look for affordable sandpaper packs, small cans of paint or stain, and use existing rags or brushes. Avoid power tools if you don’t own them, as manual sanding can be effective. Prioritize the table’s needs and be resourceful to stay within budget.
Common mistakes include inadequate surface preparation (not sanding enough or cleaning properly), rushing drying times between coats, and applying finishes too thickly. Not sanding with the wood grain can also lead to visible scratches. Patience and attention to detail at each step are crucial for a professional-looking result.
Consider your home’s existing decor and lighting. Darker stains can add elegance, while lighter paints can brighten a room.
Test samples on an inconspicuous area or scrap wood before committing. Think about the table’s function; a high-traffic table might benefit from a durable, easy-to-clean paint, while a decorative piece could feature a more delicate stain.
Conclusion
The journey of DIY furniture restoration: refinish an old table and give it a new life for under $50 is a testament to the power of creativity, resourcefulness, and a little elbow grease.
From carefully planning your budget and meticulously preparing the surface to choosing the perfect finish and applying it with precision, each step contributes to a rewarding transformation.
This process not only saves money and promotes sustainability but also allows you to create a unique, cherished piece that reflects your personal style.
By following the guidelines outlined in this guide, you can confidently turn an overlooked, aged table into a stunning focal point in your home, proving that remarkable changes don’t always require a hefty investment.


