Build a Deck for Under $1,000: Boost Home Value 4% by Summer 2026
 Are you dreaming of extending your living space outdoors without draining your savings? Imagine enjoying warm evenings on your own beautifully crafted deck, knowing you’ve not only created a valuable addition to your lifestyle but also boosted your property’s worth.
This guide will show you how to build a deck for under $1,000 and increase your home’s value by 4% before Summer 2026, proving that smart planning and DIY spirit can yield impressive returns.
The undeniable value of a well-built deck
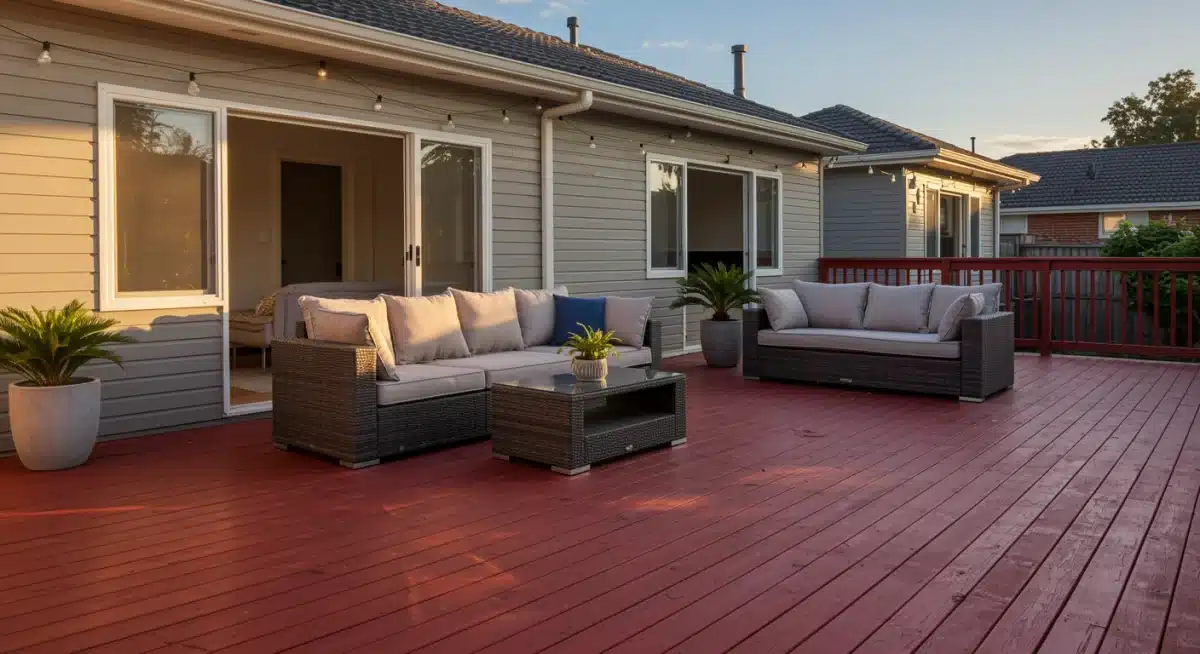
Adding a deck to your home is more than just creating an outdoor entertainment area; it is a strategic investment that significantly enhances both lifestyle and property value.
Homeowners consistently rank outdoor living spaces as highly desirable, making a deck a powerful selling point. The perceived value often far outweighs the actual cost, especially when executed thoughtfully and within a budget.
A deck expands your usable living area, providing a seamless transition between indoor comfort and outdoor enjoyment.
This additional square footage, even if it’s external, contributes to the overall appeal and functionality of your home. It’s a versatile space for dining, entertaining, or simply relaxing, making your home more attractive to potential buyers.
Understanding the ROI of a deck addition
While renovation projects often struggle to recoup their cost, a well-planned deck typically offers a strong return on investment. Studies frequently show that homeowners can recover a significant portion of their deck construction costs upon resale. For a budget-friendly deck, this ROI can be even more impressive, sometimes exceeding 100%.
Increased property appeal: A deck instantly elevates your home’s curb appeal, making it stand out in the market.
Expanded living space: It effectively adds functional square footage for relaxation and entertainment.
Competitive edge: Homes with attractive outdoor spaces often sell faster and for higher prices than those without.
Lifestyle enhancement: Beyond monetary value, a deck improves your quality of life, offering a personal oasis.
The key to maximizing this return lies in smart design, material selection, and efficient construction. By focusing on practical elements and avoiding unnecessary extravagance, you can create a beautiful and valuable asset without overspending.
This approach ensures that your initial investment yields substantial benefits, both financially and in terms of personal enjoyment.
Ultimately, a deck is a tangible asset that contributes to the holistic value of your home. It signals to buyers that the property has been cared for and enhanced, suggesting a higher standard of living. This perceived value, combined with the actual utility of the space, makes a deck an excellent investment for any homeowner.
Strategic planning for your budget-friendly deck
Building a deck for under $1,000 requires meticulous planning and a keen eye for cost-saving opportunities.
The initial design phase is critical, as it dictates material requirements, labor, and potential challenges. Start by defining the primary purpose of your deck and the size that best suits your needs, remembering that larger decks naturally incur higher costs.
Consider a simple, rectangular design, which is far more economical and easier to build than multi-level or irregularly shaped decks.
Simplicity in design translates directly to savings on materials and construction time. Also, take into account local building codes and permitting requirements early on, as these can impact your design and budget.
Choosing the right materials on a budget
Material selection is perhaps the most significant factor in keeping your deck build under budget. While exotic hardwoods and composite decking offer longevity, they come with a hefty price tag. For a sub-$1,000 project, pressure-treated lumber is your best friend. It’s affordable, readily available, and designed to withstand outdoor elements.
Pressure-treated pine: Excellent for substructures and framing due to its resistance to rot and insects.
Standard pine or cedar: Can be used for decking boards if treated and sealed properly, offering a natural aesthetic.
Reclaimed or recycled materials: Explore local salvage yards or online marketplaces for used lumber or decking boards, but inspect them thoroughly for quality.
Fasteners and hardware: Opt for galvanized or stainless steel screws and connectors to ensure durability, even if slightly more expensive upfront, as they prevent rust and structural failure.
When sourcing materials, always compare prices from multiple suppliers. Local lumber yards might offer better deals than big-box stores, especially for bulk purchases. Look for sales, discounts, or end-of-season clearances.
Buying slightly less-than-perfect lumber (e.g., with minor cosmetic flaws) can also lead to significant savings if the structural integrity isn’t compromised.
Remember that every dollar saved on materials directly contributes to staying within your $1,000 budget.
Strategic planning, from design to procurement, is the bedrock of a successful and affordable deck project. This careful foresight minimizes unexpected expenses and helps you achieve your goal of an affordable, value-adding deck.
Essential tools and safety for DIY deck building
Embarking on a DIY deck project requires more than just enthusiasm; it demands the right tools and an unwavering commitment to safety.
While you don’t need a professional contractor’s arsenal, having the essential equipment will make the job smoother, safer, and more efficient. Many tools can be rented or borrowed, further reducing your overall cost.
Before any cutting or drilling begins, ensure you have personal protective equipment (PPE) readily available.
Safety glasses, work gloves, and sturdy footwear are non-negotiable. Hearing protection is also advisable when using power tools. A small investment in safety gear can prevent serious injuries and keep your project on track.
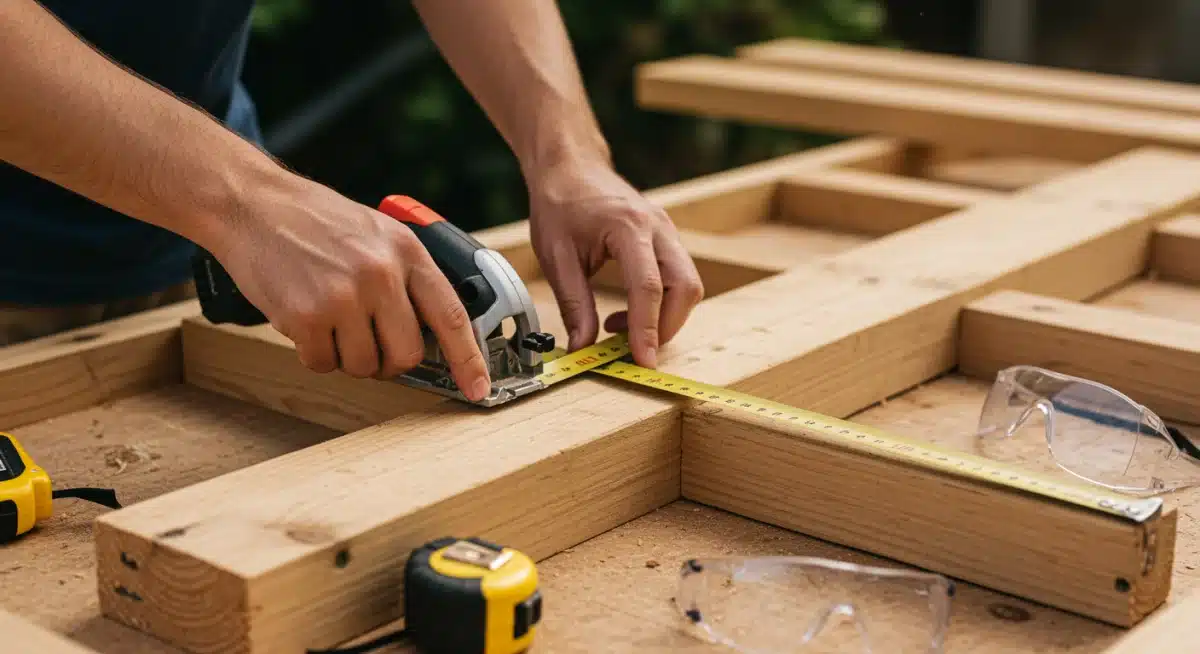
Must-have tools for your deck project
To successfully build a deck, you’ll need a combination of hand tools and power tools. Prioritize versatility and consider what you might already own or can borrow. Renting specialized tools like a post-hole digger for a day or two can be much cheaper than buying them outright.
Measuring tape and speed square: For accurate measurements and angles, crucial for a professional look.
Circular saw: Essential for cutting lumber to size quickly and precisely.
Drill/driver: For pre-drilling holes and driving screws, ideally a cordless model for convenience.
Level (long and short): Ensuring your deck is perfectly level is paramount for stability and safety.
Shovel and post-hole digger: For digging footings and setting posts.
Hammer and pry bar: For minor adjustments or corrections.
Beyond these, a chalk line, a utility knife, and a good set of clamps can also prove invaluable. Remember, sharp tools are safer tools, so ensure any blades are in good condition. If purchasing, look for affordable yet reliable brands; you don’t need top-of-the-line equipment for a single project.
Safety extends beyond just wearing PPE. Always read tool manuals, understand how to operate each piece of equipment correctly, and never work when fatigued or distracted.
Clear your workspace of clutter and keep children and pets away from the construction area. A safe work environment is a productive work environment, ensuring your project progresses without incident.
Foundation and framing: The backbone of your deck
The foundation and framing are the most critical components of your deck, providing the structural integrity that ensures safety and longevity.
Skimping on these steps can lead to serious problems down the line, compromising your investment and potentially creating hazardous conditions. Proper planning and execution here are non-negotiable.
Begin by accurately laying out your deck footprint. Use stakes and string to mark the perimeter, ensuring it’s square and level.
This initial step dictates the position of your footings, which must be dug below the frost line in your area to prevent heaving and settling. Consult local building codes for specific depth requirements.
Constructing a sturdy substructure
Once your footings are in place and concrete has cured, you’ll set your support posts. These posts, typically pressure-treated 4x4s or 6x6s, should be anchored securely to the footings using post bases.
The height of these posts will determine the deck’s elevation, so measure carefully and cut them to length, ensuring the tops are perfectly level.
Ledger board: If attaching to your house, a ledger board must be securely fastened to the rim joist of your home, with flashing installed above it to prevent water intrusion.
Beams: These horizontal members support the joists and transfer the deck’s load to the posts. Use appropriate hangers and fasteners to create strong connections.
Joists: Spaced according to your decking material’s requirements and local codes, joists run perpendicular to the beams and form the base for your decking boards.
Blocking: Install blocking between joists to prevent twisting and provide additional rigidity to the frame.
Use structural screws or bolts for all connections, avoiding nails where possible for greater strength. Double-check all measurements and angles as you go, using your level frequently.
Any slight misalignment in the framing can become a noticeable flaw in the finished deck. This meticulous attention to detail during the foundation and framing stages will pay dividends in the long-term stability and appearance of your deck.
Remember, the goal is to create a robust, safe platform that will withstand years of use and varying weather conditions. While this stage might seem complex, taking your time and following best practices will result in a deck that you can trust and enjoy for many seasons to come. A solid foundation is truly the secret to a successful and lasting deck project.
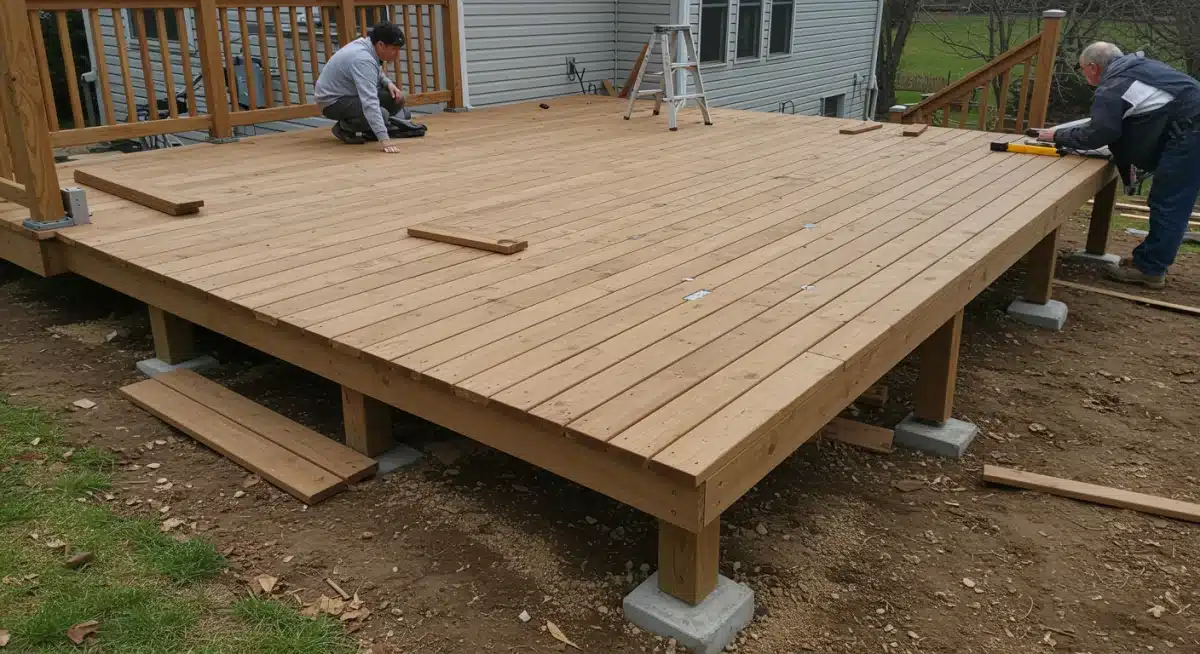
Decking and railing: Adding the finishing touches
With the foundation and framing complete, you’re ready for the most visually rewarding part of the project: installing the decking boards and railings. This is where your deck truly starts to take shape, transforming from a skeletal structure into a functional and aesthetically pleasing outdoor space. Patient and precise work here will ensure a professional finish.
Begin by laying out your decking boards. Decide on a pattern – typically, boards run perpendicular to the house or diagonally for a more decorative look. Diagonal patterns use more material and require more cuts, which can impact your budget, so consider this trade-off carefully. Leave proper spacing between boards for drainage and expansion/contraction.
Cost-effective decking and railing options
For decking boards within your $1,000 budget, pressure-treated pine is usually the most economical choice. You can enhance its appearance and longevity with stains and sealers. Alternatively, consider less common but affordable options if available in your area, such as certain grades of cedar or even repurposing suitable materials.
Decking board installation: Use exterior-grade screws designed for decking. Pre-drill holes to prevent splitting, especially near board ends.
Railing systems: A simple railing system using pressure-treated 2x4s for top and bottom rails and 2x2s for balusters is the most budget-friendly. Ensure baluster spacing meets local code requirements (typically 4 inches or less).
Stairs: If your deck requires stairs, pre-cut stringers can save time and ensure consistent rise and run. Simple handrails can be constructed from 2x4s.
Finishing touches: Sand any rough edges, apply a good quality deck stain or sealer to protect the wood, and consider adding post caps for a finished look.
When installing railings, safety is paramount. Ensure all components are securely fastened and can withstand force.
The railing height must also comply with local building codes, usually a minimum of 36 inches for residential decks. A simple design, while cost-effective, can still be sturdy and attractive with careful execution.
The final steps involve cleaning the deck, applying a protective finish, and conducting a thorough safety inspection. This stage is your opportunity to add personal flair through colors or accents, making your budget-friendly deck feel custom and inviting. With these finishing touches, your deck will be ready for enjoyment and ready to impress.
Permitting, codes, and increasing home value
Navigating the local permitting process and understanding building codes is a crucial, often overlooked, aspect of building a deck.
Skipping these steps can lead to significant headaches, including fines, forced demolition, or issues when you try to sell your home. Always check with your local planning or building department before starting any construction.
Permits ensure that your deck meets structural integrity and safety standards, protecting both you and future occupants. The application process typically involves submitting your deck plans, which should include dimensions, materials, and foundation details. While it adds a small cost and time commitment, it’s an essential part of a legitimate and value-adding home improvement.
Maximizing your 4% home value increase
To ensure your deck contributes the maximum possible to your home’s value, it needs to be more than just functional; it needs to be appealing and well-integrated.
A deck that looks like an afterthought or appears poorly constructed will not yield the desired return. Focus on quality finishes and thoughtful design, even within your budget.
Compliance with codes: A deck built to code is a safe deck, and safety is a huge factor in home value and buyer confidence.
Aesthetics and integration: Choose materials and finishes that complement your home’s existing style. A cohesive look enhances overall property appeal.
Maintenance: Regular cleaning, staining, and sealing will keep your deck looking new and prevent premature deterioration, preserving its value.
Outdoor living appeal: Stage your deck with affordable outdoor furniture, potted plants, and subtle lighting to showcase its potential as an inviting living space.
When selling, highlight your new deck as a key feature. Emphasize its low maintenance, durability, and the added living space it provides.
A well-documented history of the build, including permits and material receipts, can also instill confidence in buyers and demonstrate the quality of the addition. The goal is to present a deck that feels like an integral, high-quality extension of the home, not a cheap add-on.
By adhering to codes, maintaining quality, and presenting your deck effectively, you solidify its contribution to your home’s market value. This strategic approach ensures that your budget-friendly deck isn’t just a personal amenity but a wise financial decision, poised to deliver that impressive 4% increase in home value by Summer 2026.
Long-term maintenance for lasting value
Building a deck for under $1,000 is an impressive feat, but its long-term value hinges significantly on consistent maintenance.
A well-maintained deck not only remains safe and aesthetically pleasing but also retains its ability to contribute positively to your home’s market value. Neglecting maintenance can quickly diminish your investment and turn a valuable asset into a liability.
Regular inspections are the cornerstone of effective deck maintenance. At least once a year, preferably in spring, thoroughly examine your deck for any signs of wear, damage, or structural issues. Look for loose fasteners, rotting wood, cracked boards, or unstable railings. Addressing small problems early prevents them from escalating into costly repairs.
Simple steps to preserve your deck’s appeal
Protecting your deck from the elements is crucial for its longevity. Even pressure-treated lumber benefits greatly from periodic sealing and staining. These protective layers guard against moisture, UV radiation, and mildew, which can all accelerate deterioration. Choose high-quality products designed for outdoor use and follow manufacturer recommendations for application frequency.
Cleaning: Annually wash your deck with a deck cleaner and a stiff brush or pressure washer (used carefully to avoid damaging the wood). Remove dirt, grime, and mildew buildup.
Staining/Sealing: Reapply stain or sealer every 1-3 years, depending on product type and sun exposure. This maintains the wood’s appearance and weather resistance.
Fastener check: Periodically tighten any loose screws or bolts, and replace rusty or damaged hardware.
Vegetation control: Keep plants and soil away from deck posts and joists to prevent moisture retention and rot. Trim overhanging branches to reduce debris and shade.
Beyond these routine tasks, pay attention to the overall condition of your deck. If you notice any significant sagging, shifting, or widespread rot, consult a professional.
While the goal is DIY, knowing when to call in an expert is part of smart homeownership. Proactive maintenance ensures that your budget-built deck continues to provide enjoyment and financial returns for many years.
By dedicating a small amount of time and effort to maintenance each year, you’re safeguarding your initial investment and ensuring that your deck remains a beautiful, functional extension of your home. This commitment to care is what truly locks in that increased home value, making your under-$1,000 project a lasting success.
| Key Aspect | Brief Description |
|---|---|
| Budget Management | Strategic material sourcing and simple design are crucial to stay under $1,000. |
| DIY Execution | Leveraging personal labor and careful planning minimizes professional costs. |
| Value Impact | A well-built, permitted deck can increase home value by 4% or more. |
| Long-Term Care | Regular maintenance ensures durability and sustained property value. |
Frequently Asked Questions About Building a Budget Deck
Is it truly possible to build a deck for under $1,000?
Yes, it is entirely possible to build a deck on a $1,000 budget with the right strategy. Success depends on detailed planning, selecting cost-effective materials such as pressure-treated lumber, and handling the construction yourself.
When you build with a simple layout and source materials carefully—watching for seasonal sales or surplus inventory—you can control expenses without sacrificing structural strength or safety.
What are the most significant cost-saving strategies when you build a DIY deck?
The greatest savings come when you build the deck yourself rather than hiring contractors. Choosing affordable wood, keeping the design straightforward (such as a classic rectangular platform), and comparing supplier prices can dramatically reduce total costs.
Many homeowners also build smarter by renting specialized tools instead of purchasing them, preventing unnecessary spending while still achieving professional-quality results.
How much value does it add when you build a new deck?
When you build a well-designed deck, you’re making an investment that often recoups 60–80% of its cost at resale. A budget-conscious project can deliver even stronger returns, potentially increasing your home’s value by around 4%—especially if the deck improves outdoor functionality and curb appeal. Choosing to build an attractive gathering space signals to buyers that the home is both practical and lifestyle-friendly.
Do I need a permit before I build a small deck?
In most areas, you will need a permit before you build even a modest-sized deck. Local building codes exist to ensure that any structure you build meets safety and engineering standards.
Always confirm requirements with your municipal planning or building department so you can build confidently and avoid fines, delays, or complications during a future home sale.
What kind of maintenance is required after you build a budget deck?
After you build your deck, consistent maintenance is essential to protect your investment. Plan for annual cleaning, routine inspections for loose fasteners or signs of rot, and reapplying stain or sealant every one to three years. Proper upkeep ensures the structure you build remains durable, visually appealing, and financially valuable for many seasons to come.
Conclusion
Choosing to build a deck for under $1,000 while aiming to increase your home’s value by up to 4% before Summer 2026 is both an ambitious and highly attainable project.
With thoughtful planning, smart budgeting, and careful material selection, homeowners can build an inviting outdoor space that delivers lasting financial and lifestyle benefits. Taking the DIY approach further reduces costs and allows you to build a structure tailored to your needs.
The advantages go far beyond resale value. When you build a functional deck, you create a versatile extension of your home—perfect for relaxing evenings, family gatherings, and outdoor entertaining. To ensure long-term success, always build with local codes in mind, prioritize structural safety, and follow a consistent maintenance routine to preserve durability and appearance.
Ultimately, deciding to build a budget-friendly deck is a smart home improvement strategy that combines practicality with strong return on investment.
With the right preparation and commitment, you can build a space that enhances curb appeal, supports everyday living, and stands as a lasting symbol of strategic, value-driven home enhancement.


