Build a Bookshelf Under $100: Organize Your Home Library
 Are you looking to declutter your living space and provide a proper home for your beloved book collection without breaking the bank? The idea to build a bookshelf for under $100 and organize your home library might seem daunting at first, but with the right approach and a bit of DIY spirit, it’s entirely achievable.
This guide will walk you through the process, offering practical steps and creative solutions to construct a sturdy and attractive bookshelf that fits both your budget and your literary needs.
Planning your budget-friendly bookshelf project
Embarking on any DIY project requires careful planning, and building a bookshelf for under $100 is no exception. Before you even think about cutting wood, it’s crucial to map out your design, materials, and tools to ensure you stay within your financial limits.
This initial phase sets the foundation for a successful and cost-effective build, preventing unexpected expenses down the line.
Consider the space where your new bookshelf will reside. Measure its dimensions accurately, taking into account height, width, and depth.
This will dictate the size of your bookshelf and, consequently, the amount of material you’ll need. Think about the style you want to achieve; a simple, minimalist design is often the most budget-friendly and easiest to construct for beginners. Avoid complex joinery or intricate details that require specialized tools or expensive lumber.
Material selection: affordable options
The choice of materials is perhaps the most significant factor in keeping your project under budget. While hardwoods can be beautiful, they are typically out of the $100 range. Focus on more economical alternatives that still offer strength and durability.
Pine: Readily available at most hardware stores, pine is an excellent choice for its affordability and ease of working. It’s relatively soft, making it easy to cut and drill, and it takes stain or paint well.
Plywood: Plywood sheets can be cut into various sizes for shelves and sides. Look for project-grade plywood, which is usually smoother and has fewer imperfections than utility grades.
MDF (Medium-Density Fiberboard): While heavier and sometimes more prone to sagging over long spans, MDF is very inexpensive and offers a smooth surface perfect for painting. It’s often used for backing or smaller shelf sections.
Reclaimed wood: Check local salvage yards, construction sites (with permission), or even online marketplaces for free or low-cost reclaimed wood. This can add character and significantly reduce costs.
Once you have a clear idea of your design and materials, create a detailed shopping list. Include not just the wood, but also screws, wood glue, sandpaper, and any finish you plan to apply.
Comparing prices at different hardware stores or online retailers can also yield significant savings. Remember, a little research upfront can save a lot of money and frustration later.
Gathering the right tools for the job
Having the correct tools makes all the difference in a DIY project, especially when you’re aiming to build a bookshelf for under $100.
You don’t need a professional workshop full of expensive machinery; many essential tools can be borrowed, rented, or purchased affordably. The key is to have what you need to make accurate cuts, secure joints, and achieve a clean finish.
For basic cuts, a hand saw or a circular saw will suffice. If you opt for a circular saw, ensure you have a straight edge or a guide to make precise, square cuts.
A measuring tape, a pencil, and a carpenter’s square are indispensable for marking and ensuring everything is aligned correctly. Don’t underestimate the importance of accurate measurements; even a slight deviation can throw off the entire project.
Essential tools for a budget build
While a comprehensive toolkit is ideal, a minimalist approach is often necessary when working with a strict budget.
Focus on multi-purpose tools that can handle various tasks. If you don’t own a particular tool, consider asking a friend or neighbor if you can borrow theirs before making a purchase. This can help you avoid unnecessary expenses.
Measuring tape and pencil: For accurate marking and sizing.
Carpenter’s square: Essential for ensuring all your cuts and assemblies are perfectly square.
Hand saw or circular saw: For cutting wood to size. A circular saw with a fine-tooth blade will give cleaner cuts.
Drill/driver: Necessary for pre-drilling holes and driving screws. A cordless drill offers convenience.
Wood clamps: Helpful for holding pieces together while glue dries or during assembly.
Sandpaper (various grits): For smoothing surfaces and preparing for finishing.
Safety glasses and gloves: Always prioritize safety when working with tools.
For assembly, wood glue and screws are your best friends. Wood glue provides strong, lasting bonds, while screws add structural integrity. Ensure you select screws appropriate for the thickness of your wood to prevent splitting.
Having a few clamps on hand can also be incredibly useful for holding pieces together while the glue sets, ensuring tight and secure joints. By carefully selecting and utilizing these fundamental tools, you can confidently tackle your bookshelf project without overspending.
Cutting and preparing your wood pieces
Once you have your design, materials, and tools ready, the next critical step is cutting your wood to the precise dimensions you need. Accuracy in this stage is paramount, as poorly cut pieces can lead to a wobbly or uneven bookshelf.
Take your time, double-check your measurements, and prioritize safety above all else. This phase is where your plans start to take physical form, bringing you closer to your goal to build a bookshelf for under $100 and organize your home library.
Begin by carefully marking all your cuts on the wood. Use your measuring tape and carpenter’s square to draw precise lines. For shelves and sides, ensure your lines are perfectly straight and perpendicular to the edges.
When using a circular saw, set the blade depth correctly – just enough to cut through the wood and a little extra. Always use a straight edge or guide to ensure your cuts are perfectly straight. If using a hand saw, take slow, steady strokes, letting the saw do the work.
Ensuring clean cuts and smooth edges
The quality of your cuts directly impacts the final appearance and stability of your bookshelf. Rough or jagged edges will not only look unprofessional but can also make assembly more challenging and compromise the strength of your joints. After cutting, inspect each piece for splinters or rough spots.
Measure twice, cut once: This age-old adage is crucial for DIY projects. Reconfirm all measurements before making any cuts to avoid wasting material.
Use a sharp blade: A dull saw blade can lead to splintering and rough cuts. Ensure your saw blade is sharp and appropriate for the type of wood you’re cutting.
Support your material: When cutting, make sure your wood is well-supported to prevent it from shifting or vibrating, which can result in inaccurate cuts.
Sand all edges: After cutting, use sandpaper (starting with a coarser grit like 80 or 100, then moving to finer grits like 150 or 220) to smooth all cut edges. This removes splinters and prepares the wood for finishing.
Once all your pieces are cut and sanded, lay them out according to your design. This dry fit allows you to visualize the structure and identify any potential issues before you commit to assembly.
Make any necessary adjustments now, as it’s much easier to correct mistakes at this stage than after gluing and screwing. Taking the time to properly cut and prepare your wood will result in a much more professional and durable bookshelf.
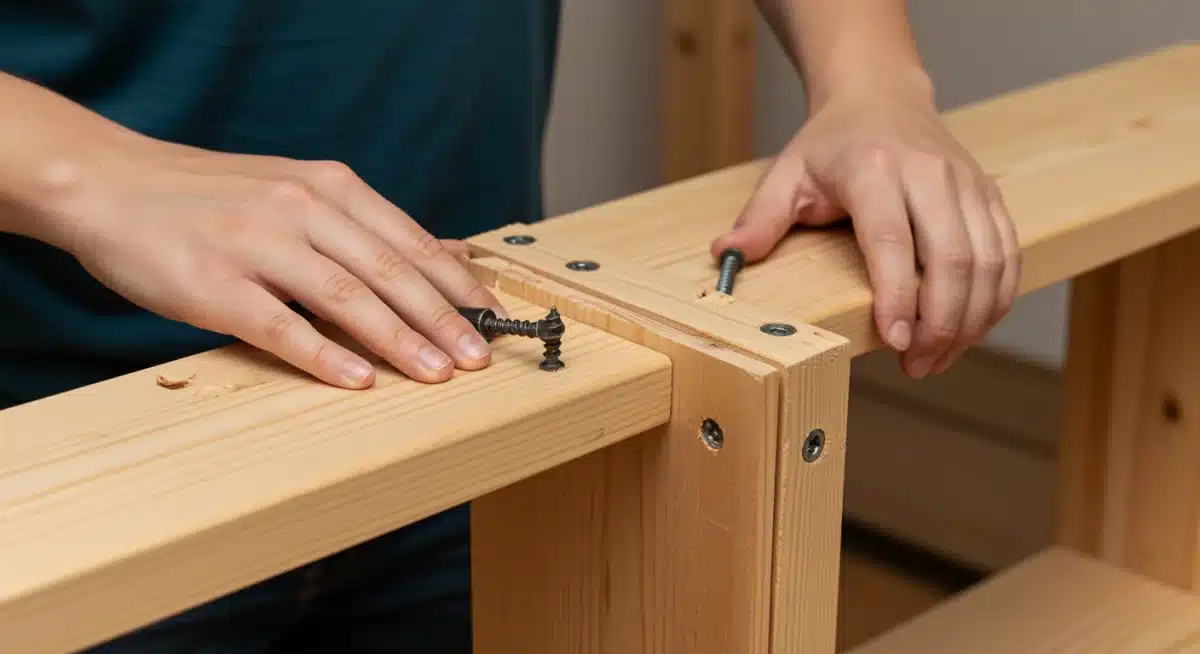
Assembling your budget bookshelf
With all your wood pieces cut and prepared, it’s time for the exciting part: assembly. This is where your flat pieces of wood transform into a functional bookshelf.
Attention to detail and patience are key here, as secure joints are essential for the stability and longevity of your unit. Remember, the goal is to successfully build a bookshelf for under $100 and organize your home library, and proper assembly ensures it stands the test of time.
Start by assembling the main frame. For a simple design, this usually involves attaching the side panels to the bottom and top pieces. Use wood glue on all mating surfaces before securing with screws. Apply a thin, even layer of glue, then align the pieces carefully.
Pre-drilling pilot holes is crucial, especially with softer woods like pine, to prevent splitting when driving screws. Make sure your pilot holes are slightly smaller than the screw diameter.
Techniques for strong and stable joints
The strength of your bookshelf largely depends on the quality of its joints. While complex joinery might be beyond a budget build, simple butt joints reinforced with glue and screws can be remarkably sturdy if executed correctly. Consider using a speed square or carpenter’s square frequently during assembly to ensure all corners are perfectly 90 degrees.
Wood glue is your friend: Always use a good quality wood glue on all contact surfaces. It creates a bond that is often stronger than the wood itself. Wipe away any excess glue immediately with a damp cloth before it dries.
Pilot holes are essential: Pre-drill pilot holes for every screw. This prevents wood splitting and makes driving screws much easier and more secure.
Clamping for strength: Use clamps to hold pieces tightly together while the glue dries. This ensures maximum contact and a stronger bond. If you don’t have clamps, heavy objects can sometimes serve as a temporary substitute.
Backing for stability: Adding a thin plywood or MDF backing to your bookshelf can significantly improve its stability and prevent racking (where the bookshelf leans to one side). Nail or screw the backing into the rear edges of the shelves and sides.
Once the main frame is assembled, you can install the shelves. Mark the positions for each shelf carefully, ensuring they are evenly spaced or configured to your specific needs. Again, use wood glue and screws, pre-drilling pilot holes for each attachment point.
Allow sufficient drying time for the glue before placing any heavy items on your new bookshelf. A well-assembled bookshelf will not only look good but also provide reliable storage for your books for years to come.
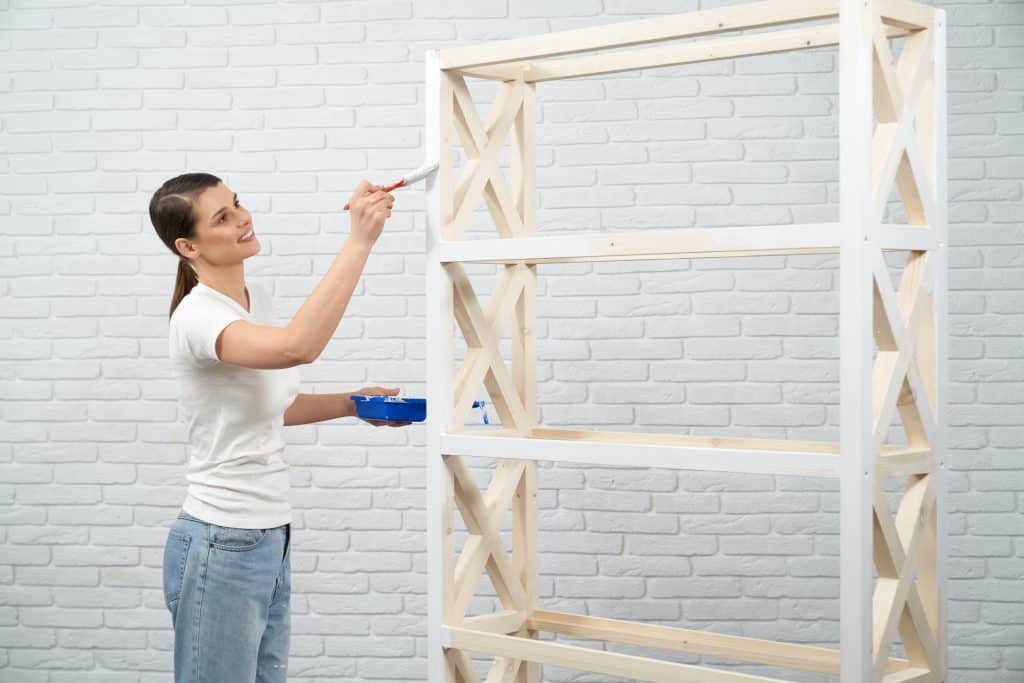
Finishing touches: painting, staining, and protection
With your bookshelf fully assembled, the next step is to add the finishing touches that will protect the wood and enhance its appearance. This stage allows you to personalize your creation, making it truly your own. Whether you opt for paint, stain, or a clear protective coat, proper application will ensure your efforts to build a bookshelf for under $100 and organize your home library result in a durable and attractive piece of furniture.
Before applying any finish, give your entire bookshelf a final sanding. Start with a medium-grit sandpaper (around 120-150) to smooth out any remaining imperfections, then move to a finer grit (220) for a silky-smooth finish.
This step is crucial for achieving an even and professional-looking result. After sanding, thoroughly clean the bookshelf to remove all dust and debris. A tack cloth or a damp rag works well for this.
Choosing and applying your finish
The type of finish you choose will depend on your desired aesthetic and the type of wood you used. Each option offers different levels of protection and visual appeal.
Paint: A great option for covering less attractive woods like MDF or for adding a pop of color to your room. Use a primer first, especially on porous woods, to ensure better adhesion and a smoother final coat. Apply multiple thin coats, allowing each to dry completely between applications.
Wood stain: Enhances the natural grain of the wood, adding depth and color. Test the stain on a scrap piece of your wood first to ensure you like the color. Apply with a brush or rag, wiping off excess before it dries to prevent blotchiness. Follow with a clear protective topcoat.
Clear coat (polyurethane, lacquer): Ideal for showcasing the natural beauty of pine or reclaimed wood. These finishes offer excellent protection against moisture and wear. Apply multiple thin coats, sanding lightly with a very fine grit (e.g., 320 or 400) between coats for a super smooth finish.
Always work in a well-ventilated area and follow the manufacturer’s instructions for drying times and application techniques.
Proper ventilation is not just for quick drying but also for your safety, as many finishes emit fumes. Once your chosen finish is completely dry and cured, your bookshelf is ready for its primary purpose: organizing your cherished books.
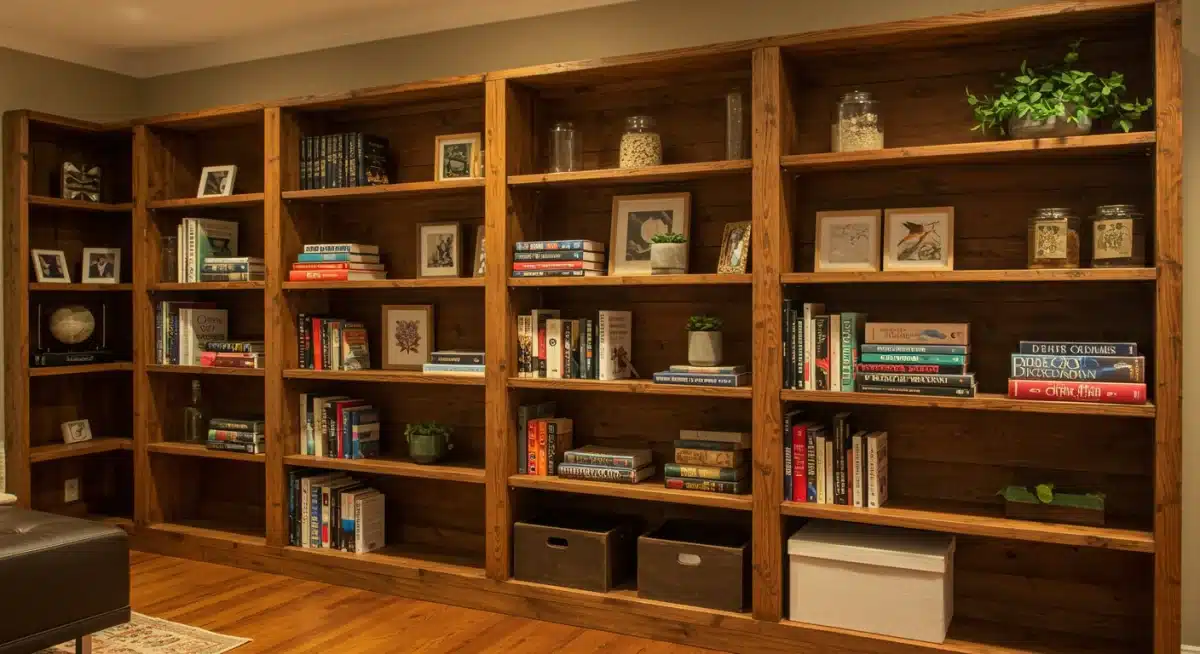
Organizing your home library effectively
Building a bookshelf is only half the battle; the true satisfaction comes from seeing your home library neatly organized. An organized bookshelf not only looks aesthetically pleasing but also makes it easier to find the books you want to read.
Effective organization transforms your space and makes your book collection a joy to interact with. This final step truly completes your mission to build a bookshelf for under $100 and organize your home library.
Before you start placing books, consider decluttering your existing collection. Donate or sell books you no longer read or need.
This frees up valuable space and ensures that only the books you truly value find a spot on your new shelves. Once you’ve curated your collection, think about how you want to categorize your books. There are several popular methods, each with its own advantages.
Smart strategies for book arrangement
The way you arrange your books can significantly impact the functionality and appearance of your bookshelf. Choose a method that makes sense to you and fits your reading habits.
By genre: Grouping books by genre (fiction, non-fiction, fantasy, history, etc.) is a common and practical approach. It helps you quickly locate books based on your current reading mood.
Alphabetical by author: For larger collections, arranging books alphabetically by the author’s last name within each genre can be very efficient.
By color: A visually striking method that can create a beautiful focal point in a room. While not the most practical for finding specific titles quickly, it’s popular for aesthetic reasons.
By size: Grouping books by height can create a tidy, uniform look on your shelves and make the most of vertical space.
Mixing books with decor: Integrate small decorative items, plants, or framed photos among your books. This breaks up the monotony and adds personality to your bookshelf.
Remember to leave some breathing room on your shelves. Overcrowding can make your bookshelf look cluttered and make it difficult to remove and replace books. Utilize bookends to keep books upright and prevent them from toppling over.
Periodically review your organization system and make adjustments as your collection grows or your preferences change. A well-organized bookshelf is a dynamic and evolving space that reflects your literary journey.

Maintaining your DIY bookshelf and library
Building and organizing your bookshelf is a significant achievement, but ongoing maintenance is essential to keep it looking great and functioning well over time.
Regular care will protect your investment and ensure your home library remains an inviting and organized space. This final section ensures that your efforts to build a bookshelf for under $100 and organize your home library continue to pay off for years to come.
Dust is the arch-nemesis of bookshelves and books. Make it a habit to dust your shelves and book spines regularly, perhaps once a week or every other week. A soft, dry cloth or a duster attachment on your vacuum cleaner works best.
For books, a soft brush can gently remove dust from pages and covers. This not only keeps your library clean but also prevents dust from accumulating and potentially damaging your books.
Tips for long-term care and durability
Beyond routine dusting, there are several practices you can adopt to extend the life of your DIY bookshelf and maintain the integrity of your book collection.
Check for stability: Periodically check the screws and joints of your bookshelf. If anything feels loose, tighten the screws or reapply wood glue if necessary. This is especially important if your bookshelf is frequently moved or if heavy items are placed on it.
Avoid overloading: While your DIY bookshelf is sturdy, avoid placing excessively heavy items on a single shelf. Distribute weight evenly across the shelves to prevent sagging or undue stress on the structure.
Protect from direct sunlight: Position your bookshelf away from direct sunlight, which can fade book covers and damage wood finishes over time. If this isn’t possible, consider using UV-blocking window films or curtains.
Control humidity: Extreme fluctuations in humidity can cause wood to warp or crack, and can also damage books. Maintain a stable indoor environment, ideally between 30% and 50% relative humidity.
Address spills immediately: Accidents happen. If liquids spill on your bookshelf or books, wipe them up immediately to prevent staining or water damage.
By following these simple maintenance tips, your budget-friendly, custom-built bookshelf will remain a functional and beautiful centerpiece of your home library for many years.
It’s a testament to the power of DIY and thoughtful organization, demonstrating that quality and functionality don’t always require a hefty price tag.
| Key Step | Brief Description |
|---|---|
| Plan & Budget | Define design, measure space, select affordable materials like pine or plywood to stay under $100. |
| Gather Tools | Acquire essential tools like a saw, drill, measuring tape, and clamps; borrow or rent to save costs. |
| Cut & Assemble | Precisely cut wood, pre-drill holes, use wood glue and screws for strong, stable joints, and add a backing. |
| Finish & Organize | Sand, paint or stain, then organize books by genre, author, or color for an aesthetic and functional library. |
Frequently asked questions about DIY bookshelves
Absolutely. By choosing affordable materials like pine, plywood, or reclaimed wood, and focusing on simple designs, you can construct a robust and functional bookshelf well within a $100 budget. Smart shopping for lumber and utilizing basic tools are key to cost savings.
For beginners, essential tools include a measuring tape, pencil, carpenter’s square, a hand saw or circular saw, a drill/driver, wood glue, screws, and sandpaper. Many of these can be borrowed or purchased affordably, keeping your initial investment low.
To prevent sagging, ensure your shelves are not excessively long without support. For wider spans, use thicker wood or add a central support. Distribute book weight evenly, and consider adding a backing board, which significantly increases overall rigidity and stability.
Organizing by genre or alphabetically by author within genres typically offers the easiest access. While aesthetic arrangements like color-coding are popular, they can make finding specific titles more challenging. Choose a system that best suits your reading habits.
Achieving a professional look involves meticulous sanding, using wood filler for imperfections, and applying a high-quality finish like paint or stain. Ensuring all cuts are square and joints are tight also contributes significantly to a polished, finished appearance.
Conclusion
Successfully embarking on the journey to build a bookshelf for under $100 and organize your home library is more than just a DIY project; it’s an investment in your home’s functionality and aesthetic appeal.
By carefully planning, selecting budget-friendly materials, utilizing basic tools, and applying thoughtful finishing touches, you can create a sturdy and beautiful piece of furniture that perfectly houses your literary treasures.
The satisfaction of crafting something with your own hands, coupled with the joy of a well-organized space, makes this endeavor incredibly rewarding. Embrace the process, and soon you’ll be enjoying a personalized home library that reflects your style and passion for books, all while adhering to a remarkably modest budget.


