Build a Backyard Fire Pit: Under $200 DIY Guide
 Dreaming of cozy evenings spent around a crackling fire in your own backyard? You might be surprised to learn that creating this inviting outdoor space doesn’t require a substantial investment.
This guide will show you how to build a stunning and functional backyard fire pit DIY for under $200, making those fireside dreams a reality without breaking the bank.
Planning Your Budget-Friendly Fire Pit Project
Before you even think about laying the first stone, careful planning is crucial, especially when working with a strict budget.
This initial phase involves selecting the right location, understanding local regulations, and sketching out your design. A well-thought-out plan can prevent costly mistakes and ensure your project stays within the $200 limit while delivering a safe and aesthetically pleasing result.
Consider the overall aesthetic of your backyard and how the fire pit will integrate with existing landscaping.
Think about the size and shape that best fits your space and needs, keeping in mind that simpler designs often translate to lower costs. A circular or square design using readily available materials is typically the most budget-friendly option.
Choosing the Ideal Location
The placement of your fire pit is paramount for both safety and enjoyment. You’ll want it far enough from your home, fences, and overhanging branches to prevent fire hazards, yet close enough to be a convenient gathering spot. Consider prevailing wind directions to minimize smoke blowing into seating areas.
Maintain at least 10-20 feet clearance from structures.
Avoid placing under low-hanging trees or power lines.
Ensure the ground is level and stable for construction.
Consider accessibility for bringing in firewood and seating.
Always check your local fire codes and homeowner association rules regarding open flames and fire pit construction. Some areas have specific setback requirements or require permits. Ignoring these could lead to fines or safety risks, undoing all your hard work and budget savings.
By carefully planning your fire pit’s location and design, you set a solid foundation for a successful and cost-effective DIY project.
This thoughtful approach ensures safety, compliance, and maximizes your enjoyment of the finished product, all while keeping your budget firmly in check.
Sourcing Affordable Materials for Your Fire Pit
The key to staying under the $200 budget for your fire pit lies heavily in smart material selection. High-quality, durable materials don’t always have to come with a hefty price tag.
Knowing where to look and what to prioritize can make all the difference, allowing you to achieve a professional look without the professional cost.
Most budget-friendly fire pits are constructed using concrete retaining wall blocks or landscape pavers.
These materials are designed to withstand outdoor elements and are relatively inexpensive. They come in various colors and textures, offering versatility for your design without requiring specialized tools for installation.
Essential Materials and Tools List
To keep costs low, focus on the essentials. You can often borrow tools from friends or rent them for a fraction of the purchase price.
Here’s a general list, but always adjust based on your specific design and local availability:
Concrete retaining wall blocks or landscape pavers (heat-resistant options are best).
Construction adhesive or mortar (rated for high temperatures if connecting inner layers).
Gravel or paver base for drainage.
Shovel, rake, and tamper for ground preparation.
Level, tape measure, and string for accurate layout.
Safety glasses and work gloves.
Optional: Metal fire pit ring insert (can extend life and safety, but adds cost).
When purchasing blocks, look for sales at local hardware stores, home improvement centers, or landscape supply yards. Sometimes, buying in bulk can offer a better price per unit.
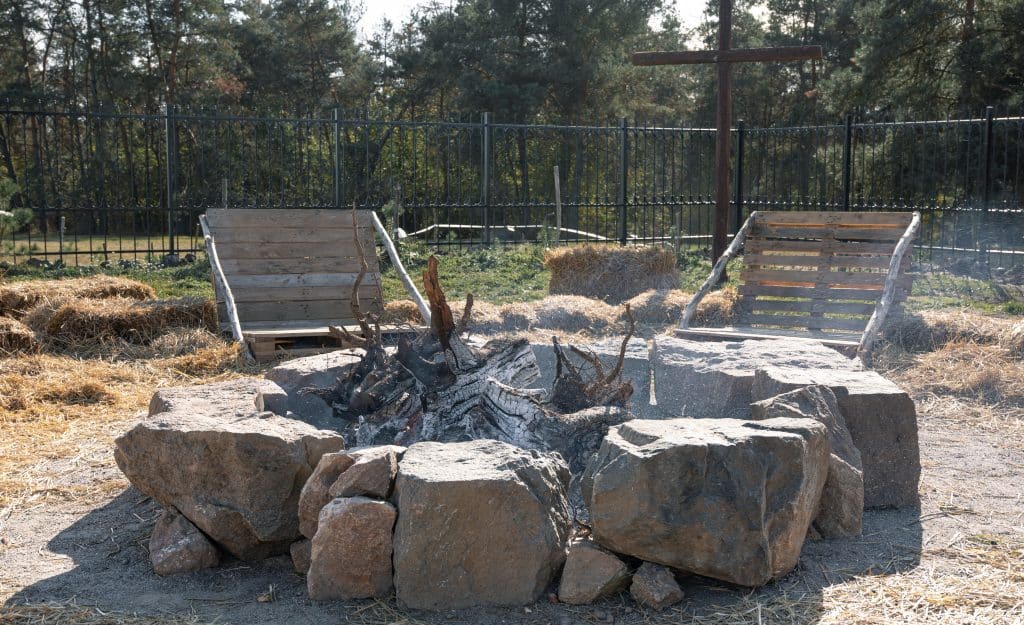
Consider using reclaimed materials if available and safe, but always ensure they are suitable for high heat exposure. Natural stones can also be an option if sourced locally and affordably, but require more skill to stack securely.
Careful material sourcing is where your budget truly takes shape. By being resourceful and prioritizing cost-effective yet durable options, you can gather everything needed for your fire pit without exceeding the $200 mark, proving that a beautiful outdoor feature doesn’t have to be expensive.
Preparing the Site and Laying the Foundation
Proper site preparation is the cornerstone of a stable and long-lasting fire pit. Skimping on this step can lead to an uneven structure, poor drainage, and potential safety hazards.
Dedicate ample time to clearing and leveling the area, ensuring your foundation is robust enough to support the weight of the fire pit and withstand the elements.
Begin by clearly marking the perimeter of your fire pit. Use a string and a stake to draw a perfect circle or a measuring tape and stakes for a square.
This visual guide will help you excavate accurately and ensure your fire pit is symmetrical. The goal is to create a flat, compacted base that will prevent settling and shifting over time.
Excavation and Leveling Techniques
Once marked, excavate the area to a depth of about 4-6 inches. This depth allows for a sufficient layer of gravel or paver base, which is crucial for drainage and stability. Remove any grass, roots, or large rocks.
Use a shovel to dig out the soil, ensuring a relatively flat bottom.
Periodically check the level across the excavated area with a long board and spirit level.
Compact the soil thoroughly using a hand tamper or a rented plate compactor.
Add a 2-3 inch layer of gravel or paver base, spreading it evenly.
Wet the gravel slightly and compact it again, aiming for a firm, level surface.
A well-prepared foundation will not only contribute to the structural integrity of your fire pit but also enhance its overall appearance.
An uneven base can make the entire structure look skewed and can be a tripping hazard. Take your time during this phase; it’s an investment in the longevity and safety of your outdoor feature.
By meticulously preparing the site and laying a solid foundation, you ensure that your fire pit will be stable, safe, and ready for years of enjoyment.
This critical step, though sometimes overlooked, is fundamental to the success of your budget-friendly outdoor project.
Constructing the Fire Pit Walls
With a perfectly leveled foundation in place, the exciting part begins: building the walls of your fire pit.
This step transforms your prepared base into the recognizable structure of a fire pit. The process involves stacking your chosen blocks in a stable pattern, ensuring each layer is level and securely placed.
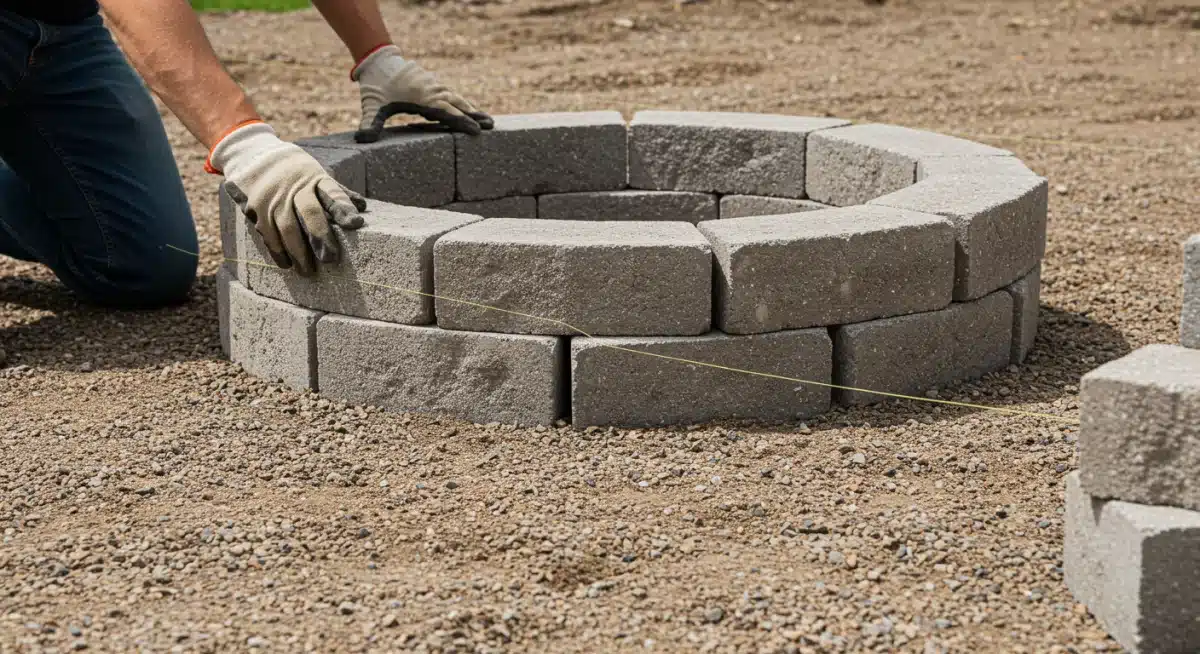
Start by laying the first course of blocks directly onto your compacted gravel base. Arrange them according to your chosen design, whether circular or square.
Use a rubber mallet to gently tap each block into place, ensuring it’s level both individually and in relation to its neighbors. A level is your best friend here, as any deviation in the first course will be magnified in subsequent layers.
Stacking and Securing Blocks
Once the first course is perfectly level, you can begin stacking additional layers. For most retaining wall blocks, a staggered or running bond pattern is recommended for structural integrity.
This means that the vertical joints of one layer do not align with the vertical joints of the layer below it, distributing weight more evenly.
Apply construction adhesive to the top surface of each block before placing the next layer.
Ensure consistent overhangs if your blocks are designed with a lip.
Check for levelness frequently, both horizontally and vertically.
Use a chisel and hammer to split blocks if necessary for a tighter fit or specific pattern.
Build up the walls to your desired height, typically 2-3 courses for a comfortable seating height. If using a metal fire pit ring, ensure your internal diameter accommodates it.
The construction adhesive is vital for securing the blocks together, preventing them from shifting or being dislodged.
While some blocks are designed to interlock, adhesive provides an extra layer of stability, especially for a structure that will experience heat and outdoor weather fluctuations.
Allow sufficient curing time for the adhesive before moving on to the final touches or using the fire pit.
By carefully stacking and securing each block, you’ll create a robust and visually appealing fire pit wall.
This methodical approach ensures your DIY project is not only attractive but also safe and durable, ready to host countless enjoyable fireside gatherings.
Adding Finishing Touches and Ensuring Safety
Once the main structure of your fire pit is complete, the final touches are what truly elevate its appearance and functionality.
This stage also encompasses critical safety considerations, ensuring your new outdoor feature is not only beautiful but also secure for all users. Neglecting safety can turn a fun gathering into a dangerous situation.
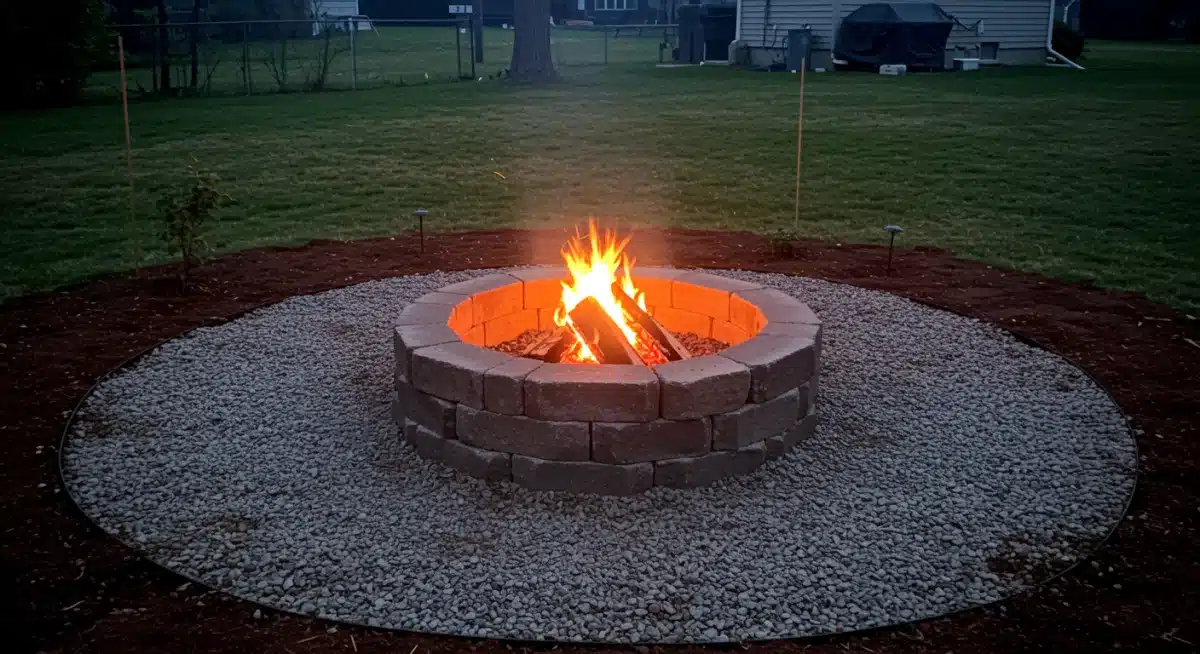
Consider the area immediately surrounding your fire pit. A perimeter of non-combustible material, such as gravel, pavers, or concrete, is highly recommended.
This barrier helps contain stray sparks and provides a clean, stable surface for seating. Aim for at least a 2-3 foot radius around the fire pit itself.
Safety Measures and Aesthetic Enhancements
Integrating a metal fire pit ring insert is a wise investment, even if it pushes your budget slightly. These rings protect the blocks from direct heat exposure, extending the life of your fire pit, and offer a smoother, more finished interior surface.
If you opt for an insert, ensure your block structure’s internal diameter matches the insert’s size.
Install a metal fire pit ring if desired, placing it inside the block structure.
Fill any gaps between the blocks and the ring with small stones or sand.
Spread a layer of decorative gravel or river stones around the exterior base.
Ensure easy access to a water source (hose or bucket) or a fire extinguisher.
Educate all users on fire safety rules, especially children.
Never leave a fire unattended and always fully extinguish embers before leaving.
For aesthetic enhancements, consider planting low-growing, fire-resistant plants around the gravel perimeter, but ensure they are far enough away to avoid heat damage.
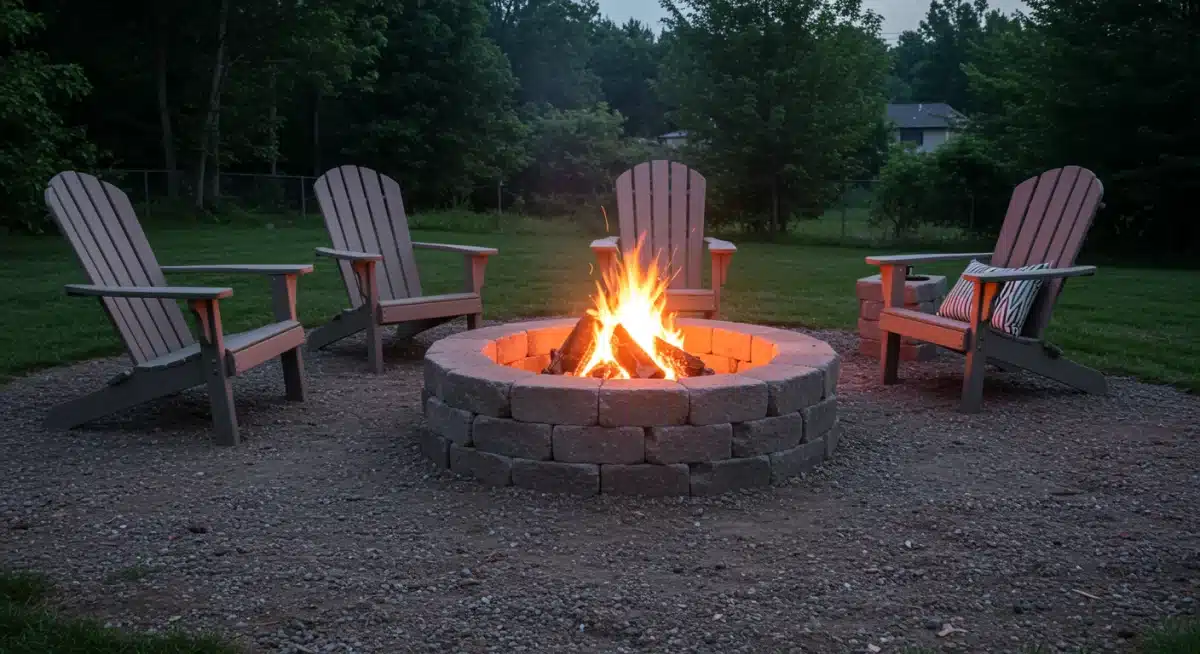
Adding comfortable seating, such as Adirondack chairs or custom benches, completes the inviting atmosphere. Remember, the goal is to create a safe, enjoyable, and visually appealing outdoor space.
By focusing on these finishing touches and rigorously implementing safety measures, your budget-friendly fire pit will be transformed into a cherished backyard amenity.
This attention to detail ensures both beauty and peace of mind, allowing you to fully relax and enjoy your DIY creation.
| Key Aspect | Brief Description |
|---|---|
| Budget Focus | Achieving a functional and attractive fire pit for under $200 through smart material sourcing. |
| Site Preparation | Crucial for stability and safety, involving leveling and compacting a gravel base. |
| Material Selection | Using affordable concrete blocks or pavers, secured with construction adhesive for durability. |
| Safety & Maintenance | Prioritizing clearances, fire safety, and routine cleaning for long-term enjoyment. |
Frequently Asked Questions About DIY Fire Pits
For a budget-friendly fire pit, heat-resistant concrete retaining wall blocks or landscape pavers are ideal. Avoid using regular concrete blocks or river rocks that haven’t been certified for high heat, as they can explode when heated. Look for materials specifically designed for fire pit construction to ensure safety and durability.
It is generally recommended to place a fire pit at least 10 to 20 feet away from any combustible structures, such as your house, fences, sheds, or overhanging trees. Always check your local fire codes and homeowner association rules, as specific setback requirements can vary by location and may be stricter.
While not strictly necessary for structural integrity, a metal fire pit ring insert is highly recommended. It protects the surrounding blocks from direct heat, preventing cracking and extending the life of your fire pit.
It also creates a smoother interior surface and enhances safety by containing the fire more effectively within the pit.
A stable, well-draining base is crucial. Excavate 4-6 inches and fill with a compacted layer of gravel or paver base. This provides excellent drainage, preventing water from pooling and undermining the structure. A level and firm base ensures your fire pit remains stable and prevents shifting over time, crucial for safety and longevity.
To stay under budget, focus on affordable materials like concrete retaining wall blocks, which are often on sale.
Borrow or rent tools instead of buying. Prioritize essential construction materials and consider DIY seating options. Smart shopping, comparing prices, and utilizing reclaimed materials can significantly reduce costs while achieving a great result.
Conclusion
Building a beautiful, functional, and safe backyard fire pit for under $200 is not just a pipe dream; it’s an achievable DIY project that can significantly enhance your outdoor living space.
By meticulously planning, smartly sourcing materials, and carefully executing each construction step, you can transform your backyard into an inviting oasis without overspending.
Remember, the true value lies not just in the cost savings, but in the satisfaction of creating something with your own hands and the countless memories you’ll forge around its warm glow.


