DIY Basement Waterproofing: 4 Steps for 2026 Damage Prevention

 Water in the basement is more than just an annoyance; it can lead to significant structural damage, mold growth, and a substantial hit to your home’s value. Fortunately, taking proactive measures with DIY basement waterproofing can help you prevent these issues before they escalate.
This guide will walk you through the essential steps to safeguard your home against moisture, ensuring a dry and healthy environment for years to come, especially as we approach 2026 with new insights and techniques.
Understanding the Enemy: Common Causes of Basement Leaks
Before you can effectively waterproof your basement, it’s crucial to understand why water gets in in the first first place. Moisture intrusion is rarely a single issue but often a combination of factors, both internal and external.
Identifying these causes accurately is the first critical step in developing a successful waterproofing strategy. Without a proper diagnosis, you might be treating symptoms rather than the root problem, leading to recurring issues and wasted effort.
Many homeowners assume a wet basement means a cracked foundation, which isn’t always the case. Sometimes, the problem is as simple as poor grading around your home or clogged gutters.
Other times, it can be more complex, involving hydrostatic pressure or issues with your home’s drainage system. A thorough inspection can reveal the true culprits, guiding your DIY efforts toward the most effective solutions.
Exterior Factors Influencing Basement Moisture
The majority of basement water problems originate from outside your home. Understanding these external forces is key to preventing water from ever reaching your foundation walls. Proper management of rainwater and groundwater is paramount.
Poor Gutter and Downspout Management: Clogged gutters or downspouts that discharge water too close to the foundation are primary offenders, allowing thousands of gallons of water to saturate the soil next to your basement.
Improper Landscape Grading: If the ground around your home slopes towards the foundation instead of away from it, rainwater will naturally flow towards your basement walls, increasing hydrostatic pressure.
Cracked Exterior Foundation Walls: While often hidden, cracks in the foundation can allow water to seep directly into your basement. These can be caused by settling, soil expansion, or even tree roots.
High Water Table: In some regions, a naturally high water table can exert significant hydrostatic pressure on basement walls and floors, forcing water through any available opening.
By addressing these exterior factors first, you significantly reduce the likelihood of water penetrating your basement. It’s often the simplest and most cost-effective approach to waterproofing.
Interior Indicators of Water Intrusion
Even if you haven’t seen a flood, your basement might be telling you it has a moisture problem. Recognizing these subtle signs early can save you a lot of trouble down the line. Don’t wait for a major leak to take action.
Musty Odor: A persistent musty smell is a strong indicator of mold or mildew growth, which thrives in damp environments.
Efflorescence: White, powdery deposits on concrete or masonry walls are efflorescence, mineral salts left behind after water evaporates, confirming moisture penetration.
Peeling Paint or Wallpaper: If paint is bubbling or wallpaper is peeling on basement walls, it’s a clear sign of moisture working its way through the surface.
Dampness or Condensation: Consistently damp walls or floors, or visible condensation, point to high humidity and potential water issues.
Understanding the causes of basement leaks is the foundational step in any DIY waterproofing project. By accurately identifying where and why water is entering your home, you can focus your efforts on the most impactful solutions, saving time, money, and preventing future damage.
Step 1: Thorough Inspection and Problem Identification
The success of any DIY basement waterproofing project hinges on a meticulous inspection. You can’t fix what you don’t fully understand. This initial stage involves a detailed examination of both your home’s exterior and interior, looking for all potential entry points for water. Think of yourself as a detective, searching for clues that reveal the true nature and extent of your moisture problem.
Start by walking around the perimeter of your house. Pay close attention to the ground slope, the condition of your gutters and downspouts, and any visible cracks in the foundation.
Inside, examine every inch of your basement walls and floor, even behind finished walls if possible. Don’t forget to check around windows, doors, and utility penetrations. A small crack can lead to significant water intrusion over time, so no detail is too small to overlook.
Exterior Inspection: Key Areas to Scrutinize
Your home’s exterior is the first line of defense against water. Problems here are often the easiest and most cost-effective to address, preventing water from ever reaching your foundation.
Gutter and Downspout Condition: Ensure gutters are free of debris and properly sloped towards downspouts. Confirm downspouts extend at least 5-10 feet away from the foundation, ideally discharging onto splash blocks or into an underground drainage system.
Landscape Grading: Observe the ground around your foundation. It should slope away from the house at a rate of at least 6 inches for the first 10 feet. If water pools near your foundation after rain, this is a major red flag.
Foundation Cracks: Look for any visible cracks in the exterior foundation walls. Hairline cracks might seem minor, but they can expand and allow water to enter. Larger cracks require immediate attention.
Window Wells: Ensure window wells are clear of debris and have proper drainage. They should also be covered to prevent water and leaves from accumulating.
Addressing these exterior issues can often resolve a significant portion of basement moisture problems without even touching the interior. It’s about diverting water before it becomes an issue.
Interior Inspection: Pinpointing Entry Points
Once inside, your focus shifts to identifying exactly where and how water is making its way into your basement. This requires a systematic approach, often best done during or immediately after a heavy rain shower.
Wall and Floor Cracks: Carefully inspect all concrete walls and the basement floor for cracks, even tiny ones. Water stains, efflorescence, or active trickles will highlight problem areas.
Floor-Wall Joint: The cove joint, where the floor meets the wall, is a common entry point for hydrostatic pressure. Look for signs of dampness or water seepage along this seam.
Pipe and Wire Penetrations: Check around any pipes, wires, or other utilities that enter the basement through the foundation. The seals around these penetrations can degrade over time, creating gaps for water.
Window and Door Seals: Basement windows and doors can be sources of leaks if their seals are compromised or if they are improperly installed. Test them with a hose from the outside.
A thorough inspection is the cornerstone of effective DIY basement waterproofing. By methodically checking both the interior and exterior of your home, you gain a clear understanding of your specific water intrusion issues, enabling you to choose the most appropriate and effective solutions for a dry basement.
Step 2: Exterior Drainage Improvement and Grading
After identifying the sources of water, the next crucial step in DIY basement waterproofing is to manage exterior drainage and ensure proper grading around your home.
This is often the most impactful and preventative measure you can take, as it aims to divert water away from your foundation before it ever has a chance to penetrate. Addressing exterior issues first can often mitigate, or even eliminate, the need for more extensive interior work.
Rainwater and melting snow are powerful forces, and if not properly managed, they will inevitably find their way to the lowest point – your basement. By optimizing your gutters, downspouts, and the landscape surrounding your home, you create a robust first line of defense. This proactive approach not only protects your basement but also preserves your foundation and overall property value.
Optimizing Gutters and Downspouts
Your gutter system is designed to collect rainwater from your roof and channel it safely away from your home. Any failure in this system can directly contribute to basement water problems. Regular maintenance and strategic modifications are key.
Clean Gutters Regularly: Leaves, twigs, and other debris can quickly clog gutters, causing water to overflow directly onto your foundation. Clean them at least twice a year, more often if you have many trees.
Extend Downspouts: Ensure all downspouts discharge water at least 5 to 10 feet away from your foundation. You can use simple downspout extenders, flexible pipes, or even underground drainage systems for a more permanent solution.
Repair Leaks and Damage: Inspect gutters for cracks, holes, or loose connections. Repair or replace damaged sections to ensure water flows efficiently and doesn’t leak prematurely near the house.
Install Gutter Guards: Consider installing gutter guards to prevent debris buildup, reducing the frequency of cleaning and ensuring continuous water flow.
A well-maintained and properly extended gutter system is a fundamental component of effective exterior drainage, dramatically reducing the volume of water that saturates the soil around your basement.
Improving Landscape Grading
The slope of the ground immediately surrounding your home is paramount in directing surface water. Improper grading can funnel water directly towards your foundation, leading to hydrostatic pressure and seepage.
Create a Positive Slope: The ground should visibly slope away from your foundation. A general rule of thumb is a drop of 6 inches over the first 10 feet. If your yard slopes towards your house, you’ll need to add soil to create the correct grade.
Use Appropriate Fill Material: When adding soil, use compacted clay soil or a soil-sand mixture that sheds water effectively. Avoid highly porous materials that will absorb and hold water near the foundation.
Avoid Garden Beds Near Foundation: While aesthetically pleasing, garden beds often require regular watering and can hold moisture against the foundation. If you have them, ensure they are properly drained and graded.
Install French Drains (If Necessary): For persistent issues with groundwater or areas where regrading isn’t sufficient, a French drain can be installed. This involves a trench filled with gravel and a perforated pipe to redirect subsurface water away from the foundation.
By investing time and effort in exterior drainage improvement and proper grading, you establish a powerful defense against basement water intrusion. These steps are often the most effective in preventing water from becoming a problem in the first place, laying a solid foundation for a dry and healthy basement.
Step 3: Sealing Cracks and Openings
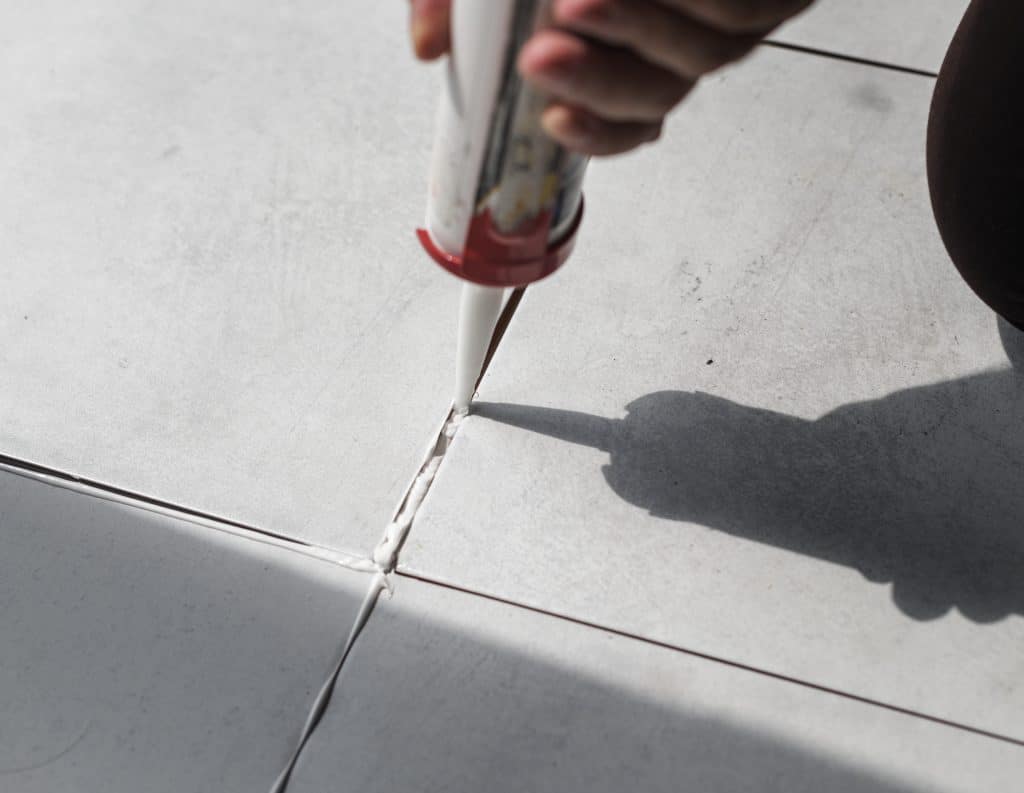
Once you’ve addressed exterior drainage, the next critical phase in your DIY basement waterproofing journey is to seal any existing cracks, holes, and openings in your foundation walls and floor. Even with perfect exterior drainage, water can still find its way through compromised areas of your basement’s structure. This step focuses on creating an impermeable barrier against moisture, ensuring that your foundation remains watertight.
Sealing these entry points requires careful attention to detail and the use of appropriate materials. Not all cracks are created equal, and different types of cracks and openings demand specific sealing methods. Ignoring even small fissures can lead to significant water problems, as water relentlessly exploits any weakness in your basement’s defense. This is where precision and the right tools make all the difference.
Addressing Wall Cracks and Mortar Joints
Cracks in basement walls are common, often resulting from foundation settling, concrete shrinkage, or external pressure. Identifying the type and severity of the crack will dictate the best repair method.
Hairline Cracks: For non-structural hairline cracks (less than 1/8 inch wide), a high-quality polyurethane caulk or hydraulic cement can be effective. Clean the crack thoroughly before application, ensuring a good bond.
Larger Cracks: Wider cracks (1/8 inch to 1/2 inch) may require epoxy injection kits or specialized crack repair compounds. These often involve injecting a resin into the crack, which expands and creates a strong, waterproof seal. Follow manufacturer instructions precisely.
Mortar Joint Repair: Deteriorated mortar joints in concrete block or stone foundations should be repointed. This involves scraping out old, loose mortar and replacing it with fresh, waterproof mortar.
Basement Wall Coatings: After sealing individual cracks, consider applying a waterproof coating or sealant to the entire interior basement wall. These products create a barrier that prevents moisture from seeping through porous concrete or masonry.
Properly sealing wall cracks is vital to preventing direct water entry. Remember to allow sufficient curing time for any sealants or compounds before proceeding with further steps.
Sealing Floor Cracks and Floor-Wall Joints
Basement floors can also develop cracks, especially if hydrostatic pressure from beneath is a problem. The joint where the floor meets the wall (the cove joint) is another common area for water intrusion.
Floor Cracks: Similar to wall cracks, small floor cracks can be sealed with polyurethane caulk or epoxy injection. For larger or active cracks, a specialized concrete crack filler designed for floors is best. Ensure the area is clean and dry.
Cove Joint Sealing: The floor-wall joint is often a weak point. Apply a flexible, waterproof sealant specifically designed for this application. In some cases, a channel drain system (interior drain tile) may be necessary to relieve hydrostatic pressure and direct water to a sump pump.
Sump Pump Installation/Maintenance: If you have a sump pump, ensure it’s in good working order. Test it regularly. If you experience significant hydrostatic pressure, installing a sump pump system with an interior perimeter drain might be a necessary, albeit larger, DIY project.
Utility Penetrations: Carefully seal around all pipes, wires, and other utility lines that pass through your basement walls or floor. Use waterproof caulk, expanding foam, or specialized escutcheon plates to create a tight seal.
Sealing cracks and openings is a meticulous but essential step in achieving a dry basement. By carefully addressing each potential entry point with the correct materials and techniques, you significantly enhance your basement’s resistance to water intrusion, creating a more secure and protected living space.
Step 4: Interior Waterproofing Barriers and Systems
Even after addressing exterior drainage and sealing individual cracks, some basements may still benefit from interior waterproofing barriers and systems. This final layer of defense is particularly useful in situations where exterior solutions are challenging or insufficient, or when dealing with persistent hydrostatic pressure. Interior waterproofing focuses on managing any water that still manages to penetrate the foundation, directing it away before it can cause damage.
These interior solutions range from simple sealants and paints to more complex drainage systems. The choice depends on the severity of your moisture problem and your budget. While some projects can be tackled by a dedicated DIYer, others might require professional consultation, especially for extensive drainage systems. However, understanding the options empowers you to make informed decisions for your home’s protection.
Applying Waterproof Sealants and Paints
For minor dampness or as an added layer of protection, waterproof sealants and paints can be highly effective. These products are designed to prevent moisture from passing through porous concrete and masonry.
Waterproof Paints/Coatings: These specialized paints contain binders that block water molecules from penetrating the wall surface. They are applied like regular paint but offer a much higher level of water resistance. Ensure the walls are clean, dry, and free of efflorescence before application.
Masonry Sealers: For unpainted concrete or block walls, clear masonry sealers can be applied. These penetrate the surface, creating a hydrophobic barrier that repels water without changing the appearance of the wall.
Crystalline Waterproofing: This type of coating forms crystals that penetrate the concrete and fill pores and hairline cracks, becoming an integral part of the concrete structure. It’s a more permanent solution for active water seepage.
Vapor Barriers: For basement floors, especially if you plan to install flooring, a vapor barrier (thick plastic sheeting) laid over the concrete slab can prevent moisture from rising through the floor and causing issues like mold or warping.
These interior barriers are excellent for preventing general dampness and minor seepage, enhancing the comfort and usability of your basement space.
Considering Interior Drainage Systems
For more significant water problems, particularly those caused by hydrostatic pressure, interior drainage systems might be necessary. These systems collect water that enters the basement and divert it to a sump pump.
Interior Perimeter Drains (French Drains): This involves excavating a trench around the interior perimeter of your basement, laying a perforated pipe, covering it with gravel, and connecting it to a sump pump. Water that seeps through the walls or floor-wall joint is collected by the drain and pumped out.
Sump Pump Systems: A sump pump is crucial for any interior drainage system. It collects water in a pit and automatically pumps it out of the basement. Ensure your sump pump has a reliable power source and consider a battery backup for power outages.
Wall Membranes/Panels: These dimpled plastic sheets are installed on the interior of basement walls, creating an air gap that allows water to flow down to an interior perimeter drain. They also prevent moisture from directly contacting finished walls.
Dehumidifiers: While not a waterproofing system, a high-capacity dehumidifier is an essential tool for managing ambient humidity in a basement. It helps prevent mold growth and reduces the overall damp feeling, complementing your waterproofing efforts.
Implementing interior waterproofing barriers and systems provides a robust last line of defense against basement moisture. By strategically applying sealants, paints, and potentially installing drainage systems, you can ensure your basement remains dry, healthy, and a valuable part of your home, even in challenging conditions.
Maintaining Your Waterproofing Efforts
Waterproofing your basement isn’t a one-and-done project; it requires ongoing vigilance and maintenance to ensure its long-term effectiveness. Just like any other aspect of home maintenance, regular check-ups and prompt attention to minor issues can prevent them from escalating into major problems. Neglecting your waterproofing system, whether DIY or professionally installed, can lead to the return of moisture issues, undoing all your hard work and investment.
Think of maintenance as an integral part of your DIY basement waterproofing strategy for 2026 and beyond. By establishing a routine of inspection and care, you not only preserve the dry conditions you’ve worked hard to achieve but also extend the life of your home’s foundation and protect your valuable belongings stored in the basement. Proactive maintenance is always less costly and less stressful than reactive repairs.
Seasonal Checks and Routine Tasks
Establishing a regular schedule for checking your basement and exterior drainage components is crucial. Different seasons can bring different challenges, so tailor your maintenance routine accordingly.
Spring: After winter thaws, check for new cracks in the foundation, ensure downspouts are clear of ice and debris, and verify that the ground still slopes away from your home. Test your sump pump.
Summer: Inspect window wells for debris and ensure covers are secure. Check for any signs of condensation or high humidity inside the basement and adjust dehumidifier settings if needed.
Fall: This is the most critical time for gutter cleaning. Remove all leaves and debris to prepare for heavy autumn rains and winter snow. Inspect roof shingles for damage that could lead to water runoff issues.
Winter: Monitor for ice dams on the roof that could cause water to back up and seep into walls. Ensure downspout extensions are still functional and not blocked by snow or ice.
These seasonal checks are your first line of defense, allowing you to catch and address potential issues before they become serious. Consistency is key in effective basement maintenance.
Addressing Minor Issues Promptly
Even with the best waterproofing efforts, small issues can arise. The key is to address them immediately before they escalate. A small leak ignored can quickly become a significant problem.
Reseal Small Cracks: If you notice new hairline cracks developing, reapply caulk or sealant as soon as possible. Don’t wait for them to widen.
Clear Blockages: If a downspout or drain becomes blocked, clear it immediately. Standing water near your foundation is a major risk.
Monitor Humidity Levels: Use a hygrometer to keep track of basement humidity. If it consistently rises above 50-60%, investigate the cause and adjust your dehumidifier or ventilation.
Inspect Sump Pump: Regularly test your sump pump by pouring a bucket of water into the pit to ensure it activates and drains properly. Clean the pit of any sediment.
By staying vigilant and addressing minor issues as they appear, you can maintain the integrity of your waterproofing system and ensure your basement remains dry and healthy. Ongoing maintenance is an investment in your home’s future and your peace of mind.
Advanced Solutions and When to Call a Professional
While many aspects of DIY basement waterproofing are achievable for the average homeowner, there are situations where advanced solutions or professional intervention become necessary.
Recognizing when a problem exceeds your DIY capabilities is crucial for preventing further damage and ensuring a lasting solution. Sometimes, the complexity of the issue, the specialized equipment required, or the sheer scale of the project warrants expert help.
It’s important to understand that some basement water problems stem from significant structural issues or complex geological conditions that are beyond the scope of typical DIY repairs.
Attempting to fix these without the proper knowledge or tools can lead to wasted money, ineffective results, or even exacerbate the problem. Knowing when to consult a professional can save you time, effort, and ultimately, more money in the long run.
Recognizing Complex Water Problems
Certain indicators suggest that your basement water issue might be more severe than a simple crack or poor drainage, requiring a more sophisticated approach.
Structural Cracks: Large, jagged, or horizontal cracks in your foundation walls often indicate structural movement or significant pressure. These require professional assessment and repair, as they can compromise the integrity of your home.
Persistent Hydrostatic Pressure: If you’ve addressed exterior drainage and sealed visible cracks, but still experience significant water seepage through the floor or floor-wall joint, it suggests a high water table and persistent hydrostatic pressure that may require an interior drain tile system, often best installed by professionals.
Mold Infestation: Extensive mold growth, especially if it returns after cleaning, indicates a deep-seated moisture problem that needs comprehensive remediation, often including professional drying and air quality testing.
Bowing Walls: If your basement walls are bowing inward, it’s a clear sign of immense external pressure and a severe structural issue. This requires immediate professional engineering assessment and stabilization.
These complex problems are not only difficult to diagnose accurately but also require specialized techniques and equipment that are typically not available to the DIYer. Prompt professional intervention can prevent catastrophic failure.
Professional Waterproofing Services
When faced with complex issues, professional waterproofing companies offer a range of advanced solutions and expertise. They have the experience and equipment to tackle problems that are beyond DIY scope.
Exterior Excavation and Waterproofing: For severe foundation cracks or widespread seepage, professionals can excavate around the foundation, repair cracks, apply exterior waterproof membranes, and install exterior drain tile systems. This is a highly effective but labor-intensive process.
Interior Drain Tile Systems: While a motivated DIYer can install an interior drain tile, professionals can do it more efficiently, ensure proper grading within the trench, and integrate it seamlessly with a high-capacity sump pump system.
Foundation Repair and Stabilization: For bowing walls or significant structural cracks, professionals can install wall anchors, carbon fiber straps, or steel beams to stabilize and repair the foundation, preventing further movement.
Vapor Barrier Installation: For crawl spaces or basements with significant ground moisture, professional encapsulation with heavy-duty vapor barriers can create a dry, sealed environment.
Deciding when to call a professional is a critical part of a responsible homeowner’s approach to basement waterproofing. While DIY efforts are valuable for many issues, knowing the limits and seeking expert help for advanced problems ensures the long-term health and safety of your home.
Cost-Effective DIY vs. Professional Investment
When considering DIY basement waterproofing, one of the primary motivations is often cost savings. Tackling projects yourself can indeed be significantly cheaper than hiring professionals, especially for minor issues.
However, it’s essential to weigh the potential savings against the complexity of the problem, the time commitment, and the risk of ineffective repairs. Understanding this balance helps you make an informed decision that protects your home and your wallet.
The cost-effectiveness of DIY waterproofing largely depends on your skill level, the nature of the water intrusion, and the tools you already possess. For simple tasks like gutter cleaning, downspout extensions, or sealing hairline cracks, DIY is almost always the more economical choice.
However, for more extensive problems, the initial savings of DIY might be overshadowed by the need for future professional repairs if the DIY solution proves inadequate.
Budget-Friendly DIY Solutions
Many common basement moisture problems can be effectively addressed with relatively inexpensive materials and a bit of elbow grease. These solutions are ideal for proactive prevention and minor issues.
Gutter Maintenance: Cleaning gutters and extending downspouts costs very little beyond your time and perhaps the price of downspout extenders (typically $10-$30 each).
Grading Adjustments: Adding soil to improve grading can be done with bags of topsoil or fill dirt, which are quite affordable. Renting a tamper might be the biggest expense, but even then, it’s a fraction of professional regrading.
Crack Sealing: High-quality polyurethane caulk or hydraulic cement for small cracks typically ranges from $5-$20 per tube/container. Epoxy injection kits for larger cracks might be $40-$100.
Waterproof Paint/Sealers: A gallon of waterproof masonry paint or sealer usually costs $30-$70, significantly less than professional wall coatings.
These DIY options allow homeowners to address many common waterproofing needs without breaking the bank, making them excellent first steps in moisture prevention.
When Professional Investment Makes Sense
For certain complex or extensive waterproofing challenges, the investment in professional services is often more cost-effective in the long run. Professionals bring specialized expertise, equipment, and warranties that DIY projects cannot match.
Extensive Structural Damage: If your foundation has significant cracks, bowing walls, or signs of severe structural stress, professional repair is essential. The cost can range from a few thousand to tens of thousands of dollars, but it’s an investment in your home’s safety and longevity.
Persistent Hydrostatic Pressure: Installing an interior or exterior drain tile system, especially with a sump pump, is a major undertaking. Professionals can ensure proper design, installation, and integration, typically costing $5,000-$15,000, depending on the scope.
Chronic Leaks: If you’ve tried multiple DIY solutions without success, it’s time to call in an expert. Their diagnostic tools and experience can pinpoint elusive problems and provide guaranteed solutions.
Time and Expertise Constraints: If you lack the time, physical capability, or specific knowledge required for a large-scale DIY project, hiring a professional can save you stress and ensure the job is done correctly the first time.
Ultimately, the decision between DIY and professional waterproofing boils down to a careful assessment of the problem, your capabilities, and your budget. For smaller, manageable issues, DIY offers significant savings. For complex or structural problems, professional investment provides peace of mind and a lasting solution, protecting your home’s integrity and value.
| Key Step | Brief Description |
|---|---|
| Thorough Inspection | Identify all interior/exterior moisture sources and entry points. |
| Exterior Drainage | Optimize gutters, downspouts, and landscape grading away from foundation. |
| Seal Cracks & Openings | Repair wall/floor cracks and seal utility penetrations using appropriate materials. |
| Interior Barriers | Apply waterproof paints/sealants or consider interior drainage systems. |
Frequently Asked Questions About DIY Basement Waterproofing
The first signs often include a musty odor, white powdery residue (efflorescence) on walls, damp spots, peeling paint, or visible condensation. Catching these early can prevent more significant and costly damage, making early detection a key part of effective DIY basement waterproofing efforts.
You should clean your gutters at least twice a year, typically in late spring and late fall. If your property has many trees, especially deciduous ones, more frequent cleaning might be necessary to prevent clogs and ensure proper water diversion away from your foundation.
No, regular paint is not designed to withstand hydrostatic pressure or block moisture effectively. For basement walls, you need specialized waterproof masonry paint or a dedicated waterproofing sealer. These products contain binders that create a much stronger moisture barrier than standard paints.
Hydrostatic pressure occurs when water saturates the soil around your foundation, exerting force against basement walls and floors. This pressure can push water through cracks, porous concrete, or the floor-wall joint, leading to leaks and seepage. It’s a common cause of persistent basement water issues.
You should call a professional if you observe large structural cracks, bowing basement walls, persistent leaks despite DIY efforts, or if you suspect a high water table requires an interior drain tile system. Complex problems often require specialized expertise and equipment for a lasting solution.
Conclusion
Embarking on DIY basement waterproofing is a commendable and often highly effective way to protect your home from the damaging effects of moisture. By systematically approaching the process—from thorough inspection and improving exterior drainage to sealing cracks and applying interior barriers—you can significantly mitigate the risks of water intrusion.
Remember that consistency in maintenance is just as crucial as the initial efforts, ensuring your basement remains dry and healthy for years to come. While many issues are within the scope of a dedicated homeowner, recognizing when to call in professional expertise for complex problems is a sign of smart homeownership. Safeguarding your basement is an investment in your home’s structural integrity, value, and your overall peace of mind.