Hardwood Flooring Fixes: Easy DIY Repairs That Work
 Hardwood floors add timeless elegance and value to any home, but daily life inevitably brings wear and tear. From the scuffs of moving furniture to the accidental spills, your beautiful flooring can accumulate blemishes.
This guide focuses on practical DIY hardwood floor repair, offering effective solutions for scratches, dents, and stains, empowering you to maintain their pristine appearance without professional help.
Understanding hardwood floor damage: types and causes
Before diving into repairs, it’s crucial to understand the different types of damage that can afflict hardwood floors and their underlying causes.
Identifying the specific issue will guide you toward the most effective repair strategy, ensuring you don’t exacerbate the problem with an inappropriate solution.
Hardwood floors, while durable, are susceptible to various forms of damage. Scratches are perhaps the most common, ranging from superficial scuffs on the finish to deeper gouges that penetrate the wood itself. Dents, often caused by dropped objects or heavy furniture, compress the wood fibers. Stains, on the other hand, involve discoloration from absorbed liquids, which can range from minor surface marks to deep-seated pigment changes.
Common culprits behind floor imperfections
Many everyday occurrences contribute to hardwood floor damage. Understanding these can help in prevention as much as in repair.
Foot traffic: Dirt, grit, and small stones tracked in from outside can act like sandpaper, creating countless tiny scratches over time.
Furniture movement: Dragging chairs, tables, or other heavy items without proper protection is a leading cause of deep scratches and gouges.
Pet claws: Even well-trimmed pet nails can leave a network of fine scratches, especially on softer wood species.
Dropped objects: Heavy or sharp items falling onto the floor can create noticeable dents or even small chips.
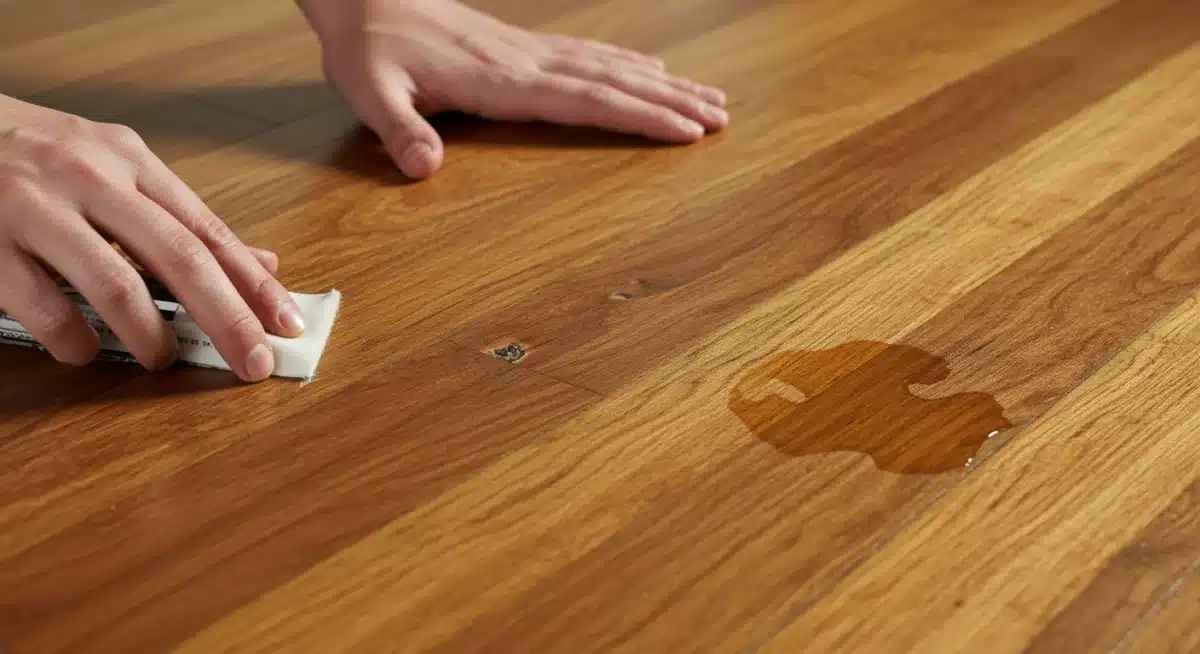
Spills: Water, wine, pet urine, and other liquids can seep into the wood, causing discoloration, swelling, or even mold if not cleaned promptly.
Each type of damage requires a specific approach. For instance, a superficial scratch might only need a touch-up pen, while a deep dent could call for steaming or wood filler.
Stains demand careful identification of the liquid culprit to determine the appropriate cleaning agent. By accurately assessing the damage, you set the stage for a successful DIY repair, preserving the beauty and integrity of your hardwood floors for years to come.
Tackling minor scratches: quick fixes for surface scuffs
Minor scratches are an inevitable part of owning hardwood floors, but they don’t have to be permanent.
Many surface scuffs can be effectively diminished or even removed with simple DIY techniques, restoring the floor’s smooth appearance without extensive refinishing.
The key is to address them promptly and choose the right method for the depth of the scratch.
These superficial marks typically affect only the top protective layer of the finish, rather than penetrating the wood itself.
This means that with proper care and the right materials, you can often blend them away, making them virtually invisible. The effectiveness of these quick fixes largely depends on the severity and depth of the scratch. It’s always best to start with the least invasive method and progress if necessary.
Simple solutions for light scratches
For the lightest of scuffs, sometimes all that’s needed is a bit of polish or a specialized product.
Hardwood floor repair kits: Many manufacturers offer kits designed for minor scratches, often including touch-up pens, waxes, or polishes that match common wood tones. These are excellent for camouflaging fine lines.
Walnuts or pecans: The natural oils in these nuts can work wonders on light scratches. Simply rub a shelled walnut or pecan directly over the scratch; the oils will seep into the wood, helping to conceal the mark.
Crayons or wax sticks: For slightly deeper but still superficial scratches, a wax crayon or stick in a matching color can fill the scratch. Melt the wax slightly and rub it into the groove, then buff with a soft cloth.
Before applying any solution, always clean the area thoroughly to remove dirt and debris. Test your chosen method on an inconspicuous spot first to ensure color matching and prevent any adverse reactions.
Patience and a light touch are essential for achieving professional-looking results with these quick fixes. If the scratch is still visible, you might need to consider slightly more involved methods, but these initial steps are often surprisingly effective.
Repairing deeper scratches and gouges: beyond surface solutions
When scratches go beyond the finish and into the wood grain, quick fixes might not be enough. Deeper scratches and gouges require more substantial repair methods to restore the floor’s integrity and appearance.
These solutions typically involve filling the void, sanding, and then matching the floor’s existing finish, demanding a bit more effort but yielding impressive results.
It’s important to distinguish between a deep scratch and a gouge. A deep scratch is a noticeable line in the wood, while a gouge implies a loss of wood material.
Both compromise the floor’s protective layer and can lead to further damage if left unaddressed. The goal of these repairs is not just to hide the damage but to rebuild the affected area, ensuring a seamless blend with the surrounding flooring.
Proper preparation is key, including thoroughly cleaning the damaged section and ensuring it’s dry before beginning any repair work.
Advanced techniques for significant damage
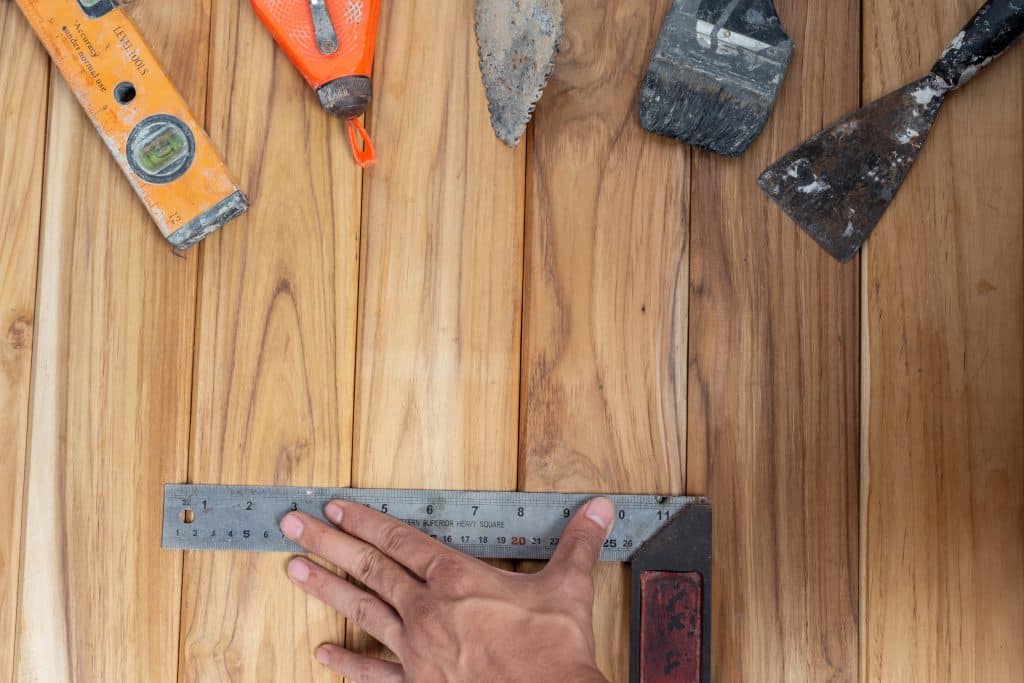
Addressing these more serious imperfections often involves wood fillers and precise finishing techniques. Always work in a well-ventilated area and follow product instructions carefully.
Wood filler or wood putty: For gouges or wide scratches, wood filler is an excellent choice. Apply it carefully with a putty knife, ensuring it’s pressed firmly into the void. Allow it to dry completely, then sand it flush with the surrounding floor. Choose a filler that can be stained to match your floor color.
Color-matched wood markers or stain pens: After filling and sanding, you’ll need to re-stain the repaired area. Use a wood marker or stain pen that closely matches your floor. Apply in thin layers, blending outwards to avoid harsh lines.
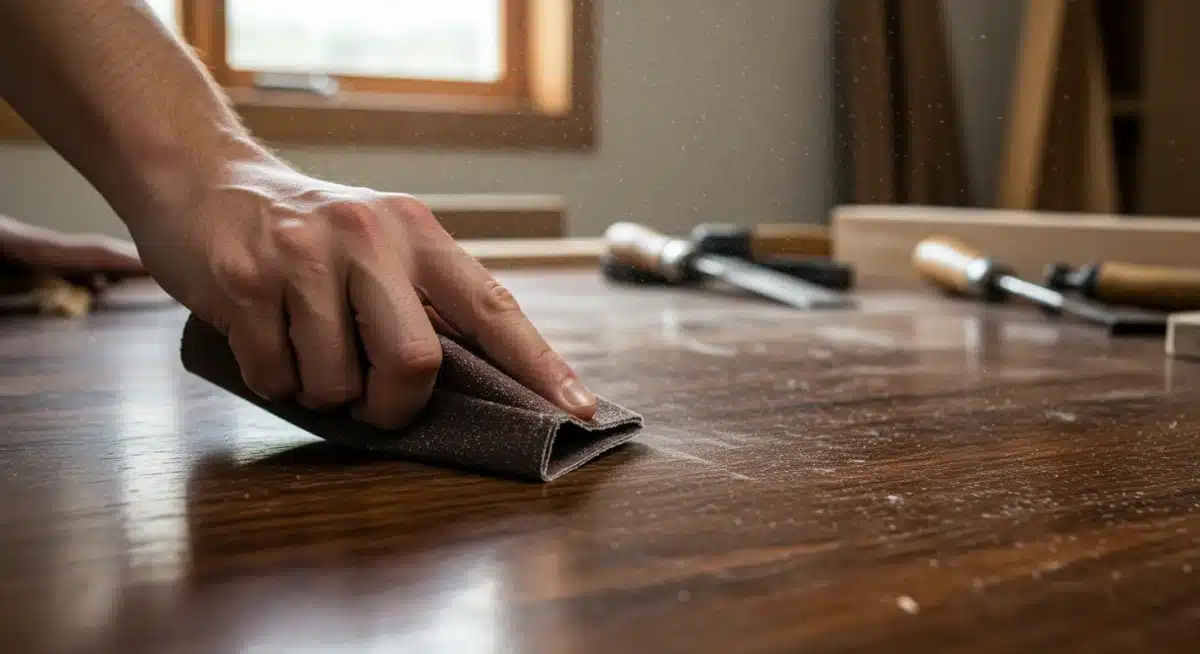
Fine-grit sanding: For deep scratches that haven’t removed wood material, careful sanding can sometimes smooth out the edges. Use very fine-grit sandpaper (220-grit or higher) and sand with the grain of the wood. Be extremely cautious not to over-sand, as this can create a depression.
Once the filler is dry and sanded, and the color is matched, you’ll need to apply a new layer of finish. This might involve a small amount of polyurethane or a similar clear coat, carefully brushed or wiped over the repaired area.
The trick is to apply just enough to blend with the existing finish without creating a noticeable raised patch. With patience, these methods can make even significant scratches and gouges disappear, extending the life and beauty of your hardwood floors.
Fixing dents in hardwood floors: steaming and filling methods
Dents, unlike scratches, involve the compression of wood fibers, creating an indentation on the surface.
While they might seem daunting, many dents in hardwood floors can be effectively repaired using methods that either encourage the wood fibers to swell back into place or fill the void with a suitable material.
The approach largely depends on the dent’s depth and whether the wood fibers are merely compressed or actually broken.
A common misconception is that all dents are permanent. However, wood has a natural ability to expand when exposed to moisture and heat, a property that can be harnessed for repair.
For shallower dents where the wood fibers are still intact, steaming can be remarkably effective. Deeper dents, especially those where wood has been visibly crushed or removed, will require a filling method to achieve a smooth, even surface. Always ensure the floor is clean and dry before attempting any dent repair.
Restoring compressed wood fibers
For dents that haven’t broken the wood fibers, moisture and heat can be your allies.
The iron and damp cloth method: Place a damp cloth or paper towel over the dent. With an iron set to medium heat (no steam), gently press the iron onto the cloth for a few seconds.
The heat and moisture will cause the compressed wood fibers to swell, often lifting the dent. Repeat this process, checking the dent’s progress, until it is level with the surrounding floor. Be careful not to scorch the wood.
Water droplet method: For very shallow dents, simply applying a few drops of water directly into the dent and allowing it to soak in overnight can sometimes be enough to encourage the wood to swell. This is a slower process but can be effective for minor imperfections.
For deeper dents or those where the wood fibers have been damaged beyond simple swelling, wood filler or wood epoxy becomes necessary.
After cleaning the dented area, apply a wood filler that matches your floor’s color using a putty knife.
Overfill slightly, then sand it flush with the floor once dry. For a more durable repair on significant dents, a two-part wood epoxy can be used, which hardens to a very strong finish.
Always remember to reapply a matching finish after any filling and sanding to protect the repaired area and blend it seamlessly with the rest of your floor.
Effective stain removal: targeting common hardwood floor discolorations
Stains on hardwood floors can be particularly frustrating, as they penetrate the wood and alter its natural color. However, many common discolorations can be effectively removed or significantly lightened with the right approach and cleaning agents. The key to successful stain removal lies in identifying the type of stain and acting quickly, as fresh stains are always easier to treat than old, set-in ones.
Different types of stains require different solutions. Water stains, for instance, often appear as dark rings or spots and indicate moisture penetration.
Pet urine stains can be particularly challenging due to their acidic nature and strong odor. Oil-based stains, such as grease or food spills, can leave dark, greasy marks.
Each of these requires a specific chemical reaction or absorption method to lift the discoloration from the wood fibers. Always test any cleaning solution in an inconspicuous area first to ensure it doesn’t damage your floor’s finish.
Strategies for various stain types
Tailoring your approach to the specific stain will maximize your chances of success.
Water stains (dark spots): For fresh water stains, try rubbing with a cloth dampened with mineral spirits.
For older, darker stains, a paste made from baking soda and water or toothpaste can sometimes lift the discoloration.
Apply, let sit, then gently wipe away. For stubborn dark spots, light sanding and re-staining might be necessary.
Pet urine stains: These are notorious for penetrating deep and causing dark, pungent stains. Blot fresh stains immediately.
For dried stains, a solution of hydrogen peroxide applied with a cloth and left to soak can help bleach the stain. Cover the area with plastic wrap to prevent evaporation.
Repeat as needed, then rinse thoroughly. Professional products designed for pet stains are also highly effective.
Oil, grease, or food stains: Sprinkle cornstarch, talcum powder, or baking soda over the stain to absorb the oil. Let it sit for several hours or overnight, then vacuum or wipe away. For tougher stains, a mild detergent solution or mineral spirits on a cloth can be used.
After successfully removing a stain, it’s crucial to clean the area thoroughly with a damp cloth and then dry it completely.
Depending on the method used, you may need to reapply a small amount of wood finish or wax to the treated spot to restore its protective layer and blend it with the surrounding floor.
Consistent maintenance and quick action are your best defenses against persistent floor stains. 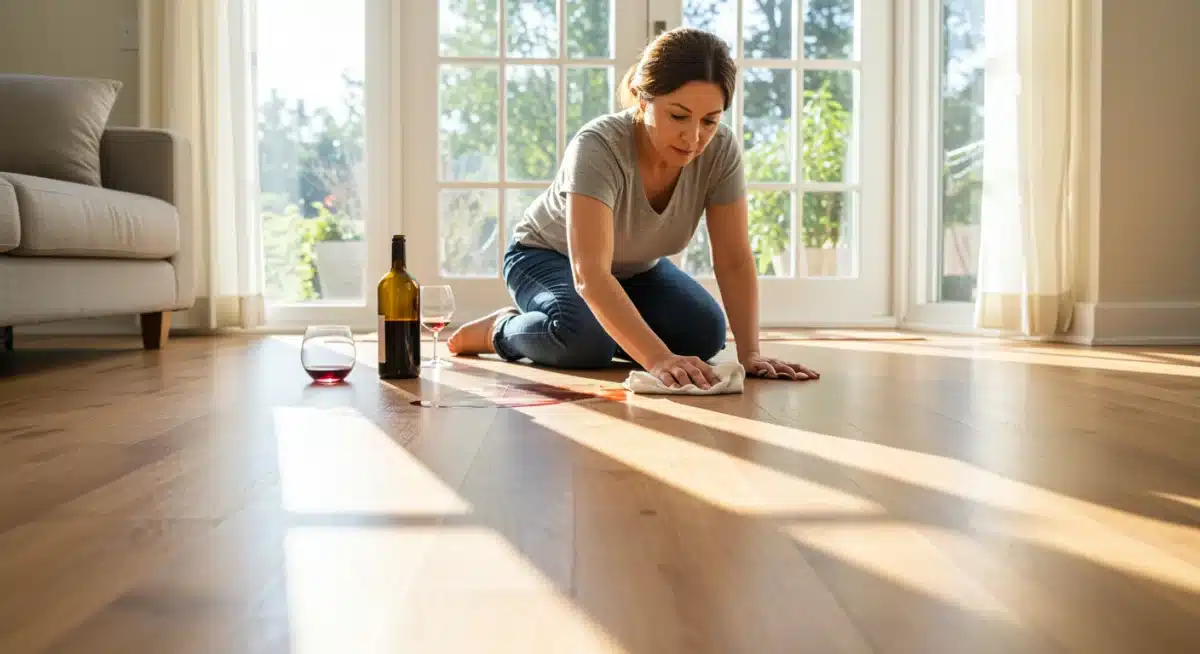
Preventative measures: keeping your hardwood floors pristine
While DIY repairs are effective for addressing existing damage, prevention is always the best strategy for maintaining the beauty and longevity of your hardwood floors.
Implementing a few simple habits and protective measures can significantly reduce the incidence of scratches, dents, and stains, saving you time and effort in the long run. A proactive approach ensures your floors remain a stunning feature of your home for years to come.
Many common types of damage stem from everyday activities that can be easily mitigated. Think about the sources of wear and tear in your home – pet claws, heavy furniture, tracked-in dirt, and accidental spills.
By addressing these potential hazards head-on, you create a protective shield for your flooring. Investing in the right tools and adopting mindful behaviors will pay dividends by preserving the finish and structural integrity of your hardwoods.
Essential tips for floor protection
Incorporating these preventative measures into your routine will make a noticeable difference.
Use furniture pads: Attach felt pads to the legs of all furniture that rests on your hardwood floors, including chairs, tables, and sofas. This prevents scratches when furniture is moved.
Area rugs and mats: Place area rugs in high-traffic areas, such as hallways, living rooms, and under dining tables. Use doormats at all entrances to trap dirt and moisture before it can be tracked onto the floors.
Regular cleaning: Sweep or vacuum (with a hardwood floor attachment) regularly to remove grit and dirt that can act as abrasives. Damp mop with a hardwood-specific cleaner as needed, avoiding excessive water.
Pet nail maintenance: Keep pet nails trimmed to minimize scratches. Consider soft claws or booties for particularly active pets.
Prompt spill cleanup: Wipe up spills immediately to prevent liquid from soaking into the wood and causing stains or swelling.
Beyond these daily practices, consider periodic maintenance like reapplying a protective finish every few years, especially in high-traffic areas.
This replenishes the sacrificial layer that protects the wood itself. By combining diligent cleaning, strategic protection, and timely preventative actions, you can significantly prolong the life and enhance the appearance of your hardwood floors, making costly repairs or refinishing less frequent necessities.
When to call a professional: knowing your DIY limits
While many common hardwood floor issues can be successfully addressed with DIY methods, there are instances where professional intervention becomes necessary.
Recognizing your limits and knowing when to call in an expert can prevent further damage, save you money in the long run, and ensure the best possible outcome for your floors. Attempting complex repairs without the right skills or tools can often lead to more extensive and expensive problems.
The line between a DIY project and a professional job isn’t always clear, but generally, it involves the scale of the damage, the type of wood, and your comfort level with advanced techniques.
Minor scratches, small dents, and localized stains are typically within the realm of a confident DIYer. However, widespread damage, structural issues, or unfamiliar wood types often warrant expert assessment.
A professional will have specialized tools, extensive experience, and access to commercial-grade products that are not readily available to the average homeowner.
Indicators for professional help
Several signs suggest it’s time to consult with a flooring professional.
Extensive damage: If large areas of your floor are heavily scratched, dented, or stained, a full refinishing by a professional might be more cost-effective and yield better results than piecemeal DIY repairs.
Structural issues: Cupping, crowning, buckling, or widespread gapping between planks often indicate underlying moisture problems or improper installation, which require professional diagnosis and repair.
Deep gouges or holes: While small gouges can be filled, very deep damage or holes that compromise the plank’s integrity might require plank replacement, a task best handled by an experienced professional.
Unidentified or persistent stains: If you’ve tried various DIY methods for a stain without success, or if the stain’s origin is unknown, a professional can assess the situation and use specialized techniques or chemicals.
Lead-based finishes: If your home was built before 1978, there’s a possibility of lead-based finishes. Sanding or disturbing these requires specific safety protocols and professional handling to avoid health hazards.
A professional can offer a comprehensive assessment, recommend the most appropriate course of action, and execute repairs with precision, ensuring the aesthetic and structural integrity of your hardwood floors.
Don’t hesitate to seek their expertise when the scope of the damage exceeds basic DIY capabilities, as it’s an investment in your home’s value and appearance.
| Key Point | Brief Description |
|---|---|
| Minor Scratches | Use repair kits, walnuts, or wax sticks for superficial scuffs and finish damage. |
| Deeper Scratches & Gouges | Apply wood filler, sand, and re-stain for damage penetrating the wood grain. |
| Dents | Steam with an iron and damp cloth for compressed fibers, or fill with wood filler for deeper dents. |
| Stains | Identify stain type (water, pet, oil) and use specific cleaning agents like mineral spirits, hydrogen peroxide, or absorbents. |
Frequently asked questions about hardwood floor repair
Yes, many deep scratches can be repaired using DIY methods. Techniques like applying wood filler, carefully sanding, and then matching the stain and finish can effectively hide significant damage, provided you work patiently and follow instructions for the products used.
Prevention is key. Use felt pads under all furniture, place area rugs in high-traffic zones, and use doormats at entrances. Regularly sweep or vacuum to remove abrasive grit, and keep pet nails trimmed to minimize surface damage.
For fresh water stains, mineral spirits can help. For older, darker stains, a paste of baking soda and water or even toothpaste rubbed gently can sometimes lift the mark. For stubborn spots, light sanding and re-staining might be necessary.
Steaming is generally safe for most solid hardwood floors with compressed fibers. However, exercise caution with engineered wood or floors with delicate finishes, as excessive heat or moisture could cause delamination or damage. Always test in an inconspicuous area first.
Consider professional help for extensive damage, structural issues like cupping or buckling, very deep gouges requiring plank replacement, or persistent stains that resist DIY efforts. Professionals have specialized tools and expertise for complex repairs.
Conclusion
Maintaining the beauty of hardwood floors doesn’t always require costly professional intervention.
By understanding the nature of different types of damage and employing the right DIY techniques, homeowners can effectively address common issues like scratches, dents, and stains.
From simple touch-ups for superficial scuffs to more involved methods for deeper imperfections, the power to restore your flooring lies largely in your hands.
Remember that consistent preventative measures are your best defense, but when damage occurs, a methodical and patient approach to DIY repair can bring your hardwood floors back to their former glory, ensuring they continue to enhance your home’s appeal for years to come.


