Raised Garden Bed DIY: Fresh Produce & $50 Grocery Savings
 Are you looking to enjoy the taste of fresh, organic produce right from your backyard while also making a tangible impact on your household budget? Then learning how to build a raised garden bed: DIY project for fresh produce and a $50 savings on groceries is an endeavor you absolutely need to consider.
This practical guide will walk you through the steps to create your own productive garden space, transforming your outdoor area into a source of delicious, healthy food and significant financial relief.
The Appeal of Raised Garden Beds: More Than Just Dirt
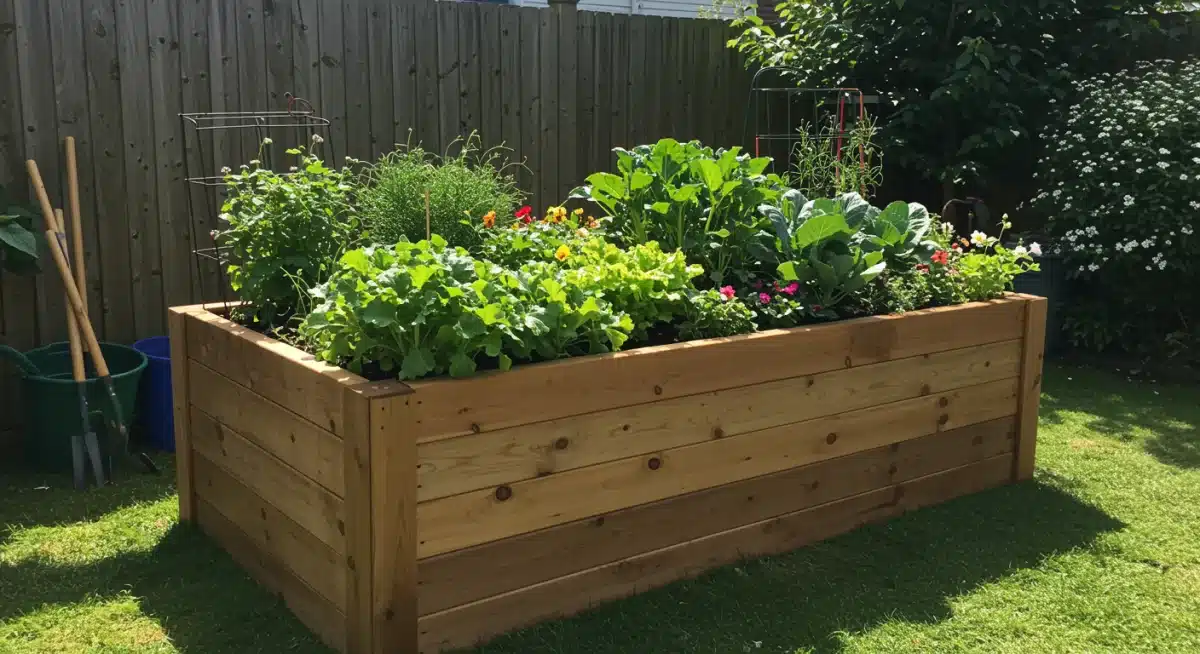
Raised garden beds have surged in popularity among home gardeners, and for excellent reasons. They offer a controlled environment that significantly improves growing conditions compared to traditional in-ground gardens.
Understanding these benefits is the first step towards appreciating why a raised bed is an investment in both your diet and your wallet.
Beyond the aesthetic appeal they bring to any yard, raised beds address many common gardening challenges.
They allow you to dictate the soil quality, ensuring your plants receive the optimal nutrients and drainage they need to flourish. This control often translates into healthier, more abundant harvests, directly contributing to your goal of fresh produce and grocery savings.
Optimal Soil Control and Drainage
One of the primary advantages of a raised garden bed is the complete control it offers over soil composition.
Unlike native soil, which can be compacted, nutrient-deficient, or poorly draining, a raised bed allows you to fill it with a custom blend of high-quality soil. This tailored environment is crucial for plant health and productivity.
Improved Fertility: You can create a rich, loamy soil mix packed with organic matter, providing a consistent supply of nutrients to your plants.
Enhanced Drainage: Raised beds naturally drain better than in-ground gardens, preventing waterlogging that can lead to root rot and other plant diseases.
Weed Suppression: Starting with fresh, weed-free soil significantly reduces the amount of weeding required, saving you time and effort.
The ability to manage your soil so effectively means your plants are less stressed and more resilient, leading to larger yields and a greater variety of produce for your table.
This direct correlation between soil quality and harvest size is a key factor in maximizing your grocery savings.
Extended Growing Season and Easier Access
Raised beds also offer practical benefits that extend beyond soil management. Their elevated nature means the soil warms up faster in the spring, allowing you to plant earlier and potentially enjoy a longer growing season.
This can be particularly advantageous in regions with shorter summers or unpredictable weather patterns, giving you more opportunities to harvest fresh vegetables.
Moreover, the height of raised beds makes gardening much more accessible and comfortable. Bending and kneeling are significantly reduced, which is a blessing for gardeners of all ages and physical abilities.
This ergonomic benefit encourages more frequent tending to your plants, leading to better care and ultimately, better results.
In conclusion, the appeal of raised garden beds lies in their ability to create an ideal growing environment, extend your gardening season, and make the entire process more enjoyable.
These factors collectively contribute to a more productive garden, directly supporting your aim to grow fresh produce and reduce grocery expenses.
Planning Your Raised Garden Bed: Design for Success
Before you even pick up a hammer or shovel, careful planning is paramount for a successful raised garden bed.
A well-thought-out design ensures your bed fits your space, suits your gardening needs, and maximizes its potential for yielding fresh produce and saving you money. Consider factors like location, size, and materials to lay a solid foundation for your DIY project.
Rushing into construction without a clear plan can lead to inefficiencies, wasted materials, and a less productive garden down the line. Taking the time to plan will not only save you headaches but also ensure your raised bed is a long-term asset to your home and grocery budget.
Choosing the Right Location
The placement of your raised garden bed is perhaps the most critical decision. Plants, especially vegetables, require ample sunlight to thrive.
A spot that receives at least six to eight hours of direct sunlight per day is ideal. Observe your yard throughout the day to identify the sunniest locations.
Sunlight Exposure: Prioritize areas with full sun for most vegetables. Partial shade might be acceptable for leafy greens during hot summers.
Water Access: Ensure your chosen spot is conveniently located near a water source, whether it’s a hose spigot or a rain barrel.
Accessibility: Consider how easily you can access all sides of the bed for planting, weeding, and harvesting. Avoid placing it in high-traffic areas where it might be damaged.
Beyond sunlight and water, also think about protection from strong winds or curious pets. A strategic location can prevent many common gardening frustrations before they even start.
Selecting Materials and Dimensions
The materials you choose for your raised garden bed will impact its durability, cost, and aesthetic. Wood is a popular choice due to its natural look and ease of working, but other options exist. Similarly, the dimensions of your bed should be practical for both gardening and maintenance.
For wood, options include cedar, redwood, or untreated pine. Cedar and redwood are naturally rot-resistant and long-lasting but can be more expensive. Untreated pine is more budget-friendly but may have a shorter lifespan. Avoid treated lumber, as chemicals can leach into the soil and contaminate your produce.
Consider the following dimensions:
Width: A width of 3 to 4 feet is generally ideal, allowing you to reach the center of the bed comfortably from either side without stepping on the soil.
Length: This can vary based on your space, but longer beds often prove more efficient for planting.
Height: A height of 10 to 12 inches is sufficient for most vegetables. Taller beds (18-24 inches) offer even better drainage and reduced bending, but require more soil to fill.
By carefully planning these elements, you ensure your raised garden bed is not only functional but also a sustainable and productive addition to your home, truly supporting your goal to build a raised garden bed for fresh produce and a $50 savings on groceries.
Gathering Your Tools and Materials: The DIY Arsenal
Once your planning is complete, the next step in your journey to build a raised garden bed is to assemble all the necessary tools and materials.
Having everything on hand before you begin construction will streamline the process, prevent frustrating delays, and ensure your project stays on track. This preparation is key to an efficient and enjoyable DIY experience, leading to your fresh produce sooner.
Think of this stage as preparing your workspace. A well-organized approach means less time scrambling for a misplaced tool and more time focused on the rewarding task of building your garden haven. It’s about setting yourself up for success from the very beginning.
Essential Tools for Construction
You don’t need a professional workshop to build a sturdy raised garden bed. Most of the tools required are common household items or easily accessible at a local hardware store. Here’s a list of what you’ll likely need:
Measuring Tape: For accurate dimensions and cuts.
Saw: A circular saw or handsaw for cutting lumber to size.
Drill: For pre-drilling holes and driving screws.
Level: To ensure your bed is perfectly level on all sides.
Square: To ensure corners are perfectly square.
Shovel or Spade: For preparing the base and filling the bed with soil.
Wheelbarrow: Useful for transporting soil and materials.
Having these tools ready will make the construction process smoother and more precise, contributing to a more durable and aesthetically pleasing raised bed.
Required Materials for Your Raised Bed
The materials list is relatively straightforward, but choosing the right quality and quantity is important.
This directly impacts the longevity and stability of your garden bed. Remember the earlier discussion on wood types; cedar or redwood are excellent choices for durability, while untreated pine offers a more economical option.
Lumber: Decide on the type and quantity based on your planned dimensions. For a typical 4×8 foot bed, you might need two 2x6x8 foot boards and two 2x6x4 foot boards for each layer of height.
Screws: Exterior-grade wood screws (e.g., galvanized or stainless steel) are essential to prevent rust and ensure structural integrity. Look for screws that are at least 2.5 inches long.
Corner Brackets (Optional): Metal corner brackets can add extra stability, especially for larger or taller beds.
Landscape Fabric or Cardboard: To line the bottom of the bed, preventing weeds from growing up from beneath while allowing drainage.
A small investment in good quality materials will pay dividends in the lifespan of your garden bed, ensuring it continues to produce fresh food and save you money for many seasons to come. Gathering these items systematically will set the stage for a successful build.
Constructing Your Raised Garden Bed: Step-by-Step Guide
With your planning complete and materials gathered, it’s time to bring your vision to life. Building a raised garden bed is a straightforward process that even novice DIY enthusiasts can tackle with confidence.
Following these steps will ensure you construct a sturdy and functional bed ready for planting, paving the way for your fresh produce and grocery savings.
Take your time with each step, ensuring accuracy and stability. A well-built garden bed will serve you for many years, making the effort worthwhile. This is the heart of your DIY project, where theory turns into tangible results.
Preparing the Site and Assembling the Frame
The first physical step is to prepare the ground where your raised bed will sit. Clear any debris, weeds, or grass from the area. While not strictly necessary, leveling the ground slightly can help ensure your bed sits evenly and doesn’t lean over time.
Once the site is prepared, it’s time to assemble the frame:
Cut Lumber: If your lumber isn’t already cut to size, precisely measure and cut your boards according to your planned dimensions.
Form the Rectangle/Square: Lay out your cut boards on the prepared ground to form the desired shape. Ensure the corners are square using a carpenter’s square.
Secure the Corners: Using your drill and exterior-grade screws, attach the boards at each corner. For stronger joints, pre-drill pilot holes to prevent wood splitting. If building a multi-layer bed, stack and secure each layer, staggering the joints for added strength.
This foundational work is crucial for the overall stability and longevity of your raised bed. A square and level frame will make all subsequent steps much easier.
Lining the Bed and Filling with Soil
With the frame assembled, the next step involves preparing the interior of the bed for planting. This includes lining the bottom and then filling it with the appropriate soil mix. These steps are vital for managing weeds and providing optimal growing conditions for your plants.
Line the Bottom: Lay down a layer of landscape fabric or flattened cardboard at the bottom of the bed. This acts as a barrier against weeds and grass from below while still allowing water to drain. Overlap edges slightly to prevent gaps.
Add a Base Layer (Optional): Some gardeners add a layer of coarse organic material like logs, branches, or straw at the very bottom. This ‘Hugelkultur’ method can improve drainage and provide slow-release nutrients as it decomposes.
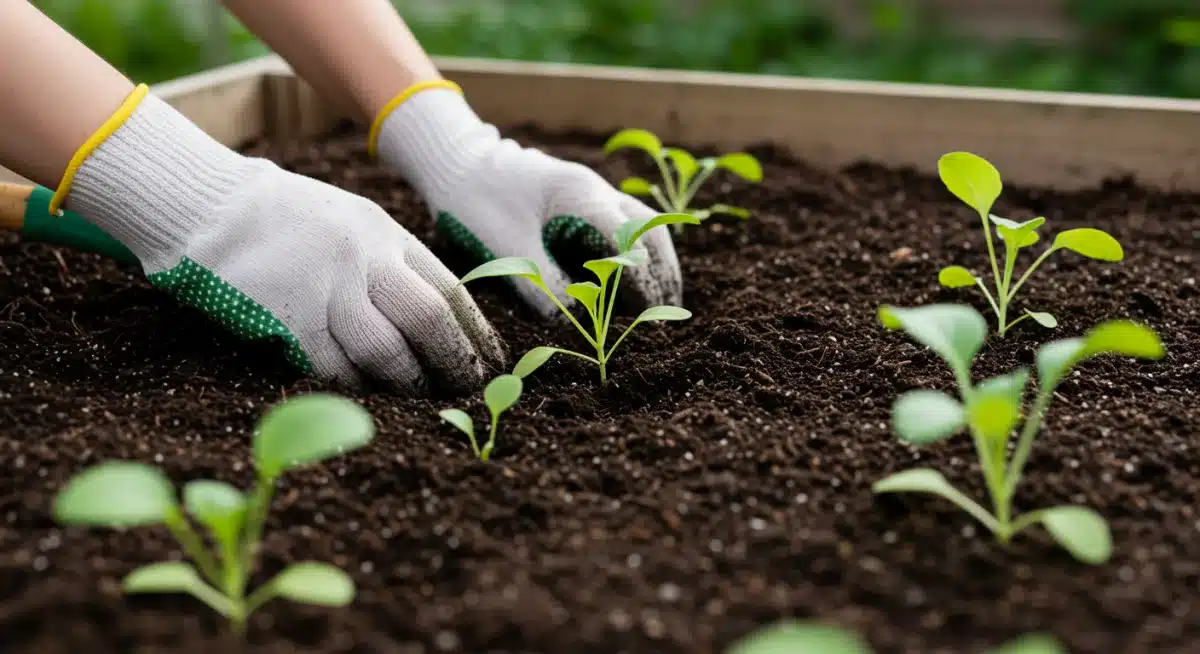
Fill with Soil Mix: Now, fill your raised bed with a high-quality soil mix. A good blend typically includes topsoil, compost, and a small amount of perlite or vermiculite for aeration. Aim for a mix that is rich in organic matter and drains well. Fill to within a few inches of the top edge of the bed.
Carefully filling your raised bed with the right soil mix is an investment in your garden’s future. It provides the perfect medium for your chosen vegetables to flourish, directly supporting your goal to build a raised garden bed for fresh produce and a $50 savings on groceries.
Choosing Your Crops: Maximizing Fresh Produce and Savings
Once your raised garden bed is built and filled with rich soil, the exciting part begins: deciding what to plant! Strategic crop selection is key to maximizing both your fresh produce yield and your potential grocery savings.
Focus on vegetables that you and your family enjoy, that are expensive to buy at the store, and that grow well in your climate.
This stage is where your raised bed truly starts to pay off. Every lettuce leaf, every ripe tomato, and every crisp bell pepper you harvest represents a saving and a taste of unparalleled freshness. Make choices that align with your culinary preferences and local growing conditions.
High-Yield, High-Value Vegetables
To truly impact your grocery bill, prioritize vegetables that offer a high yield per plant and are typically more expensive to purchase. These crops provide the biggest return on your gardening effort and investment. Consider planting varieties that produce continuously throughout the season.
Leafy Greens: Lettuce, spinach, kale, and Swiss chard are incredibly productive, can often be harvested multiple times, and are costly in stores.
Tomatoes: Though they take up space, homegrown tomatoes are infinitely superior in taste to store-bought varieties and can be quite expensive, especially organic options.
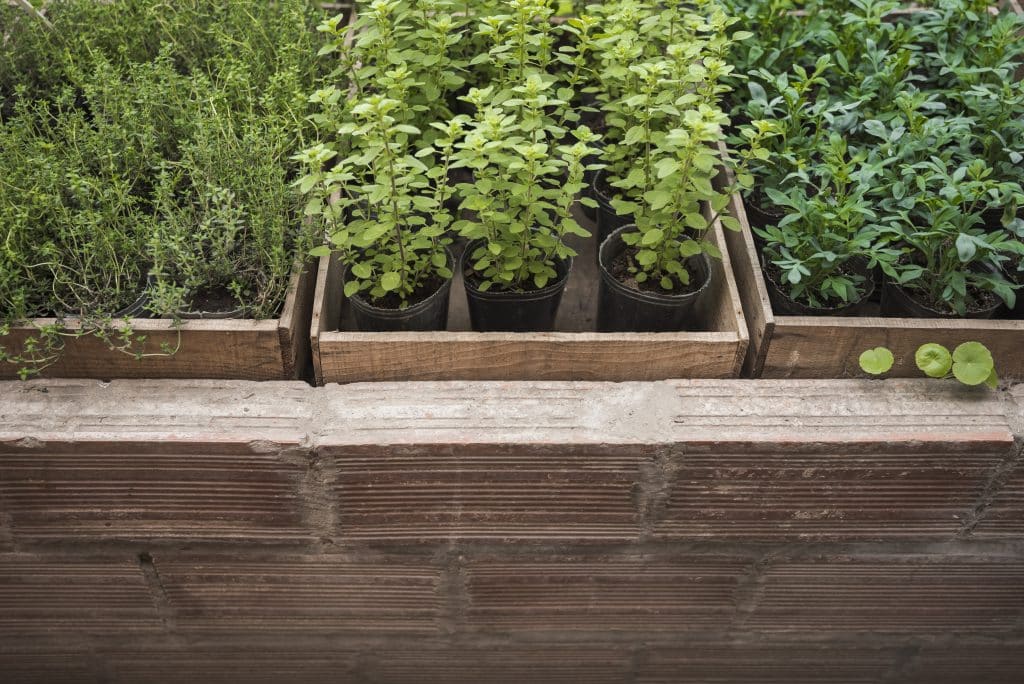
Herbs: Basil, parsley, cilantro, and mint are easy to grow, produce abundantly, and can be very pricey to buy fresh from the supermarket.
Peppers: Bell peppers and chili peppers are excellent additions, offering good yields and adding flavor to many dishes.
By focusing on these types of vegetables, you ensure that your raised garden bed is a powerhouse of productivity, directly translating into tangible savings at the checkout counter.
Succession Planting and Companion Planting
To further maximize your harvest and ensure a continuous supply of fresh produce, incorporate succession planting and companion planting techniques. These methods optimize space and improve plant health, leading to greater yields.
Succession Planting: Instead of planting all your seeds at once, sow small batches of quick-growing crops (like lettuce or radishes) every few weeks. This ensures a staggered harvest rather than a single large one, providing fresh produce over a longer period.
Companion Planting: Strategically plant certain vegetables together that benefit each other. For example, planting marigolds near tomatoes can deter pests, while basil planted with tomatoes is said to improve their flavor. Research compatible pairings for your chosen crops.
These advanced techniques help you get the most out of your raised garden bed, ensuring a steady stream of fresh, delicious food and maximizing your potential for grocery savings. A well-planned crop selection is the cornerstone of a truly productive garden and a healthier, more economical lifestyle.
Maintaining Your Raised Bed for Continuous Harvests
Building your raised garden bed is just the beginning; consistent maintenance is crucial to ensure continuous, bountiful harvests and to truly realize the $50 savings on groceries each week.
A well-maintained garden is a productive garden, and a productive garden feeds your family while reducing your reliance on supermarket produce. Regular attention to watering, feeding, and pest control will keep your plants thriving.
Think of garden maintenance as an ongoing conversation with your plants. By observing their needs and responding promptly, you foster a healthy ecosystem that rewards you with fresh, delicious food season after season. This commitment is what transforms a simple DIY project into a sustainable source of nourishment.
Watering and Fertilizing Strategies
Proper watering is perhaps the most critical aspect of garden maintenance, especially in raised beds which can dry out faster than in-ground gardens. Consistent moisture is vital for plant growth and fruit development.
Deep Watering: Water deeply and less frequently rather than shallowly and often. This encourages roots to grow deeper, making plants more resilient to dry spells.
Morning Watering: Water in the early morning to allow leaves to dry before evening, reducing the risk of fungal diseases.
Monitor Moisture: Stick your finger about an inch or two into the soil. If it feels dry, it’s time to water. Consider a drip irrigation system for efficiency and consistency.
Alongside water, plants need nutrients. Raised beds, while starting with rich soil, will eventually deplete their nutrients. Regular feeding is essential:
Compost: Top-dress your beds with a layer of compost annually or semi-annually to replenish organic matter and nutrients.
Organic Fertilizers: Use balanced organic fertilizers (liquid or granular) throughout the growing season, following product instructions. Consider fish emulsion, seaweed extract, or compost tea.
These practices ensure your plants have everything they need to produce abundantly, making your raised bed a consistent source of fresh, healthy food.
Pest and Disease Management
Even the healthiest gardens can encounter pests and diseases. Early detection and organic prevention methods are your best defense. A proactive approach minimizes damage and keeps your produce safe for consumption.
Regular Inspection: Inspect your plants daily for any signs of pests (e.g., chewed leaves, sticky residue) or diseases (e.g., spots, wilting).
Manual Removal: For larger pests like slugs or caterpillars, manual removal is often effective. Pick them off and dispose of them.
Organic Sprays: For smaller pests like aphids, a strong spray of water or an insecticidal soap can be very effective. Neem oil is another excellent organic option for various pests and some diseases.
Good Air Circulation: Proper plant spacing and pruning can improve air circulation, reducing the likelihood of fungal diseases.
By staying vigilant and employing organic pest and disease management techniques, you protect your harvest without introducing harmful chemicals. This commitment to natural gardening ensures your fresh produce is not only delicious but also truly healthy, reinforcing the value of your decision to build a raised garden bed for fresh produce and a $50 savings on groceries.
The Financial Impact: Saving $50 on Groceries Weekly
While the joy of harvesting your own fresh produce is immeasurable, the financial benefits of a raised garden bed are equally compelling.
The goal to save $50 on groceries weekly isn’t an exaggeration; it’s an achievable reality for many home gardeners. Understanding how these savings accumulate can motivate you further and highlight the true return on your DIY investment.
The rising cost of fresh, organic produce at supermarkets makes homegrown options incredibly attractive.
By displacing even a fraction of your store-bought vegetables with your own, you’ll see a noticeable difference in your weekly spending. This section breaks down the economics of your productive raised bed.
Calculating Your Potential Savings
To truly grasp the financial impact, let’s consider the cost of common vegetables you might grow. A single head of organic lettuce can cost $3-$5.
A bunch of organic kale or Swiss chard is often $4-$6. Fresh herbs, sold in small bundles, can easily run $3-$4 each. Tomatoes, especially heirloom varieties, can be $4-$6 per pound.
If your family consumes:
2 heads of lettuce/greens per week ($8-$10)
1 pound of tomatoes ($4-$6)
2 bunches of herbs ($6-$8)
1-2 bell peppers ($4-$8)
A handful of other seasonal veggies (radishes, carrots, beans, etc. – $10-$15)
You can quickly see how the weekly cost of these items adds up to $32-$47, or even more, depending on your consumption habits and local prices.
By growing these yourself, you essentially transfer that cost from your grocery bill to your backyard. Over a typical 20-week growing season, this could amount to savings of $640 to $940, easily exceeding the initial investment in your raised bed.
Beyond Direct Savings: Health and Quality Benefits
The financial savings extend beyond just the direct cost of produce. There are often hidden benefits that contribute to your overall well-being and long-term financial health.
Reduced Waste: You harvest what you need, when you need it, significantly reducing food waste compared to buying large quantities that might spoil.
Superior Nutrition: Freshly harvested vegetables retain more nutrients than those that have traveled long distances and sat on supermarket shelves. This contributes to a healthier diet, potentially reducing future healthcare costs.
No Pesticides: By growing your own, you control what goes into your food, ensuring your family consumes pesticide-free produce, a significant health benefit that often comes at a premium in stores.
Educational Value: For families, gardening provides an invaluable educational experience, teaching children about food sources, sustainability, and patience.
The ability to build a raised garden bed for fresh produce and a $50 savings on groceries is not merely about cutting costs; it’s about investing in a healthier, more sustainable lifestyle. The financial returns are clear, but the benefits to your health and quality of life are truly priceless.
| Key Aspect | Brief Description |
|---|---|
| Soil Control | Allows for custom, nutrient-rich soil mixes, improving plant health and yields. |
| Grocery Savings | Growing high-value produce can save $50+ weekly on supermarket bills. |
| Extended Season | Raised beds warm faster, allowing earlier planting and longer harvests. |
| Health Benefits | Access to fresh, organic, pesticide-free produce improves family health. |
Frequently Asked Questions About Raised Garden Beds
Cedar or redwood are excellent choices for raised garden beds due to their natural rot resistance and longevity, though they can be pricier. Untreated pine is a more budget-friendly option, but may require more frequent replacement. Avoid chemically treated lumber to ensure your produce remains safe and organic.
For most common vegetables, a raised garden bed depth of 10 to 12 inches is sufficient. This allows enough room for root development. Taller beds, around 18-24 inches, offer even better drainage and reduce the need for bending, which can be beneficial for gardeners with mobility concerns.
A high-quality soil mix is crucial. A good blend typically consists of a mix of organic topsoil, compost, and some perlite or vermiculite for improved aeration and drainage. Avoid using heavy garden soil straight from your yard, as it can compact and hinder root growth in a raised bed environment.
Yes, absolutely! By consistently growing high-value, frequently purchased items like leafy greens, tomatoes, herbs, and peppers, you can significantly offset your grocery bill.
The savings accumulate rapidly over a growing season, making the initial investment well worth it for many households.
Start by lining the bottom of your raised bed with landscape fabric or a thick layer of flattened cardboard to block weeds from growing from below.
Filling your bed with fresh, weed-free soil mix also helps. Regular weeding of any new sprouts and applying mulch can further suppress weed growth.
Conclusion
Embarking on the journey to build a raised garden bed: DIY project for fresh produce and a $50 savings on groceries is a decision that offers multifaceted rewards. From the unparalleled taste of homegrown vegetables to the tangible reduction in your weekly food expenses, the benefits are clear and compelling.
This DIY endeavor not only enhances your outdoor space but also fosters a deeper connection to your food source, promoting healthier eating habits and a more sustainable lifestyle.
With careful planning, a bit of effort, and consistent maintenance, your raised garden bed will become a thriving hub of fresh produce, proving itself to be one of the most valuable home improvements you can undertake. Get started today and taste the difference!


