DIY Furniture Repair: Restore, Save, and Revitalize Your Home
 Engaging in DIY furniture repair provides an accessible and rewarding method to revitalize worn items, significantly extend their lifespan, and avoid the expense of purchasing new furniture, leading to considerable financial savings.
Are you looking to give your beloved furniture a second life while keeping your wallet happy? Mastering DIY furniture repair is not only a rewarding skill but also a smart financial move, potentially saving you hundreds of dollars on replacements. This comprehensive guide will walk you through everything you need to know.
Understanding the Value of DIY Furniture Repair
Many people view damaged furniture as destined for the landfill or a costly professional repair. However, with a few basic tools, some patience, and the right knowledge, you can often mend and restore pieces yourself.
This not only preserves the sentimental value of your items but also contributes to a more sustainable lifestyle by reducing waste.
The economic benefits are undeniable. A new sofa can cost upwards of $800, a dining table $500, and even a simple chair can set you back over $100.
By learning DIY furniture repair, you can tackle common issues like scratches, loose joints, wobbly legs, and faded finishes for a fraction of the price of buying new or hiring a specialist. Imagine saving $300 or more on just one piece!
Beyond the Savings: Environmental Impact and Personal Satisfaction
Beyond the immediate financial gains, repairing furniture aligns with eco-friendly principles. Upcycling and restoring items prevent them from ending up in overcrowded landfills, reducing your carbon footprint.
Furthermore, the satisfaction of transforming a worn-out piece into something beautiful and functional with your own hands is immense. It’s a tangible achievement that builds confidence and inspires further creativity in your home.
Extends furniture lifespan, delaying replacement costs.
Reduces landfill waste and promotes sustainability.
Offers significant financial savings compared to buying new.
Provides a sense of accomplishment and creative outlet.
In conclusion, embracing DIY furniture repair is a multifaceted approach to home improvement that benefits your budget, the environment, and your personal skill set. It’s about seeing potential where others see problems and transforming those challenges into opportunities for renewal.
Essential Tools and Materials for Your Repair Arsenal
Before diving into any repair project, having the right tools and materials is crucial. While some specialized items might be needed for specific tasks, a core set of essentials will cover most common furniture issues. Investing in quality tools now will save you time and frustration in the long run.
Start by gathering basic hand tools that are useful for almost any household repair. From there, you can expand your collection as your DIY skills grow and projects become more complex. Remember, safety always comes first, so consider protective gear like gloves and safety glasses.
Basic Hand Tools Every DIYer Needs
A well-stocked toolbox is your best friend. These tools are versatile and will assist you in diagnosing and fixing a wide range of furniture problems, from tightening screws to disassembling parts.
Screwdriver set (Phillips and flathead)
Hammer (small, for delicate work)
Pliers (needle-nose and standard)
Clamps (various sizes, for holding pieces while glue dries)
Utility knife or craft knife
Measuring tape
Once you have these basics, you can start thinking about specific repair materials. Wood glue is indispensable for loose joints, while wood filler can patch up unsightly holes and gouges. Sandpaper, in various grits, is essential for preparing surfaces for refinishing.
For finishing touches, you’ll want to have wood stain, paint, or varnish on hand, along with appropriate brushes or applicators. Don’t forget rags for wiping and cleaning. The exact materials will depend on the type of furniture and the nature of the damage.
Specialized Supplies for Common Repairs
As you progress, you might encounter situations that require more specific items. For instance, if you’re dealing with upholstery, a staple gun and fabric adhesive will be necessary. For more significant structural repairs, dowel rods or repair plates might come in handy.
Wood glue (PVA or epoxy)
Wood filler or wood putty
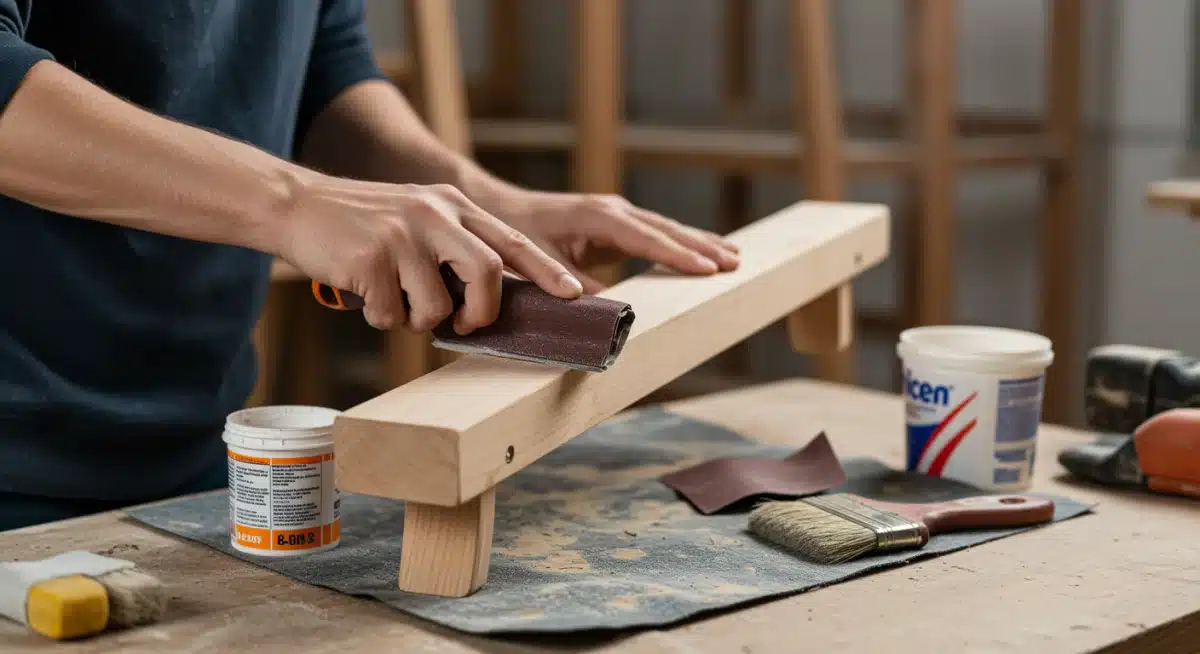
Sandpaper (various grits: 120, 220, 320)
Wood stain, paint, or clear coat finish
Brushes and rags
Protective gloves and safety glasses
By systematically building your toolkit and understanding the purpose of each item, you’ll be well-prepared to tackle almost any DIY furniture repair project that comes your way. This preparedness is key to successful and efficient restoration.
Addressing Common Furniture Maladies: Scratches, Dents, and Dings
Everyday use takes its toll on furniture, leading to inevitable scratches, dents, and dings. While these imperfections can seem daunting, many are surprisingly easy to fix with simple DIY methods. Learning to address these common maladies can dramatically improve the appearance of your furniture and prevent further damage.
The trick is to assess the severity of the damage and choose the appropriate repair technique. A light scratch might only need a touch-up, while a deep gouge will require more intensive work. Patience and precision are your allies in achieving seamless repairs.
Hiding and Repairing Surface Scratches
For minor surface scratches that haven’t penetrated the wood finish, several quick fixes can make them virtually disappear. These methods are ideal for quick touch-ups and maintaining the aesthetic of your furniture.
Walnut method: Rub a walnut (or pecan, brazil nut) over the scratch. The natural oils and pigments can help conceal minor abrasions.
Furniture marker/crayon: Use a furniture repair marker or crayon that matches your wood color to fill in and blend the scratch.
Coffee grounds/tea bags: For dark wood, a paste made from coffee grounds or a damp tea bag can help darken and hide scratches.
Deeper scratches require a bit more effort. Wood filler or putty, matched to your wood color, can be used to fill the scratch. Once dry, sand it smooth and apply a matching stain or finish. Remember to always test your chosen method on an inconspicuous area first.
Filling and Smoothing Dents and Dings
Dents, which are compressions in the wood, can often be lifted using a bit of moisture and heat. This technique causes the wood fibers to swell, effectively pushing the dent out.
To fix a dent, place a damp cloth over the affected area, then gently press a warm iron onto the cloth. The steam helps the wood expand. Repeat this process until the dent is lifted. Be careful not to scorch the wood. For deeper dents, you might need to combine this method with a small amount of wood filler after the wood has dried completely.
For dings, which are small chips or nicks, wood filler is typically the best solution. Apply a small amount, let it dry, sand it smooth, and then finish to match the surrounding area. The key is to work in small increments and build up the repair gradually for the best results. By mastering these techniques, your furniture will look well-maintained and cared for, extending its life and appeal.
Reviving Wobbly Chairs and Loose Joints
Wobbly chairs and loose joints are not just annoying; they can also be a safety hazard and lead to further structural damage if left unaddressed. Fortunately, these are among the most common and fixable DIY furniture repair issues. The solution often involves re-gluing or reinforcing the connections.
Before you begin, carefully inspect the piece to identify all loose points. Sometimes, what appears to be a single wobbly leg might be a symptom of several compromised joints. A thorough assessment ensures you address all underlying problems, leading to a more durable repair.
The Art of Re-Gluing Loose Joints
Wood glue is a powerful adhesive for furniture, but its bond can weaken over time due to stress, moisture, or drying out. Re-gluing is the most effective way to restore stability to loose joints.
Disassembly: Carefully disassemble the loose joint. If components are stubbornly stuck, a rubber mallet and gentle persuasion might be needed.
Cleaning: Scrape off all old, dried glue from both surfaces of the joint. New glue won’t adhere properly to old glue. A chisel or sandpaper can be effective here.
Application: Apply a generous but not excessive amount of high-quality wood glue to both surfaces of the joint.
Clamping: Reassemble the joint and clamp it tightly. Ensure the piece is square and stable before the glue sets. Wipe away any excess glue with a damp cloth.
Drying: Allow the glue to cure completely, usually for at least 24 hours (or as per manufacturer’s instructions), before putting any weight or stress on the joint.

For joints that cannot be fully disassembled, you might try injecting wood glue into the gaps using a syringe. This is less ideal than full disassembly but can provide a temporary fix.
Reinforcing Weakened Structures
Sometimes, re-gluing isn’t enough, especially if the wood itself is compromised or the joint experiences significant stress. In such cases, reinforcement might be necessary. This can involve adding screws, dowels, or corner braces.
For very wobbly legs, strategically placed screws can provide additional strength. Pre-drill pilot holes to prevent splitting the wood.
For more substantial reinforcement, consider using dowel rods. Drill corresponding holes in both pieces of the joint, insert glue-covered dowels, and clamp until dry. Corner braces, often metal, can be discreetly added to the inside of furniture frames for extra stability.
By diligently re-gluing and, where necessary, reinforcing your furniture’s joints, you can restore its original sturdiness and prolong its functional life for many more years, preventing the need for costly replacements.
Refinishing and Restoring Faded or Damaged Surfaces
The finish of a piece of furniture is its protective layer and primary aesthetic appeal. Over time, finishes can fade, scratch, or chip, making the furniture look old and neglected. Refinishing is a transformative DIY furniture repair process that can make an old piece look brand new, enhancing its beauty and extending its life significantly.
Refinishing might seem intimidating, but by breaking it down into manageable steps, it becomes an accessible project for most DIY enthusiasts. The key is thorough preparation and careful application of new finishes.
Preparing the Surface: Stripping and Sanding
Proper surface preparation is the most critical step in refinishing. Neglecting this stage will compromise the final result. The goal is to create a clean, smooth, and receptive surface for the new finish.
Cleaning: Begin by thoroughly cleaning the furniture with a mild detergent and water to remove dirt, grease, and grime. Allow it to dry completely.
Stripping (optional): If the old finish is very thick, uneven, or damaged, you might need to use a chemical stripper. Follow manufacturer instructions carefully, working in a well-ventilated area and wearing protective gear.
Sanding: Once clean and dry (and stripped, if applicable), sand the entire piece. Start with a medium-grit sandpaper (120-150 grit) to remove remaining finish and smooth imperfections. Progress to finer grits (220-320 grit) for a silky-smooth surface. Always sand with the wood grain.
Dust removal: After sanding, meticulously remove all dust using a tack cloth or a vacuum cleaner with a brush attachment. Any lingering dust will show through the new finish.
A well-prepared surface ensures that the new finish adheres properly and looks professional. Rushing this step is a common mistake that leads to unsatisfactory results.
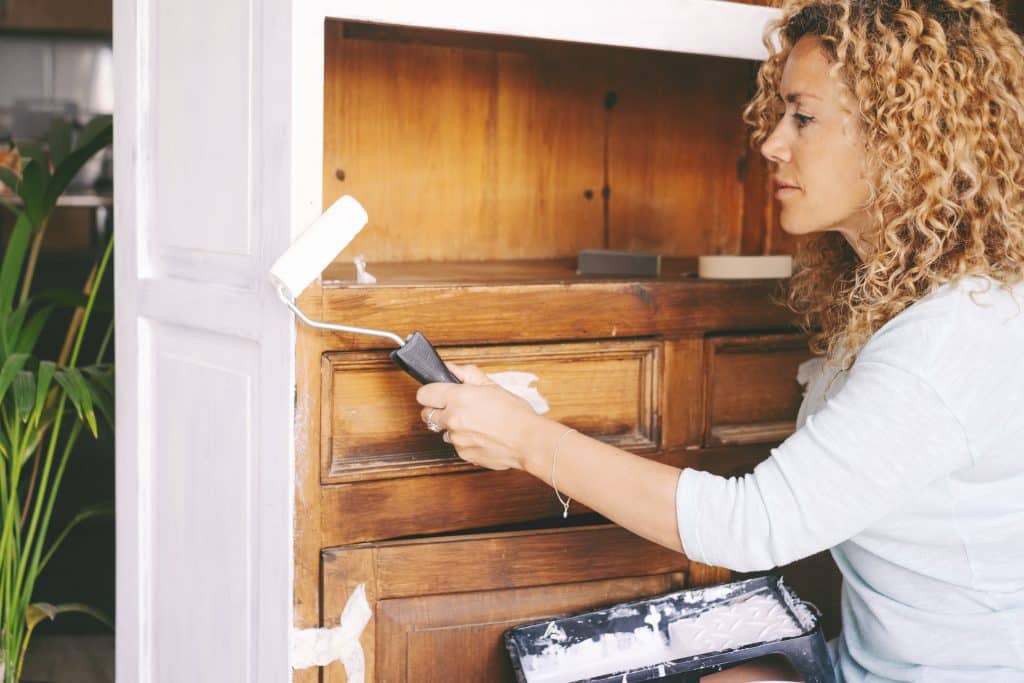
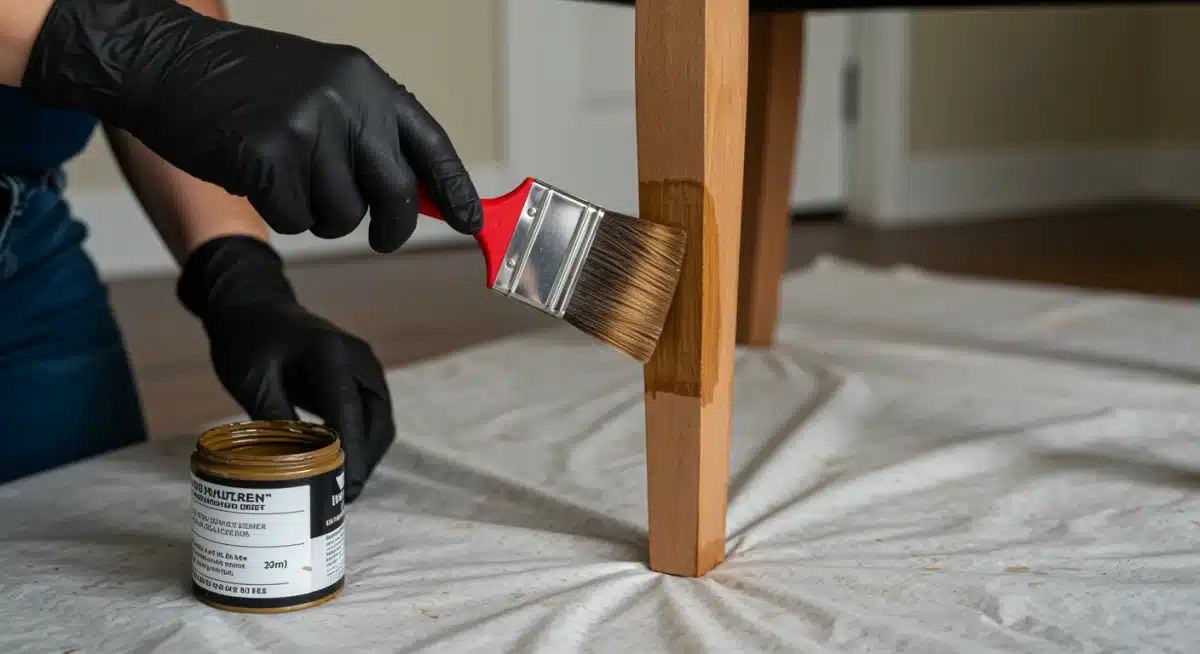
Applying New Finishes: Stain, Paint, or Varnish
With the surface prepared, you can now apply your chosen finish. The type of finish will depend on the desired look and the type of wood. Stains enhance natural wood grain, paints offer a solid color, and clear coats (varnishes, polyurethanes) provide protection while showcasing the wood.
If using a wood stain, apply it evenly with a brush or rag, wiping off excess according to the product’s instructions. Always apply in thin coats and allow adequate drying time between applications. For paint, apply a primer first, especially if you’re changing a dark color to a light one, then follow with thin, even coats of paint.
Finally, a protective topcoat like polyurethane or varnish is essential for durability. Apply several thin coats, sanding lightly with very fine-grit sandpaper (e.g., 400 grit) between coats for maximum smoothness and adhesion.
This process might take time, but the reward is a beautifully restored piece that can withstand daily use for years to come.
Upholstery Repair and Fabric Refreshment
Upholstered furniture often suffers from wear and tear on its fabric, which can include tears, stains, sagging cushions, or simply outdated patterns.
Dealing with upholstery might seem more complex than wood repairs, but many common issues can be tackled with basic DIY furniture repair skills, saving you the expense of professional re-upholstery or replacement.
From patching small holes to replacing cushion foam, these projects can significantly extend the life and improve the comfort and appearance of your upholstered pieces. A little effort can make a big difference.
Patching Tears and Hiding Stains
Small tears and holes in upholstery fabric can often be repaired discreetly. For minor snags, a needle and thread in a matching color can work wonders, creating an almost invisible mend.
Iron-on patches: For larger tears, an iron-on fabric patch, placed on the underside of the fabric, can provide a strong and durable repair. Choose a patch that closely matches the fabric’s color and texture.
Fabric adhesive: Fabric glue can also be used for small tears, especially on areas that don’t receive much stress. Apply a thin line of glue to the edges of the tear and press them together.
Cushion covers: For significant stains or widespread wear, consider removable cushion covers. These can be custom-made or purchased ready-made, offering a fresh look without full re-upholstery.
For stubborn stains, specialized upholstery cleaners can often lift discoloration. Always test any cleaning product on an inconspicuous area first to ensure it doesn’t damage or discolor the fabric. Addressing stains promptly increases your chances of complete removal.
Revitalizing Sagging Cushions and Worn Fabric
Sagging cushions are a common complaint and can make even the most comfortable sofa feel uninviting. This is usually due to compressed foam or worn-out springs. Replacing the foam is a straightforward DIY project.
To replace cushion foam, carefully unzip the cushion cover and remove the old foam. Measure the cover and cut new high-density foam to size. Wrap the new foam in batting for a softer, fuller look, then insert it back into the cushion cover. This instantly restores firmness and comfort. For sofas with non-removable cushions, you might need to add batting underneath the existing foam to lift it.
If the fabric itself is worn or outdated but the frame is sound, consider slipcovers. These offer a complete refresh and can dramatically change the look of your furniture without the intensive work of re-upholstering. They are also easily removable for cleaning. If you’re feeling ambitious, learning basic upholstery techniques for specific panels can also be a rewarding DIY project.
When to Seek Professional Help (and When to DIY)
While DIY furniture repair offers significant savings and satisfaction, there are instances when calling in a professional is the wiser choice.
Knowing your limits and recognizing complex issues can prevent further damage and ensure a high-quality, lasting repair. It’s about balancing ambition with practicality and expertise.
Distinguishing between a manageable DIY project and one that requires specialized skills can save you time, money, and potential frustration. A simple scratch is a world away from a broken antique frame.
Assessing the Complexity of the Damage
Before committing to a DIY repair, take an honest assessment of the damage. Is it superficial, structural, or does it involve intricate details?
Superficial damage: Scratches, minor dents, faded finishes, and small fabric tears are typically excellent candidates for DIY repair. The tools and techniques are accessible, and mistakes are often forgivable.
Moderate structural damage: Loose joints, wobbly legs, and sagging cushions can often be fixed with DIY methods, especially if the wood is sound and the problem is primarily adhesive failure.
Extensive structural damage: Broken frames, severely cracked wood, or widespread rot usually require professional attention. These issues can compromise the integrity and safety of the furniture.
Intricate finishes/antiques: If your furniture is a valuable antique, has a complex or unique finish, or features delicate carvings, a professional restorer is recommended. They possess the specialized knowledge and tools to preserve its value and authenticity.
Consider the tools required. If the repair demands specialized machinery or techniques you’re unfamiliar with, it might be best to defer to an expert. Attempting a repair beyond your skill level can lead to irreversible damage.
Estimating Costs: DIY vs. Professional
One of the primary motivations for DIY furniture repair is cost savings. For simple repairs, the cost of materials is often minimal, making DIY highly economical. However, for more complex issues, the cost-benefit analysis shifts.
A professional repair can range from $100 for a minor fix to several hundred or even thousands for extensive restoration, especially for high-value items. Before deciding, get a quote from a reputable furniture repair specialist.
Compare this quote to the potential cost of buying new furniture and the estimated cost of DIY materials, factoring in your time and skill level.
Sometimes, the sentimental value of a piece outweighs the repair cost, making a professional repair a worthwhile investment despite the expense.
Ultimately, the decision lies in balancing your budget, your skills, the value of the furniture, and the complexity of the repair. Don’t be afraid to ask for help when a project feels overwhelming.
Maintaining Your Repaired Furniture for Long-Term Durability
Once you’ve successfully completed your DIY furniture repair, the job isn’t entirely done. Proper maintenance is crucial to ensure your hard work lasts and to prevent future damage.
Just like a car needs regular servicing, your furniture benefits from ongoing care, especially after a repair. This proactive approach ensures long-term durability and preserves its refreshed appearance.
Adopting simple maintenance habits can significantly extend the life of your furniture, protecting your investment of time and resources in DIY repairs. Prevention is always better than cure.
Regular Cleaning and Protection
Dust and dirt can be abrasive, gradually wearing down finishes. Regular cleaning is the first line of defense. Use a soft, dry cloth for dusting. For deeper cleaning, a slightly damp cloth with a mild, furniture-specific cleaner can be used, but always wipe dry immediately.
Avoid harsh chemicals: Steer clear of abrasive cleaners, silicone-based polishes, and harsh solvents, as these can damage finishes over time.
Protect from spills: Wipe up spills immediately. Use coasters for drinks and placemats for hot dishes to prevent water rings and heat damage.
Sunlight and humidity: Position furniture away from direct sunlight, which can cause fading and drying. Maintain consistent humidity levels in your home to prevent wood from expanding, contracting, or cracking.
Consider using furniture wax or polish periodically, especially for wooden pieces, to provide an extra layer of protection and maintain luster. For upholstered items, vacuum regularly and use fabric protectors as recommended by the manufacturer.
Periodic Inspections and Touch-Ups
Even after a thorough repair, furniture can experience wear. Regular inspections allow you to catch minor issues before they escalate into major problems. Make it a habit to periodically check joints, hardware, and finishes.
Look for any signs of loosening joints, new scratches, or areas where the finish might be thinning. Address these minor issues promptly with a quick touch-up or re-tightening. For example, a slightly wobbly leg caught early can be re-glued before it becomes a complete structural failure.
Keep a small kit of repair essentials on hand – a furniture marker, a small tube of wood glue, and some fine-grit sandpaper – for these quick fixes. By being vigilant and proactive with maintenance, you can ensure your repaired furniture remains beautiful and functional for many years, proving the lasting value of your DIY efforts.
| Key Repair Area | Brief Description of Solution |
|---|---|
| Scratches & Dents | Use wood filler, markers, or steam for minor surface imperfections. |
| Wobbly Joints | Disassemble, clean, re-glue, and clamp for structural stability. |
| Faded Finishes | Strip, sand, and apply new stain, paint, or varnish for a fresh look. |
| Upholstery Tears | Patch with iron-on fabric, use fabric glue, or consider slipcovers. |
Frequently Asked Questions About DIY Furniture Repair
You can typically handle minor scratches, dents, and dings with wood filler or markers. Re-gluing loose chair joints, tightening screws, and even basic refinishing like sanding and re-staining are also very common and achievable DIY projects.
Savings can be substantial, often hundreds of dollars per piece. For example, repairing a wobbly chair might cost $10-20 in materials versus $100+ for a new chair or professional repair. Replacing cushion foam is far cheaper than a new sofa.
Start with a basic screwdriver set, a small hammer, pliers, and clamps. Essential materials include quality wood glue, wood filler, sandpaper (various grits), and appropriate cleaning supplies. Safety gear like gloves and glasses is also crucial.
Seek professional help for extensive structural damage like broken frames, severe wood rot, or intricate antique restorations. If the furniture holds significant monetary or sentimental value and you’re unsure, a professional can prevent irreversible damage.
Regular dusting and cleaning with appropriate products are key. Protect furniture from direct sunlight and humidity. Periodically inspect joints and surfaces for minor issues and address them promptly. Use coasters and placemats to prevent spills and heat damage.
Conclusion
Embracing DIY furniture repair is a powerful way to revitalize your living space, save considerable money, and contribute to a more sustainable lifestyle.
From tackling minor scratches to reinforcing wobbly joints and refreshing faded finishes, the skills you gain empower you to extend the life and beauty of your cherished pieces.
By understanding the basics, gathering the right tools, and knowing when to confidently tackle a project versus seeking professional expertise, you can transform old into new and enjoy the profound satisfaction of creating a more beautiful home with your own hands.


