Convert Your Garage: DIY Functional Living Space in 3 Weeks

 Are you looking to expand your home’s usable area without the hassle and expense of a full-blown addition? Learning to Convert Your Garage: DIY Steps to Turn It Into a Functional Living Space in 3 Weeks might be the perfect solution.
This guide will walk you through the essential steps to transform that often-underutilized space into a valuable part of your home, quickly and efficiently.
The initial vision and planning phase
Before you even pick up a hammer, a clear vision and thorough planning are paramount for a successful garage conversion. This initial phase sets the stage for the entire project, ensuring you meet your goals within the ambitious three-week timeframe.
Think about the purpose of your new space and how it will integrate with your existing home.
Consider what kind of living space you need. Is it a home office, a guest bedroom, a playroom, or perhaps a small studio apartment? Each purpose will dictate different design choices, material selections, and regulatory requirements.
Sketching out your ideas, even roughly, can help visualize the final outcome and identify potential challenges early on.
Defining your space’s purpose and layout
Understanding the exact function of your converted garage is crucial. This clarity will guide every subsequent decision, from electrical wiring to flooring. A well-defined purpose helps streamline the design process and prevents costly changes later on.
Home Office: Focus on natural light, quiet zones, and ample electrical outlets for technology.
Guest Bedroom: Prioritize comfort, privacy, and sufficient closet space.
Playroom: Emphasize durable, easy-to-clean surfaces and child-safe features.
Studio Apartment: Requires a kitchenette, bathroom facilities, and distinct living/sleeping zones.
Once the purpose is clear, begin planning the layout. Measure your garage meticulously, noting all existing features like windows, doors, and electrical outlets.
Use grid paper or a simple design software to draw out different layouts, experimenting with furniture placement and room divisions. This step helps optimize space and ensures a functional flow.
Navigating permits and building codes
Ignoring local regulations can lead to significant delays and legal issues. Garage conversions often fall under specific building codes, especially concerning structural integrity, insulation, ventilation, and electrical systems. It’s critical to research and understand these requirements in your area before starting any work.
Contact your local planning department: Inquire about necessary permits and zoning restrictions for garage conversions.
Understand insulation standards: Garages typically have lower insulation standards than living spaces, which will need upgrading.
Electrical and plumbing requirements: Ensure all new installations meet current safety codes.
Ventilation: Proper airflow is essential for health and comfort, often requiring specific fan installations or window types.
Obtaining permits can take time, so start this process as early as possible. Some conversions might require professional architectural drawings or engineering assessments.
While this adds to the initial planning, it safeguards your project from potential legal pitfalls and ensures the safety and longevity of your new living space. Getting all approvals in place before construction begins is a non-negotiable step.
The initial vision and planning phase is more than just dreaming; it’s about laying a solid, compliant foundation for your DIY project.
Thorough research into local codes, a clear understanding of your space’s intended use, and careful layout planning will significantly contribute to completing your garage conversion in three weeks. This proactive approach minimizes unforeseen complications and keeps your project on track.
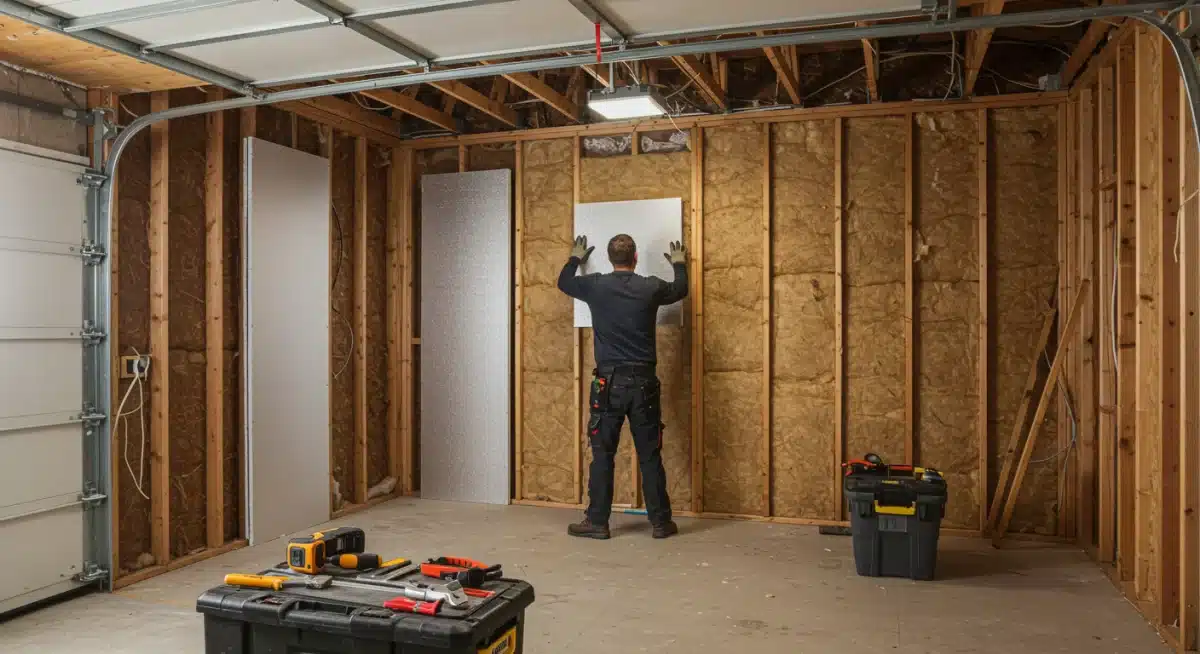
Demolition and structural preparation
With your plans and permits in hand, the next phase involves preparing the existing garage structure for its transformation.
This often includes some demolition, followed by reinforcing and modifying the structure to meet residential standards. Safety should be your utmost priority during this stage, so ensure you have the right protective gear and tools.
This stage is where the physical work truly begins, and it’s essential to approach it systematically.
Removing unwanted elements and making necessary structural changes are critical steps that cannot be rushed. Proper preparation here prevents future issues and ensures a durable, safe living space.
Clearing out and initial demolition
Start by completely emptying the garage. This includes not just movable items but also any shelving, cabinets, or fixtures that won’t be part of the new design.
Once clear, assess the existing surfaces. You might need to remove old drywall, exposed insulation, or even parts of the concrete floor if you plan to install new plumbing or radiant heating.
Use appropriate tools for demolition, such as pry bars, sledgehammers, and reciprocating saws. Always wear safety glasses, gloves, a dust mask, and sturdy footwear.
Be mindful of electrical wiring and plumbing lines that might be hidden behind walls. If unsure, consult with a professional electrician or plumber before proceeding with demolition in those areas.
Remove existing garage door: This is one of the most significant changes. You’ll likely replace it with a framed wall, window, or a standard entry door.
Clear debris: Have a plan for waste removal, such as a dumpster rental, to keep the workspace clean and safe.
Inspect for damage: Look for any signs of water damage, mold, or structural issues that need addressing before new construction begins.
Framing and structural modifications
After demolition, the structural work begins. This typically involves framing out new walls, especially where the garage door once stood, and creating any new door or window openings.
Ensure all framing adheres to local building codes for load-bearing capacity and spacing.
You may also need to reinforce the existing foundation or add additional support beams, depending on your local climate and the intended use of the space.
For example, if you’re adding a second story or heavy fixtures, extra support might be required. Pay close attention to the floor. Many garage floors are sloped towards the door for drainage, which will need to be leveled for a comfortable living space.
Frame new walls: Use lumber to build stud walls where needed, ensuring they are plumb and square.
Install new headers: For any new windows or doors, proper headers are crucial for structural support.
Level the floor: This can be done using self-leveling concrete compounds or by building a raised subfloor.
Check for moisture barriers: Ensure the foundation and walls have adequate moisture protection to prevent future issues.
The demolition and structural preparation phase lays the groundwork for everything else. Taking the time to do it right ensures a sound, safe, and code-compliant structure.
This careful approach to the foundational elements is essential for a smooth and successful conversion project, setting you up for the next stages of insulation and utilities.
Insulation, electrical, and plumbing rough-ins
Once the structural elements are in place, the next critical steps involve installing insulation and running the necessary electrical and plumbing lines.
These are often referred to as ‘rough-ins’ because they involve putting in the basic infrastructure before walls are closed up. Proper execution in this phase is vital for comfort, energy efficiency, and functionality.
These systems are typically hidden behind walls and ceilings, making it much harder and more expensive to modify them later.
Therefore, careful planning and execution during this stage are paramount. If you’re not comfortable with electrical or plumbing work, this is an area where hiring licensed professionals is highly recommended.
Achieving optimal insulation and ventilation
Garages are usually poorly insulated, making them unsuitable for year-round living without significant upgrades. Good insulation is crucial for maintaining a comfortable indoor temperature and reducing energy costs. Consider both wall and ceiling insulation, and don’t forget the floor if you haven’t already addressed it.
Wall insulation: Fiberglass batts, mineral wool, or spray foam are common choices. Ensure a tight fit to prevent thermal bridging.
Ceiling insulation: If there’s an attic above, ensure it has adequate R-value. If not, insulate the garage ceiling thoroughly.
Vapor barrier: Install a vapor barrier on the warm side of the insulation to prevent moisture buildup and mold.
Ventilation: Plan for proper air circulation. This might include exhaust fans in bathrooms or kitchens, and ensuring windows can open for cross-ventilation.
Beyond insulation, think about air sealing. Gaps and cracks around windows, doors, and utility penetrations can significantly reduce your insulation’s effectiveness. Use caulk and weatherstripping to seal these openings, creating a more airtight and energy-efficient space. A well-insulated and properly ventilated garage conversion will be comfortable in all seasons.
Electrical and plumbing infrastructure
Converting a garage to a living space almost always requires new electrical circuits and possibly plumbing. Plan the location of outlets, light fixtures, switches, and any major appliances (like a mini-fridge, microwave, or washer/dryer hookup) before running wires.
Electrical rough-in: Install wiring for outlets, switches, and lighting. Ensure you have enough circuits to meet the demands of your new space and that all work complies with the National Electrical Code (NEC).
Panel upgrade: You might need to upgrade your main electrical panel if the new space’s demand exceeds current capacity.
Plumbing rough-in: If adding a bathroom or kitchenette, run supply and drain lines. Ensure proper venting for all fixtures.
Water heater: Consider a tankless water heater for efficiency if adding a shower or sink.
It’s highly advisable to have a licensed electrician and plumber inspect, and ideally perform, these rough-in installations. This ensures safety, compliance with codes, and avoids costly mistakes. Once these systems are in place and inspected, you can move on to closing up the walls.
Completing the insulation, electrical, and plumbing rough-ins effectively is a major milestone in your garage conversion.
These hidden systems are the backbone of any functional living space, providing comfort, safety, and convenience. Investing time and, if necessary, professional expertise in this stage will pay dividends in the long run.
Finishing touches: drywall, flooring, and paint
With the structural work and utility rough-ins complete, the exciting part of seeing your vision come to life begins: the finishing touches.
This stage focuses on making the space aesthetically pleasing and comfortable, starting with drywall, moving to flooring, and culminating in a fresh coat of paint. These elements significantly impact the overall feel and usability of your new living area.
Attention to detail here can elevate your DIY project from functional to truly inviting. While these steps are often more about aesthetics, proper installation techniques are still crucial for durability and a professional finish.
Installing drywall and smooth surfaces
Hanging drywall is a foundational step in creating interior walls. Measure and cut drywall sheets to fit, securing them to the wall studs with drywall screws. Pay close attention to corners and edges, ensuring a snug fit.
Measure accurately: Minimize waste and ensure proper coverage.
Secure properly: Use enough screws to prevent bulging or cracking later.
Joint compound (mudding): Apply multiple thin coats of joint compound over seams and screw heads, sanding lightly between coats for a smooth finish. This technique, often called “mudding and taping,” is crucial for seamless walls.
Priming: After sanding is complete and the dust is cleaned, apply a good quality primer to ensure even paint adhesion and a professional look.
Achieving perfectly smooth walls requires patience and practice. Don’t rush the mudding and sanding process. Imperfections at this stage will be glaringly obvious once painted. Consider renting a drywall lift if you’re working on ceilings to make the process safer and more efficient.
Choosing and laying durable flooring
The flooring you choose will significantly impact the comfort, appearance, and maintenance of your new living space. Given the garage’s original concrete slab, you have several options for durable and attractive flooring.
Laminate or Vinyl Plank: These are popular DIY-friendly options, offering a wide range of styles, good durability, and relatively easy installation over a properly prepared subfloor. They are also moisture-resistant.
Engineered Hardwood: Provides the look of real wood but is more stable and less prone to warping than solid hardwood, suitable for areas with potential moisture fluctuations.
Carpet: Offers warmth and sound absorption, ideal for bedrooms or playrooms. Ensure proper padding is installed underneath.
Epoxy coating with rugs: If you want to keep some industrial feel, a decorative epoxy coating can be applied to the concrete, then softened with area rugs.
Before laying any flooring, ensure your subfloor is perfectly clean, dry, and level. Any unevenness will show through the new flooring. Follow the manufacturer’s installation instructions meticulously for the best results and longevity.
Painting and trim installation
A fresh coat of paint can dramatically transform the space, bringing color and personality. Choose colors that align with the space’s purpose and your overall home aesthetic. Light colors can make a small space feel larger and brighter.
Prepare surfaces: Clean walls thoroughly, patch any remaining small imperfections, and tape off trim and ceilings.
Apply primer: Even after priming the drywall, a second coat of primer (especially a stain-blocking one) can be beneficial before painting.
Two coats of paint: Most walls benefit from at least two coats of paint for full coverage and color depth.
Install trim: Baseboards, door casings, and window trims add a finished, professional look. Measure carefully, cut precisely, and secure with finish nails.
Once the paint is dry, you can begin installing light fixtures, outlets, and switches. This is also the time to install any built-in shelving or cabinetry. These final details are what truly make the space feel complete and ready for use.
The finishing touches bring your garage conversion to life. From the smooth expanse of drywall to the warmth of new flooring and the vibrancy of fresh paint, each step contributes to creating a comfortable and functional living environment.
Taking pride in these details ensures a professional and enjoyable outcome for your DIY efforts.
Window and Door Installation When You Convert a Garage
Selecting and installing windows and doors is a critical step when you convert a garage into a comfortable living space. These elements bring in natural light, improve access, and directly affect insulation, security, and visual appeal. Making the right choices ensures energy efficiency and helps the converted area feel like a true extension of your home.
This phase focuses on successfully transitioning the garage from exterior to interior use. When you convert a garage, proper framing, sealing, and weatherproofing are essential to prevent drafts, moisture issues, and energy loss.
Choosing the right windows when you convert a garage
Windows play a major role when you convert a garage, especially since garages are typically dark and enclosed. Thoughtful window selection improves comfort, brightness, and energy performance.
Window type: Casement, double-hung, and picture windows are popular when you convert a garage, offering flexibility in ventilation and style.
Energy efficiency: Choose double- or triple-pane windows with Low-E coatings to reduce heat transfer year-round.
Placement: Position windows strategically to maximize natural light while maintaining privacy and allowing for furniture placement.
Flashing and sealing: Proper flashing and high-quality sealants are essential when you convert a garage to prevent water intrusion and air leaks.
Accurate measurements and proper installation are critical. Ensure openings are square and plumb, secure the window frame according to manufacturer instructions, insulate around the frame, and seal thoroughly. This guarantees your windows perform efficiently after you convert the garage.
Selecting and Installing Doors When You Convert a Garage
Replacing the original garage door is one of the most visible steps when you convert a garage into living space. You may also need interior doors to create privacy or divide rooms.
Exterior door: Choose an insulated, pre-hung exterior door made from steel or fiberglass for durability and energy efficiency.
Security: Install quality locksets and a deadbolt to protect your newly converted space.
Interior doors: Hollow-core doors are affordable and lightweight, while solid-core doors offer better sound insulation.
Door frames: Frames must be square, level, and properly sealed to ensure smooth operation and long-term durability.
When you convert a garage, door installation requires careful shimming and alignment. Finish with trim and casing to match the rest of the home, then paint or stain the doors to blend seamlessly with the interior design.
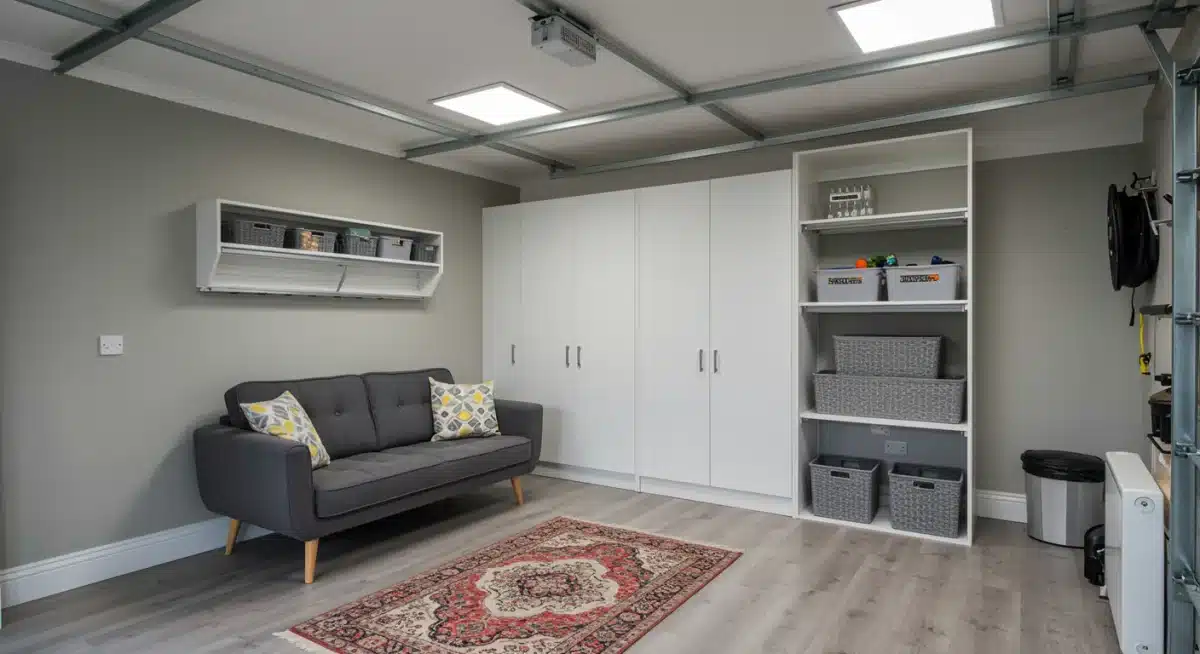
Smart Storage and Interior Design After You Convert a Garage
Once structural elements are complete, the focus shifts to functionality and comfort. When you convert a garage, smart storage and thoughtful interior design are essential to maximize space and create a welcoming environment.
This stage brings personality into the room and ensures the converted space feels intentional rather than improvised.
Storage solutions to maximize space when you convert a garage
Even after you convert a garage, storage is still important—just more refined and integrated.
Built-in shelving: Make use of vertical wall space with custom or modular shelving.
Under-window storage: Window seats with hidden storage add both seating and organization.
Wall-mounted cabinets: Floating shelves and cabinets free up floor space and make the room feel larger.
Multi-functional furniture: Choose ottomans, sofa beds, or coffee tables with built-in storage.
Tailor storage solutions to the room’s function. When you convert a garage into an office, integrated desks and filing storage work best. For guest rooms, wardrobes and organizers help keep the space clutter-free.
Creating a Cohesive Look After You Convert a Garage
Interior design is what truly transforms the space after you convert a garage. A cohesive aesthetic helps eliminate the “former garage” feel and creates a warm, livable atmosphere.
Color palette: Light, neutral colors help small converted spaces feel open and bright.
Layered lighting: Combine ambient, task, and accent lighting for flexibility and comfort.
Furniture scale: Choose furniture proportional to the room to avoid overcrowding.
Textiles and décor: Rugs, curtains, cushions, and artwork add warmth and soften industrial elements.
Mirrors can reflect light and visually expand the room, while plants add life and softness. When you convert a garage, these finishing touches make a noticeable difference.
Final Inspections and Furnishing After You Convert a Garage
As your conversion nears completion, final inspections and furnishing ensure the space is safe, compliant, and ready for use. Skipping inspections can undermine all the work you’ve done to convert the garage.
Final inspections and compliance checks
Before furnishing, schedule all required inspections to confirm that the work meets local codes.
Building inspection: Verifies the overall structure and permit compliance.
Electrical inspection: Ensures wiring, outlets, and panels meet safety standards.
Plumbing inspection: Confirms proper venting, drainage, and leak prevention.
Occupancy approval: Some areas require final authorization before using the space as living area.
Passing inspections protects your investment and supports future resale value.
Furnishing and Decorating Your Converted Garage
Once inspections are complete, you can fully enjoy the results of your project. Furnishing is where your vision comes to life.
Furniture selection: Choose pieces that match the room’s purpose and scale.
Lighting fixtures: Add floor lamps, table lamps, and ceiling lights for comfort and ambiance.
Window treatments: Curtains or blinds provide privacy and light control.
Personal décor: Artwork, plants, and accessories make the space feel like home.
Keep traffic flow in mind and avoid overcrowding. When you convert a garage thoughtfully, the result is a functional, stylish living space that feels fully integrated with the rest of your home.
| Key Step | Brief Description |
|---|---|
| Planning & Permits | Define purpose, sketch layout, and secure all necessary local building permits. |
| Structural Work | Demolish existing elements, frame new walls, level floor, and reinforce structure. |
| Utilities & Insulation | Install insulation, run electrical wiring, and rough-in plumbing lines. |
| Finishing & Decor | Install drywall, flooring, paint, then furnish and decorate the completed space. |
Frequently Asked Questions About How to Convert a Garage Into Living Space
Do I need a permit to convert my garage into a living space?
Yes, in most cases you will need a permit to convert a garage into a living space. Permits ensure your conversion meets local building, safety, and zoning codes.
Failing to secure proper permits can result in fines, legal issues, or problems when selling your home, so always check with your local municipality before you convert your garage.
What are the typical costs to convert a garage with a DIY approach?
The cost to convert a garage using a DIY method usually ranges between $10,000 and $25,000, depending on materials and project scope.
Adding plumbing, upgrading electrical systems, or installing premium finishes can raise costs. When planning to convert your garage, budget for permits, materials, and occasional professional assistance if needed.
How long does it realistically take to convert a garage into a functional living space?
Although some projects aim for a three-week timeline, most homeowners take between 3 and 8 weeks to fully convert a garage.
Your experience level, daily availability, and project complexity all influence the timeline. Permit approval alone can add extra time before you even begin to convert the space.
What insulation factors matter most when you convert a garage?
Proper insulation is essential when you convert a garage into a living area. Use high R-value insulation in walls and ceilings to improve comfort and energy efficiency. Installing vapor barriers and sealing gaps around doors and windows helps prevent moisture issues and ensures the converted space stays comfortable year-round.
Will converting my garage increase or reduce home value?
When done correctly, a permitted and well-designed garage conversion can increase home value by adding functional square footage.
However, if you convert a garage without permits or with poor workmanship, it may reduce value. To maximize ROI, ensure your conversion aligns with local standards and buyer expectations.
Conclusion
Transforming your garage into a functional living space within three weeks is an ambitious yet entirely achievable DIY project.
By meticulously planning, adhering to local regulations, executing structural and utility work with care, and focusing on smart design, you can unlock significant new potential in your home.
This guide provides a roadmap for turning an underutilized area into a valuable, comfortable, and aesthetically pleasing extension of your living environment, ultimately enhancing both your lifestyle and property value.


