Build a Fire Pit: Enjoy Outdoor Evenings for Under $200
 Building a functional and attractive fire pit for under $200 is entirely achievable, transforming your backyard into an inviting space for memorable outdoor gatherings without breaking the bank.
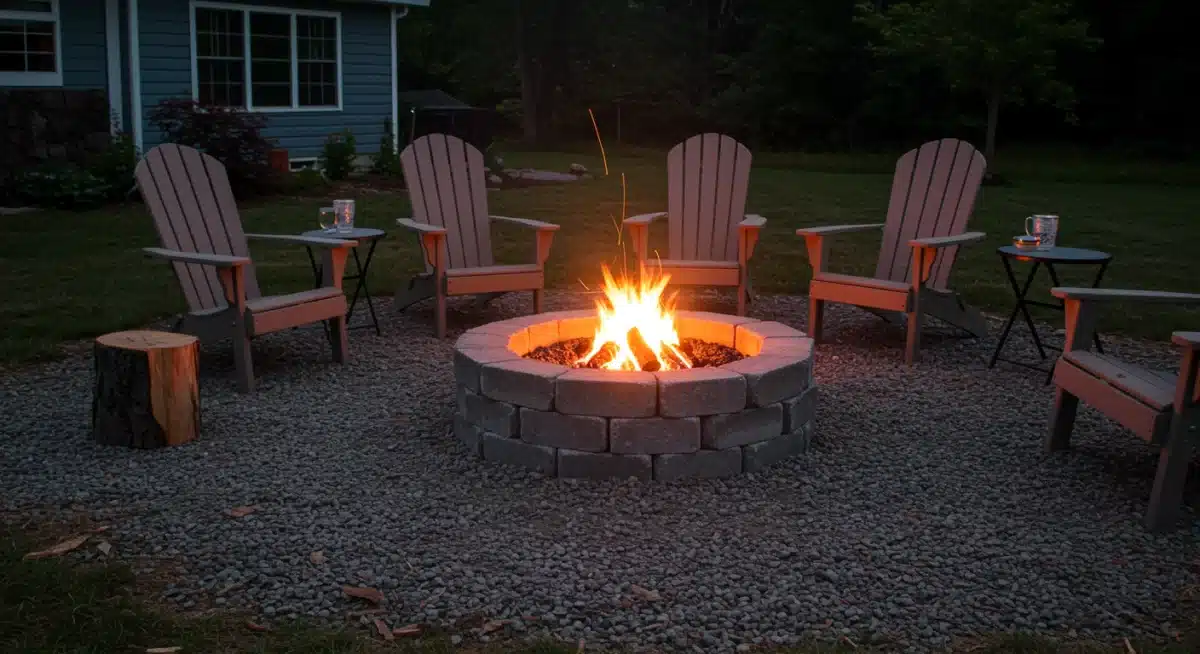
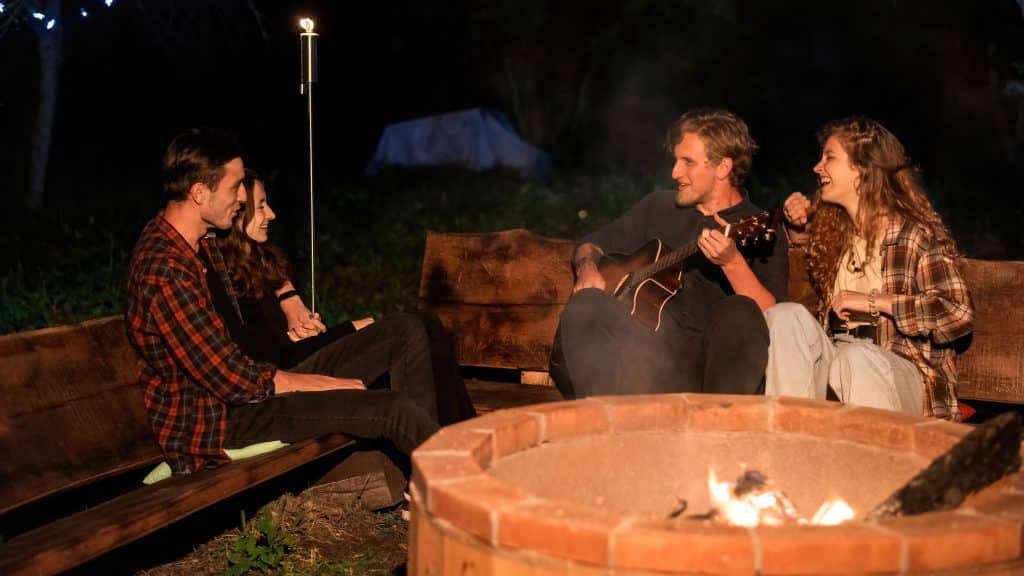
Imagine cool evenings spent gathered around a crackling fire, sharing stories and laughter with loved ones. This dream can become a reality without draining your wallet.
Learning to build a fire pit under $200 is an accessible and rewarding DIY project that will significantly enhance your outdoor living space.
Planning Your Budget-Friendly Fire Pit Project
Before you even think about laying a single brick, meticulous planning is crucial, especially when aiming to build a fire pit under $200.
This initial stage involves considering location, materials, and, most importantly, your budget. A well-thought-out plan ensures efficiency and helps avoid costly mistakes down the line.
Choosing the Perfect Location
Selecting the right spot for your fire pit is paramount for safety and enjoyment. Consider proximity to structures, overhead obstacles, and prevailing winds.
You’ll want a flat, level area that is far enough from your home, fences, and overhanging trees to prevent any fire hazards.
Maintain a minimum of 10 feet clearance from any combustible structures or materials.
Avoid placing under low-hanging branches or utility lines.
Consider wind direction to minimize smoke blowing into seating areas.
Ensure the ground is stable and can support the weight of the fire pit.
Budgeting for Materials: Where to Save
Sticking to a $200 budget requires smart material choices. Focus on readily available, affordable options that still offer durability and aesthetic appeal.
Concrete landscaping blocks are often the go-to for their cost-effectiveness and ease of use.
Look for sales at local hardware stores or even consider reclaimed materials if you can source them safely and reliably.
The key is to prioritize function and safety over high-end finishes, which can always be added later if your budget allows for upgrades.
The planning phase sets the foundation for a successful and affordable fire pit. Taking the time to properly assess your needs and resources will pay dividends, ensuring you create a safe, enjoyable, and budget-friendly outdoor feature.
Gathering Your Essential Tools and Materials
Once your plan is solid, the next step is to gather everything you’ll need. This ensures a smooth building process without interruptions.
For a project designed to build a fire pit under $200, resourcefulness and smart shopping are your best friends.
Tools You’ll Need
Most of the tools required are standard household items, which helps keep costs down. If you don’t own them, consider borrowing from a friend or renting for a short period.
Shovel and rake for site preparation.
Measuring tape and level for accurate placement.
Rubber mallet for seating blocks firmly.
Caulking gun for applying construction adhesive.
Safety glasses and gloves for personal protection.
Affordable Material List
This is where your $200 budget really comes into play. Focus on basic, sturdy materials that provide the necessary structure and heat resistance. Concrete landscaping blocks are ideal due to their affordability and availability.
A metal fire ring insert is highly recommended for safety and longevity, as it contains the fire and protects the blocks from direct heat exposure. While it might take up a significant portion of your budget, it’s a worthwhile investment.
Here’s a typical shopping list for building a budget-friendly fire pit:
Approximately 40-50 concrete retaining wall blocks (straight or slightly curved, depending on desired shape).
1-2 tubes of heat-resistant construction adhesive.
One metal fire ring insert (around 24-30 inches in diameter).
Gravel or paver base for drainage (1-2 bags).
Optional: Sand or paver leveling sand.
These materials, when sourced carefully, should keep you well within your $200 target. Always buy a few extra blocks just in case of breakage or miscuts; it’s better to have too many than too few and have to make another trip to the store.
Site Preparation: Laying the Foundation for Success
Proper site preparation is the cornerstone of any successful DIY project, especially when you build a fire pit under $200. A stable and level foundation is critical for both the safety and longevity of your fire pit.
Clearing and Leveling the Area
Begin by clearly marking the area where your fire pit will reside. Use a stake and string to create a perfect circle if you’re building a round fire pit, or outline a square or rectangular shape. Once marked, remove any grass, weeds, or debris from within this designated space.
Excavate the area to a depth of about 4-6 inches. This will allow for a stable base of gravel and ensure the first layer of blocks sits flush with the surrounding ground, providing a more integrated look.
Use your level to ensure the excavated area is as flat as possible; this step is crucial for the structural integrity of your fire pit.
Creating a Stable Base
After excavation, it’s time to create the base layer. Fill the excavated area with a few inches of gravel or paver base.
This material provides excellent drainage, preventing water from pooling under your fire pit and potentially undermining its stability over time. Spread the gravel evenly and compact it thoroughly using a hand tamper or even your feet.
Once compacted, add a thin layer of sand or paver leveling sand on top of the gravel. This allows for fine-tuning the levelness of your first course of blocks.
Use a straight edge and a level to ensure the sand bed is perfectly flat and even across the entire footprint of your fire pit. This meticulous attention to detail at this stage will make the rest of the construction much easier and result in a professional-looking finish.
A well-prepared site not only contributes to the aesthetic appeal of your fire pit but also ensures it remains safe and functional for many years to come. Don’t rush this stage; it’s the most critical part of the entire building process.
Building the Fire Pit Walls: Step-by-Step Construction
With your site perfectly prepared, it’s time to start stacking the blocks and watching your fire pit take shape. This is where the vision to build a fire pit under $200 truly comes to life. Careful placement and secure adhesion are key.
Laying the First Course of Blocks
The first course of blocks is the foundation of your fire pit’s visible structure. Carefully place each block directly onto your leveled sand base, ensuring they are tightly butted against each other.
Use a rubber mallet to gently tap each block into place, ensuring it is level both front-to-back and side-to-side. A long level can help check the overall levelness of the entire course.
If you’re building a circular fire pit, slightly angle the blocks to follow the curve. For square or rectangular designs, ensure corners are perfectly aligned.
Take your time with this initial layer; any imperfections here will be magnified in subsequent layers.
Adding Subsequent Layers and Adhesive
Once the first course is complete and perfectly level, you can begin adding the second layer. Before placing each block, apply a generous bead of heat-resistant construction adhesive to the top surface of the blocks in the previous course.
This adhesive will bond the layers together, providing stability and preventing the blocks from shifting.
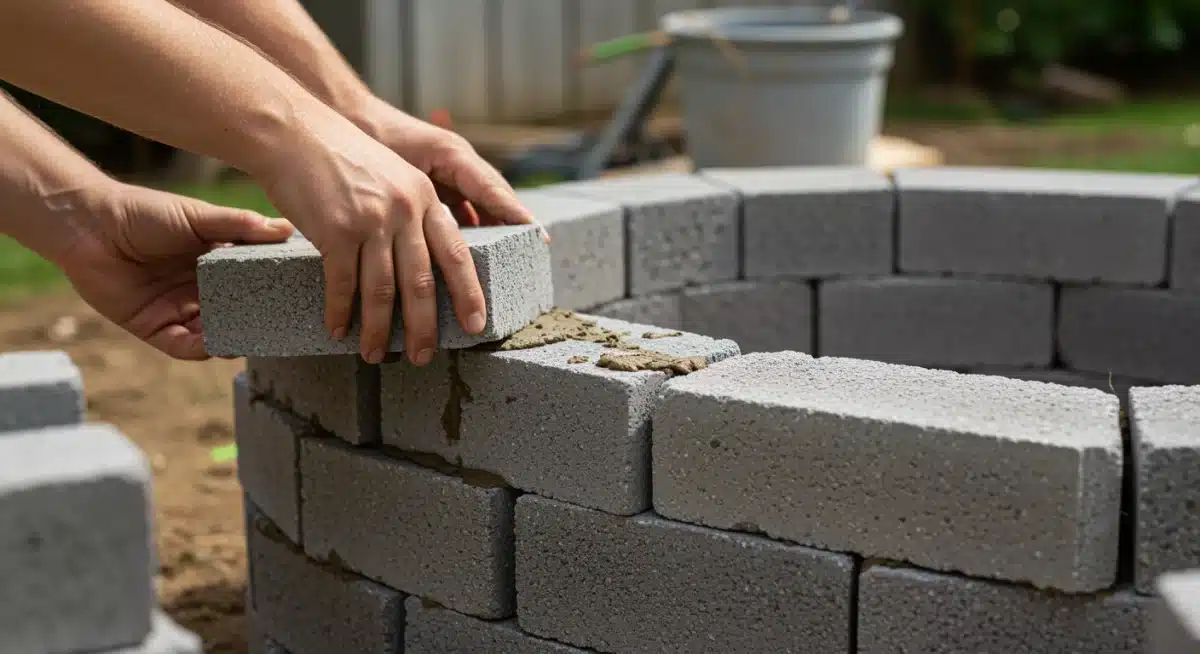
Stagger the joints of the blocks in each subsequent layer (like brickwork) for added strength and a more professional appearance.
Continue to check for levelness with each new course. Most fire pits are built with three or four courses of blocks, depending on the desired height. Remember to leave space for your metal fire ring insert if you are using one.
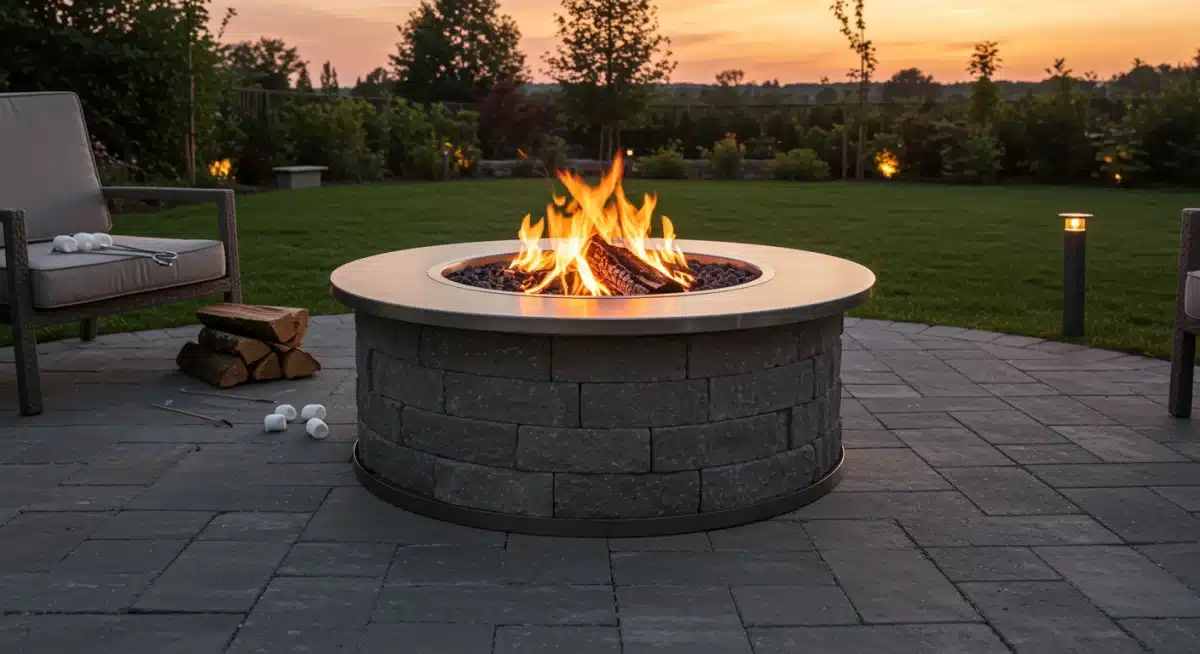
Incorporating the Metal Fire Ring Insert
The metal fire ring insert is a crucial component for safety and durability. It protects your concrete blocks from the direct heat of the fire, preventing cracking and prolonging the life of your fire pit.
Typically, the fire ring is placed inside the final course of blocks, resting on a small ledge or simply sitting on the ground within the structure.
Measure your fire ring and adjust the inner diameter of your block structure accordingly. Some people opt to place the fire ring after all blocks are laid, while others integrate it as they build the final layers. Ensure it fits snugly but has enough room for expansion and contraction with heat.
Building the walls is a methodical process. Each block contributes to the overall strength and aesthetics.
With careful attention to detail and liberal use of adhesive, your fire pit will be robust and ready for many years of enjoyment.
Finishing Touches and Safety Considerations
With the main structure of your fire pit complete, it’s time for the finishing touches that enhance its appearance and, more importantly, to address critical safety aspects.
These steps ensure your fire pit is not only beautiful but also safe for everyone to enjoy.
Adding Capstones and Aesthetic Elements
Capstones are the top layer of blocks that provide a finished look to your fire pit. They often have a smoother, more refined edge and can overhang slightly to create a more substantial appearance.
Apply heat-resistant construction adhesive to the top of your final course of blocks before carefully placing each capstone. Ensure they are level and evenly spaced, creating a clean, professional finish.
Beyond capstones, consider adding decorative gravel or river stones around the base of your fire pit for better drainage and a more polished look.
You might also integrate built-in seating or a small patio area around your fire pit using inexpensive pavers or gravel to define the space and make it more inviting.
These small additions can significantly elevate the overall aesthetic without a huge additional cost, keeping your project well within the goal to build a fire pit under $200.
Crucial Safety Guidelines for Fire Pit Use
A fire pit is a wonderful addition to any backyard, but safety must always be your top priority. Before lighting your first fire, review these essential safety guidelines:
Always keep a fire extinguisher, bucket of water, or garden hose nearby when the fire pit is in use.
Never leave a fire unattended, even for a moment.
Ensure children and pets are supervised and kept at a safe distance from the fire.
Only burn dry, seasoned wood. Avoid burning trash, leaves, or treated lumber, which can produce toxic fumes and sparks.
Be mindful of local fire restrictions and burn bans, especially during dry seasons.
Completely extinguish the fire before leaving the area. Stir the ashes and douse them with water until no embers remain.
By taking these finishing steps and adhering strictly to safety protocols, your DIY fire pit will provide years of enjoyment, creating a warm and welcoming focal point for countless outdoor gatherings.
Maximizing Enjoyment and Maintaining Your DIY Fire Pit
Building your fire pit is just the beginning. To truly enjoy your new outdoor feature and ensure its longevity, consider how to maximize its use and maintain it properly.
This will make your investment in building a fire pit under $200 even more worthwhile.
Accessories for Enhanced Fire Pit Experience
A few simple accessories can significantly enhance your fire pit experience. While not strictly part of the under $200 build cost, these can be added over time without breaking the bank.
Fire poker and log grabber: Essential for safely managing the fire and moving logs.
Spark screen: A mesh cover that prevents sparks from flying out, adding an extra layer of safety.
Grilling grate: Transforms your fire pit into a cooking station for hot dogs, marshmallows, or even simple meals.
Weather cover: Protects your fire pit from rain and snow, prolonging the life of your blocks and metal insert.
Routine Maintenance and Winterizing
Regular maintenance will keep your fire pit looking great and functioning safely. After each use, allow the fire pit to cool completely, then remove ashes and debris. A small shovel and bucket are useful for this task.
Periodically inspect the blocks and adhesive for any signs of wear or cracking and address them promptly.
For winter or extended periods of non-use, especially in regions with harsh weather, it’s wise to winterize your fire pit. This typically involves cleaning it thoroughly, ensuring it’s completely dry, and then covering it with a durable, waterproof fire pit cover.
This protection prevents moisture damage, which can lead to cracking of the concrete blocks due to freeze-thaw cycles, and keeps debris out.
By investing a little time in maintenance and smartly choosing accessories, your budget-friendly fire pit will be a source of joy and warmth for many seasons to come, proving that a significant outdoor upgrade doesn’t require a significant financial outlay.
Beyond the Build: Creating Your Outdoor Oasis
Now that you’ve successfully managed to build a fire pit under $200, it’s time to think about the broader picture: creating a complete outdoor oasis around your new centerpiece.
A fire pit is more than just a place to burn wood; it’s a social hub, a place for relaxation, and an extension of your home.
Budget-Friendly Seating Solutions
Comfortable seating is essential for enjoying your fire pit. You don’t need to spend a fortune on elaborate patio furniture. Consider these affordable options:
Adirondack chairs: Often available at reasonable prices, especially during end-of-season sales, and offer classic comfort.
DIY log benches: If you have access to logs, these can be a rustic and essentially free seating solution.
Repurposed wooden pallets: With a little sanding, painting, and some outdoor cushions, pallets can be transformed into stylish and comfortable seating.
Stackable plastic chairs: Inexpensive and easy to store, perfect for when you need extra seating for guests.
Adding outdoor cushions and throw blankets can also significantly increase comfort and add a pop of color or texture, making the space feel more inviting and cozy without a huge investment.
Lighting and Ambiance
The right lighting can transform your fire pit area from functional to magical. String lights, solar-powered lanterns, or even a few strategically placed candles can create a warm, inviting glow that complements the firelight.
These options are typically inexpensive and easy to install, allowing you to customize the ambiance to your liking.
Consider placing some potted plants or small garden beds around the perimeter of your fire pit area. This adds a touch of nature and helps to define the space, making it feel like a dedicated outdoor room.
Choose plants that are easy to maintain and suitable for your local climate.
By thoughtfully adding these elements, you can create a cohesive and comfortable outdoor living space centered around your new fire pit. It’s about more than just the structure itself; it’s about crafting an experience, a place where memories are made, all achieved with smart planning and a keen eye for value.
| Key Aspect | Brief Description |
|---|---|
| Budget Planning | Focus on affordable materials like concrete blocks and smart shopping to stay under $200. |
| Site Preparation | Clear, level, and create a stable gravel base for safety and longevity. |
| Construction | Use heat-resistant adhesive and proper staggering for sturdy block walls. |
| Safety & Maintenance | Prioritize fire safety protocols and regular cleaning for prolonged enjoyment. |
Frequently Asked Questions About DIY Fire Pits
For a budget-friendly fire pit, concrete landscaping blocks or retaining wall blocks are ideal. They are inexpensive, widely available, and relatively easy to work with.
A metal fire ring insert is also highly recommended for safety and to protect the blocks from intense heat, extending the life of your fire pit structure.
It is crucial to maintain a safe distance. A fire pit should be placed at least 10 to 20 feet away from any combustible structures, such as your house, garage, wooden fences, sheds, or overhanging tree branches.
Always check local fire codes, as regulations can vary by municipality and may have stricter requirements.
While not strictly mandatory for every design, a metal fire ring insert is highly recommended. It serves as a protective barrier, shielding the concrete blocks from direct fire exposure and extreme heat, which can cause them to crack or degrade over time. It also helps contain the fire safely within the pit.
Always burn dry, seasoned hardwood such as oak, maple, or hickory. These woods burn longer, produce less smoke, and create fewer sparks than softwoods like pine.
Avoid burning treated lumber, painted wood, trash, or leaves, as they can release toxic fumes and create dangerous embers.
Regular maintenance involves cleaning out ashes and debris after each use once the pit has cooled. Periodically check the blocks and adhesive for any signs of wear or damage and make repairs as needed.
During winter or extended periods of non-use, cover your fire pit with a waterproof cover to protect it from the elements.
Conclusion
Transforming your backyard into a welcoming retreat doesn’t require an exorbitant budget. As demonstrated, the goal to build a fire pit under $200 is not only achievable but also incredibly rewarding.
By carefully planning, choosing affordable materials, meticulously preparing your site, and following step-by-step construction, you can create a beautiful and functional outdoor feature.
Remember to prioritize safety above all else, adhering to local regulations and best practices for fire management.
With a little effort and creativity, your DIY fire pit will become the centerpiece of countless memorable evenings, offering warmth, ambiance, and a perfect gathering spot for friends and family, proving that significant home improvements can indeed be budget-friendly.


