Essential DIY Home Repairs: Tackle 5 Common Issues
 Owning a home comes with its share of responsibilities, and among the most vital is regular maintenance. Ignoring small issues can quickly lead to significant, costly repairs down the line. This guide on Essential DIY Home Repairs: Tackle 5 Common Issues Before They Become Costly in 2026.
is designed to empower you with the knowledge and confidence to handle common household problems yourself, saving you money and stress.
Understanding the Importance of Timely Home Maintenance
Home maintenance isn’t just about aesthetics; it’s about protecting your investment and ensuring the safety and comfort of your living space. Proactive repairs can extend the lifespan of your home’s systems and components, preventing premature wear and tear. When you address issues promptly, you’re not just fixing a problem; you’re safeguarding your home’s value and avoiding future headaches.
Many homeowners postpone repairs due to perceived complexity or cost, but often, the opposite is true. Early intervention with simple DIY solutions can prevent a small leak from becoming a major flood or a minor electrical glitch from turning into a fire hazard. By understanding the common pitfalls and how to address them, you become a more resilient and prepared homeowner.
The Cost of Neglect: Why Delaying Repairs is Risky
Delaying necessary home repairs can have far-reaching consequences, impacting both your wallet and your peace of mind. What starts as an inexpensive fix can rapidly escalate into a major overhaul if left unaddressed. For instance, a small roof leak might only require a few hours of work and some sealant if caught early. However, if ignored, that same leak can lead to extensive water damage to insulation, ceilings, and even structural components, costing thousands to repair.
Increased Repair Costs: Minor issues grow into major ones, requiring professional help and more materials.
Reduced Home Value: Unaddressed problems detract from your home’s appeal and market value.
Safety Hazards: Electrical faults, structural weaknesses, or mold growth can pose serious risks.
Higher Utility Bills: Leaky windows or poor insulation can lead to inefficient energy use.
The financial implications are significant. Beyond the immediate repair expenses, you might face higher insurance premiums or difficulty selling your home if it’s plagued by deferred maintenance. Investing a little time and effort now can save you a substantial amount of money and stress in the long run. Embracing DIY home repairs is a smart financial strategy for any homeowner.
Ultimately, timely home maintenance is a cornerstone of responsible homeownership. It’s about being prepared, being proactive, and understanding that a little effort today can prevent a lot of trouble tomorrow. This foundational understanding sets the stage for tackling specific common issues with confidence and competence.
Tackling Leaky Faucets and Running Toilets: Plumbing Basics
Water leaks, no matter how small, can waste a significant amount of water and lead to higher utility bills. More importantly, unchecked leaks can cause water damage, mold growth, and even structural issues over time. Addressing leaky faucets and running toilets promptly is one of the most impactful DIY home repairs you can undertake.
These common plumbing problems often have straightforward solutions that don’t require calling a professional. With a few basic tools and a bit of patience, you can easily fix these issues yourself, saving both water and money.
Fixing a Dripping Faucet
A dripping faucet is more than just an annoyance; it can waste hundreds of gallons of water annually. The most common culprit is a worn-out washer or O-ring inside the faucet handle or valve.
The repair process usually involves turning off the water supply, disassembling the faucet, replacing the faulty component, and reassembling it.
- Tools Needed: Screwdriver, adjustable wrench, replacement washers/O-rings, plumber’s tape.
- Steps:
- Turn off the water supply to the faucet (usually under the sink).
- Remove decorative caps and screws to detach the handle.
- Carefully remove the stem or cartridge to access the washer/O-ring.
- Replace the old, worn-out part with a new one.
- Reassemble the faucet, ensuring all connections are tight.
If you’re unsure about the type of washer or O-ring needed, take the old one to a hardware store for a match. Applying plumber’s tape to threaded connections can also help ensure a watertight seal. This simple fix can save a surprising amount of water and prevent potential damage to your sink or vanity over time.
Silencing a Running Toilet
A running toilet is another common household nuisance that wastes water continuously. This problem typically stems from a faulty flapper valve or an improperly adjusted fill valve. When the flapper doesn’t seal properly, water constantly flows from the tank into the bowl. If the fill valve is set too high, water overflows into the overflow tube.
To diagnose the issue, remove the toilet tank lid. If water is trickling into the bowl, the flapper likely needs replacement. If the water level is too high, adjust the float on the fill valve. Replacing a flapper is as simple as unhooking the old one and attaching a new one. Adjusting the float usually involves turning a screw or sliding a clip. These small adjustments can make a big difference in water conservation.
Addressing these plumbing basics not only conserves water but also prevents potential water damage and mold growth, which can be far more expensive to remediate. Mastering these DIY home repairs is a fundamental step towards effective home maintenance.
Patching Drywall and Filling Nail Holes: Wall Repair Essentials
Walls are the canvas of our homes, and over time, they inevitably accumulate small imperfections: nail holes from hung pictures, scuffs from moving furniture, or even minor cracks. While these might seem insignificant, they can detract from your home’s overall appearance and, if left unaddressed, can sometimes indicate larger structural issues (though less common for small cracks).
Learning to patch drywall and fill nail holes is a fundamental skill in DIY home repairs, allowing you to maintain a polished and well-kept interior.
These repairs are surprisingly simple and require minimal tools and materials. By taking the time to fix these blemishes, you not only improve the aesthetic appeal of your rooms but also prevent dust and debris from accumulating in crevices, contributing to a cleaner living environment.
Conquering Nail Holes and Small Dings
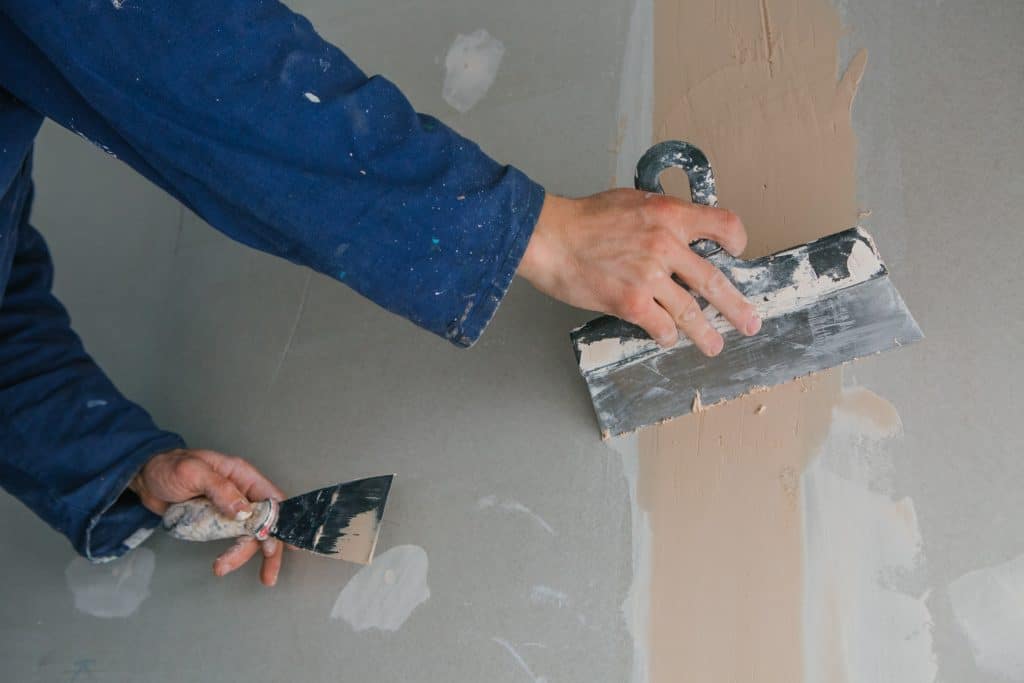
Nail holes and small dents are the easiest wall imperfections to fix. A small tub of spackling paste and a putty knife are often all you need.
For nail holes, simply apply a small dab of spackle with your finger or the putty knife, ensuring it fills the hole completely. For small dings, apply a thin layer of spackle over the damaged area, feathering the edges so it blends seamlessly with the surrounding wall.
Materials: Spackling paste, putty knife, fine-grit sandpaper.
Process:
- Clean the area around the hole/ding.
- Apply spackle, pressing it firmly into the imperfection.
- Scrape off excess spackle with the putty knife, leaving a smooth surface.
- Allow to dry completely (check product instructions).
- Lightly sand the patched area until smooth and flush with the wall.
- Wipe away dust and prepare for painting.
Once the spackle is dry and sanded smooth, the area is ready for a fresh coat of paint. This quick fix can make a significant difference in the perceived quality and care of your home, making it look much more inviting. It’s a testament to how minor DIY home repairs can elevate the overall feel of a space.
Patching Larger Drywall Holes
Larger holes in drywall, perhaps from a doorknob impact or an accidental puncture, require a bit more effort but are still well within the realm of DIY capabilities. For holes up to about 6 inches in diameter, a drywall patch kit is usually sufficient. These kits typically include a self-adhesive mesh patch and spackling compound.
For holes larger than 6 inches, you’ll need to cut a piece of new drywall to fit, secure it with furring strips or a backing board, and then apply joint compound and tape. The key to a seamless repair is to apply multiple thin coats of joint compound, sanding lightly between each coat, to create a smooth transition from the patch to the existing wall. Patience is crucial here to achieve a professional-looking finish.
Once patched and sanded, the repaired area can be primed and painted to match the rest of the wall. Mastering these drywall repair techniques not only saves you money on professional services but also gives you the satisfaction of maintaining your home’s interior appearance. These wall repair essentials are crucial components of effective DIY home repairs, ensuring your home always looks its best.
Addressing Drafty Windows and Doors: Energy Efficiency Hacks
Drafts around windows and doors are more than just a minor discomfort; they are significant culprits behind energy loss in homes, leading to higher heating and cooling bills. In the U.S., inefficient windows and doors can account for a substantial portion of a home’s energy consumption. Addressing these drafts is a relatively simple yet highly effective DIY home repair that can dramatically improve your home’s energy efficiency and your comfort.
By sealing these gaps, you create a more stable indoor temperature, reducing the workload on your HVAC system and extending its lifespan. This section will guide you through common methods to identify and seal drafts, making your home more energy-efficient and comfortable.
Caulking and Weatherstripping for a Tighter Seal
Caulking and weatherstripping are your primary tools for combating drafts. Caulk is used to seal stationary gaps and cracks around window and door frames, while weatherstripping is applied to movable parts, like the sashes of windows or the edges of doors, to create a seal when they are closed.
- Caulking:
- Identify gaps and cracks where the window/door frame meets the wall.
- Clean the surface thoroughly before application.
- Apply a continuous bead of exterior-grade caulk using a caulk gun.
- Smooth the caulk line with a wet finger or tool for a clean finish.
- Weatherstripping:
- Choose the appropriate type for your windows/doors (adhesive-backed foam, V-strip, tension seal).
- Clean the surfaces where the weatherstripping will be applied.
- Measure and cut the weatherstripping to fit.
- Apply firmly, ensuring a tight seal when the window/door is closed.
Regularly inspect your existing caulk and weatherstripping for signs of deterioration, such as cracking, peeling, or hardening. Replacing old, worn-out seals is just as important as installing new ones. These small investments in time and materials can yield significant savings on your utility bills throughout the year.
Door Sweeps and Thresholds: Sealing the Bottom
While caulking and weatherstripping handle the sides and tops of doors, the bottom often requires a different approach. Door sweeps and adjustable thresholds are designed to seal the gap between the bottom of the door and the floor, preventing drafts and insects from entering.
A door sweep is a strip of material (brush, rubber, or vinyl) attached to the bottom of the door that brushes against the threshold or floor.
Adjustable thresholds, on the other hand, allow you to raise or lower the sealing surface to create a snug fit with the door. Installing these components is typically a straightforward process, involving measuring, cutting, and securing with screws. Ensure the sweep or threshold creates a tight seal without impeding the door’s movement.
By implementing these energy efficiency hacks as part of your DIY home repairs, you’re not just fixing drafts; you’re actively contributing to a more sustainable and cost-effective home. The cumulative effect of these small improvements can lead to a noticeably more comfortable living environment and significant reductions in your energy expenditures.
Basic Electrical Fixes: Outlets, Switches, and Light Fixtures
While major electrical work should always be left to a licensed professional, many common electrical issues are relatively simple to address for the savvy DIY homeowner. These include replacing faulty outlets, light switches, and even installing new light fixtures. Understanding basic electrical principles and safety precautions is paramount before attempting any of these DIY home repairs.
Always remember that electricity can be dangerous. Safety is the absolute priority. If you’re ever unsure or uncomfortable with an electrical task, it’s best to call an expert. However, for many minor issues, a confident approach and adherence to safety guidelines can save you both time and money.
Replacing a Faulty Outlet or Light Switch
A dead outlet or a flickering light from a faulty switch can be frustrating. Often, the component itself is the problem, not the wiring. Replacing an outlet or switch is a common DIY task, provided you follow proper safety procedures.
Safety First:
ALWAYS turn off the power to the circuit at the breaker box before starting any work.
Verify the power is off using a non-contact voltage tester.
Steps for Replacement:
Remove the cover plate from the old outlet/switch.
Unscrew the device from the electrical box.
Carefully disconnect the wires, noting their positions (hot, neutral, ground).
Connect the new outlet/switch to the corresponding wires.
Secure the device back into the electrical box and replace the cover plate.
Ensure all wire connections are tight and secure. Loose connections can lead to arcing and potential fire hazards. Taking a photo of the original wiring before disconnecting anything can be a helpful reference during reassembly. This attention to detail is a hallmark of safe and effective DIY home repairs.
Installing or Replacing Light Fixtures
Upgrading an old light fixture or replacing a broken one can significantly impact a room’s ambiance. The process is similar to replacing an outlet or switch, with the added consideration of the fixture’s weight and mounting. Always ensure the new fixture is compatible with your home’s wiring and the existing electrical box can support its weight.
After turning off the power and verifying it’s off, carefully remove the old fixture. Connect the new fixture’s wires to the corresponding wires in the ceiling box (usually black to black, white to white, and ground to ground). Mount the fixture securely according to the manufacturer’s instructions. If the new fixture is heavy, consider having an extra set of hands to help hold it while you connect the wires.
These basic electrical fixes, when performed safely and correctly, are excellent ways to improve your home’s functionality and aesthetic. They are essential components of DIY home repairs that can enhance your living space without requiring expensive professional intervention for every minor issue.
Gutter Cleaning and Minor Roof Inspection: Exterior Care
The exterior of your home, particularly the roof and gutters, plays a critical role in protecting the entire structure from the elements. Neglecting these areas can lead to severe water damage, foundation problems, and costly structural repairs. Regular gutter cleaning and minor roof inspections are vital DIY home repairs that homeowners should undertake to prevent these issues before they become catastrophic.
While major roof repairs require professionals, understanding how to spot potential problems and keeping your gutters clear can save you from significant expenses and headaches. This proactive approach ensures water is diverted away from your home, protecting its integrity.
The Critical Role of Clean Gutters
Gutters and downspouts are designed to channel rainwater away from your roof and foundation. When they become clogged with leaves, twigs, and debris, water can overflow, leading to a cascade of problems:
- Foundation Damage: Water pooling around the foundation can lead to cracks and leaks in the basement.
- Fascia and Soffit Rot: Overflowing water can saturate and rot the wooden components around your roofline.
- Landscape Erosion: Uncontrolled runoff can damage garden beds and erode soil near your home.
- Ice Dams: In colder climates, clogged gutters can contribute to ice dam formation, pushing water under shingles.
Cleaning gutters is a task that typically needs to be done at least twice a year, usually in late spring and late fall. Use a sturdy ladder, wear gloves, and scoop out debris by hand or with a gutter scoop. Flush the gutters with a hose to ensure downspouts are clear. This simple, yet crucial, maintenance task is one of the most effective DIY home repairs for preventing water-related damage.
Performing a Minor Roof Inspection
You don’t need to be a roofer to perform a basic visual inspection of your roof. From the ground, or safely from a sturdy ladder, look for obvious signs of damage or wear. Binoculars can be useful for a closer look. What you’re looking for includes:
- Missing or Damaged Shingles: Look for shingles that are curled, cracked, or missing entirely.
- Granule Loss: Excessive granules in your gutters can indicate shingles are nearing the end of their life.
- Loose or Damaged Flashing: Check around chimneys, vents, and skylights for compromised flashing.
- Moss or Algae Growth: While not always damaging, heavy growth can trap moisture and accelerate shingle deterioration.
If you spot minor issues like a single curled shingle, you might be able to carefully flatten and re-seal it with roofing cement. However, for significant damage or if you’re uncomfortable working on a ladder, it’s always best to call a professional. Regular inspections allow you to catch problems early, making them easier and cheaper to address, reinforcing the value of proactive DIY home repairs for your home’s exterior.
Maintaining Appliances and HVAC Filters: Longevity and Efficiency
Beyond structural and plumbing fixes, keeping your home’s appliances and HVAC (Heating, Ventilation, and Air Conditioning) system in good working order is paramount for both their longevity and your home’s energy efficiency. These often-overlooked aspects of home maintenance can lead to significant energy waste and expensive repair or replacement costs if neglected. Engaging in these routine DIY home repairs ensures your systems run smoothly and efficiently.
Simple, consistent maintenance can extend the life of your appliances and HVAC unit by years, preventing breakdowns and ensuring optimal performance. This section will highlight key maintenance tasks that every homeowner can easily perform.
The Importance of HVAC Filter Replacement
Your HVAC system is the heart of your home’s climate control, and its air filter is its first line of defense against dust, pollen, and other airborne particles. A clogged filter restricts airflow, forcing your system to work harder, which leads to:
- Increased Energy Consumption: A strained system uses more electricity or gas.
- Reduced Air Quality: Dirty filters can’t effectively trap particles, leading to poorer indoor air.
- System Wear and Tear: Overworked components can break down prematurely.
- Higher Repair Costs: A struggling system is more prone to mechanical failures.
Filters should typically be checked monthly and replaced every 1 to 3 months, depending on usage, pet ownership, and air quality. This is one of the simplest yet most effective DIY home repairs for improving both air quality and energy efficiency. Always note the filter size when purchasing replacements to ensure a proper fit.
Appliance Care: Dishwasher, Refrigerator, and Washing Machine
Many major home appliances benefit from routine maintenance to keep them running efficiently and prevent costly repairs. Here are a few key tasks:
- Dishwasher: Clean the filter at the bottom regularly to prevent food particle buildup and ensure proper drainage. Run a cycle with a dishwasher cleaner or vinegar periodically to remove mineral deposits and odors.
- Refrigerator: Clean the condenser coils at the back or bottom of the fridge every 6-12 months. Dust and pet hair can accumulate here, making the compressor work harder and increasing energy consumption. Also, check the door seals for leaks.
- Washing Machine: Leave the door ajar after cycles to prevent mold and mildew in front-loading machines. Clean the detergent dispenser regularly. For top-loaders, periodically run a cleaning cycle with hot water and vinegar or a washing machine cleaner.
These simple maintenance steps are crucial for extending the lifespan of your expensive appliances and ensuring they operate efficiently. By incorporating these tasks into your routine, you can avoid unexpected breakdowns and the expense of professional repairs or premature replacements, embodying the spirit of effective DIY home repairs.
Creating a Home Maintenance Schedule: Your DIY Blueprint

Successful home maintenance isn’t about tackling problems as they arise; it’s about a proactive, systematic approach. Creating a comprehensive home maintenance schedule is your blueprint for ensuring all crucial DIY home repairs and preventative tasks are addressed regularly.
This systematic approach transforms overwhelming chores into manageable tasks, distributed throughout the year, preventing small issues from escalating into costly emergencies.
A well-structured schedule provides peace of mind, knowing that your home is consistently cared for. It also helps in budgeting for materials and potential professional services, making homeownership a more predictable and less stressful experience.
Seasonal Maintenance Checklist
Breaking down maintenance tasks by season makes them easier to manage and ensures seasonal-specific needs are met. Here’s a general outline:
- Spring:
- Clean gutters and downspouts.
- Inspect roof for winter damage.
- Check exterior caulk and weatherstripping.
- Clean outdoor AC unit and replace HVAC filter.
- Inspect deck and patio for repairs.
- Summer:
- Test smoke and carbon monoxide detectors.
- Clean dryer vent.
- Check for pest infestations.
- Inspect plumbing for leaks.
- Maintain lawn and garden equipment.
- Fall:
- Clean gutters again.
- Inspect furnace and replace HVAC filter.
- Winterize outdoor faucets and sprinkler systems.
- Seal any gaps or cracks to prevent drafts.
- Check chimney and fireplace if used.
- Winter:
- Test sump pump (if applicable).
- Check insulation in attic and crawl spaces.
- Monitor for ice dams on the roof.
- Ensure proper ventilation to prevent moisture buildup.
This seasonal checklist provides a framework, but personalize it to your home’s specific needs and local climate. Keep a log of when tasks were completed and any issues found, which can be invaluable for future reference or when selling your home.
Tools and Resources for the DIY Homeowner
Having the right tools is essential for effective DIY home repairs. A basic toolkit should include screwdrivers, wrenches, pliers, a hammer, tape measure, utility knife, and a non-contact voltage tester. As you gain confidence, you can expand your collection with more specialized items like a caulk gun, stud finder, or a quality ladder.
Beyond tools, leverage online resources. YouTube tutorials, manufacturer manuals, and reputable home improvement blogs offer step-by-step guides for almost any repair. Don’t be afraid to ask for advice at your local hardware store; their staff often have practical experience and can recommend the right products. Investing in knowledge and the right equipment makes every DIY task more achievable and less daunting.
By creating and adhering to a home maintenance schedule, you empower yourself to take control of your home’s health and longevity. This proactive approach to DIY home repairs ensures that your home remains a safe, comfortable, and valuable asset for years to come.
| Common Issue | DIY Solution |
|---|---|
| Leaky Faucets/Running Toilets | Replace washers/O-rings, adjust flapper or fill valve. |
| Drywall Holes/Cracks | Apply spackle for small holes, use drywall patch kits for larger ones. |
| Drafty Windows/Doors | Apply caulk and weatherstripping; install door sweeps. |
| Clogged Gutters | Regularly remove debris to ensure proper water drainage. |
Frequently Asked Questions About DIY Home Repairs
For beginners, common DIY home repairs include fixing leaky faucets, patching small drywall holes, replacing HVAC filters, and caulking drafty windows. These tasks require minimal tools and offer immediate, noticeable improvements, building confidence for more complex projects.
General home maintenance should be performed seasonally, with some tasks like HVAC filter checks monthly. A comprehensive schedule ensures everything from gutter cleaning to smoke detector testing is covered, preventing small issues from becoming expensive problems.
Call a professional for complex electrical work, major plumbing issues (like burst pipes), significant roof damage, or any repair that makes you feel uncomfortable or unsafe. Prioritize safety and structural integrity over saving a few dollars.
An essential DIY toolkit includes screwdrivers, an adjustable wrench, pliers, a hammer, tape measure, utility knife, caulk gun, and a non-contact voltage tester. These tools cover a wide range of common household fixes and are a great starting point.
Absolutely. Performing DIY home repairs prevents minor issues from escalating into costly professional interventions. Proactive maintenance extends the life of appliances and systems, reduces utility bills, and maintains your home’s value, leading to significant long-term savings.
Conclusion
Empowering yourself with the knowledge and skills for Essential DIY Home Repairs: Tackle 5 Common Issues Before They Become Costly in 2026. is one of the smartest investments you can make as a homeowner. From silencing a running toilet to sealing drafty windows, each small repair contributes to a more comfortable, energy-efficient, and valuable home.
By embracing a proactive maintenance mindset and utilizing the resources available, you can confidently address common household problems, prevent expensive emergencies, and enjoy the satisfaction of a well-maintained home. Remember, vigilance and timely action are your best allies in preserving your most significant asset.